> site manage // email setup // axigen
Axigen email
setup.
Your mail server is ax.email. Open the guide for your device or app.
// The settings
- Incoming (IMAP) server
- ax.email
- IMAP port
- 993, SSL/TLS
- Outgoing (SMTP) server
- ax.email
- SMTP port
- 465, SSL/TLS
- Username
- Your email address
- Authentication
- Outgoing server requires authentication
// Step by step
iPhone and iPad
-
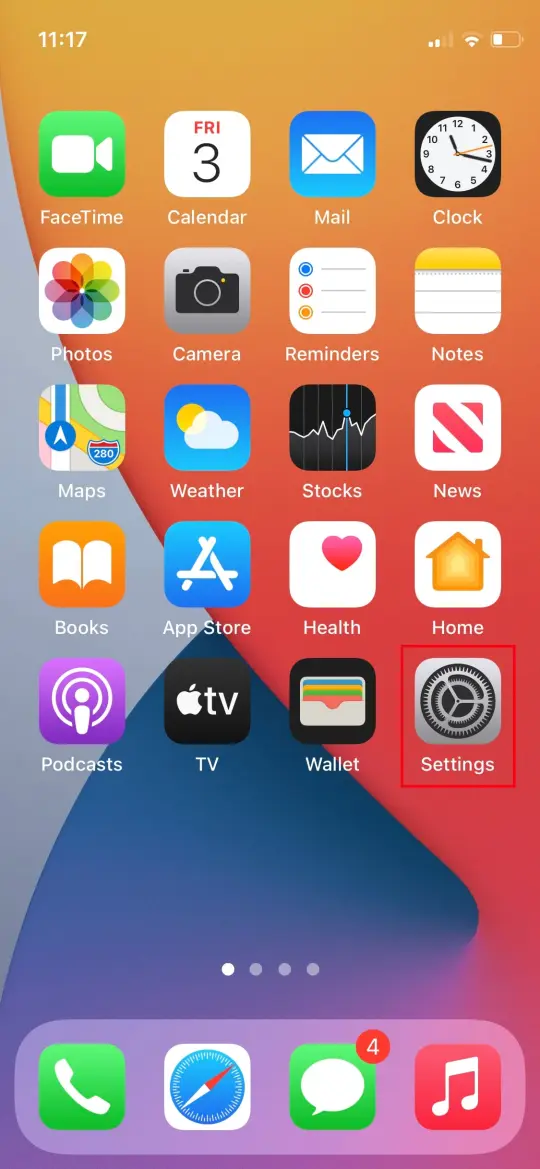
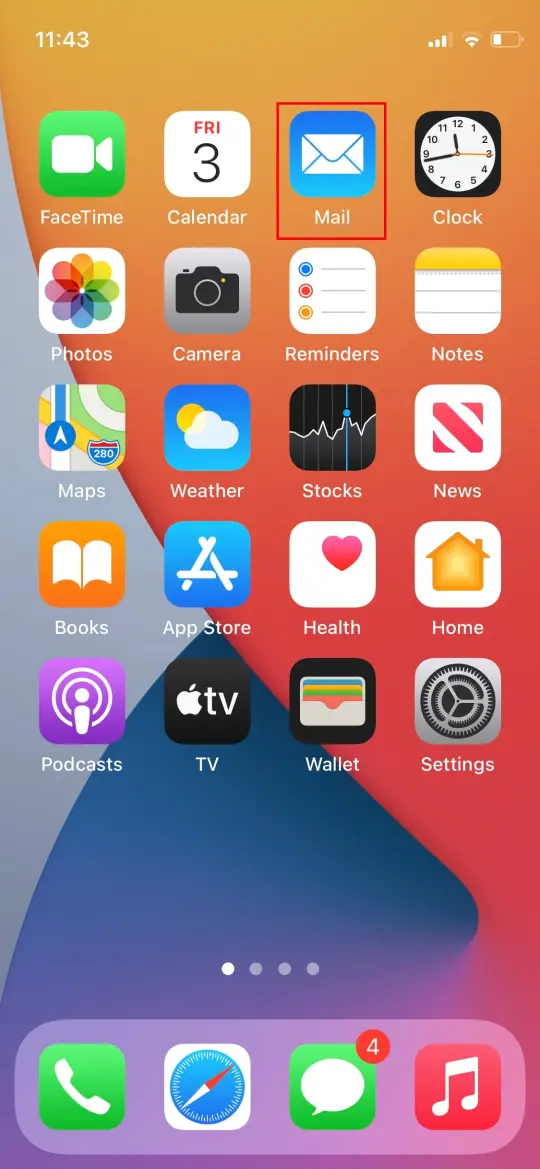
Open Settings from your home screen.
-
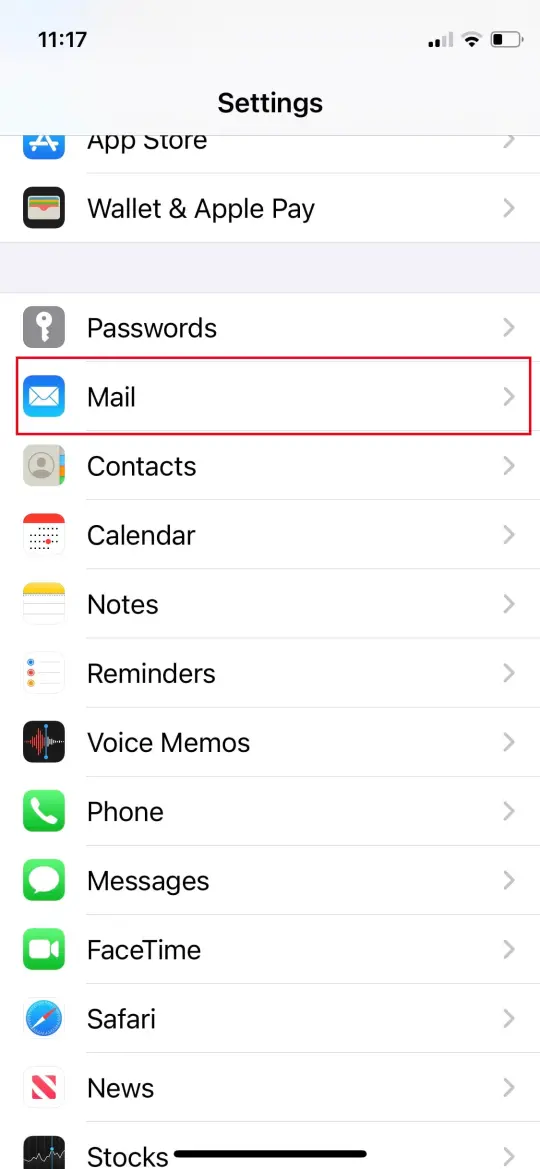
Select Mail.
-
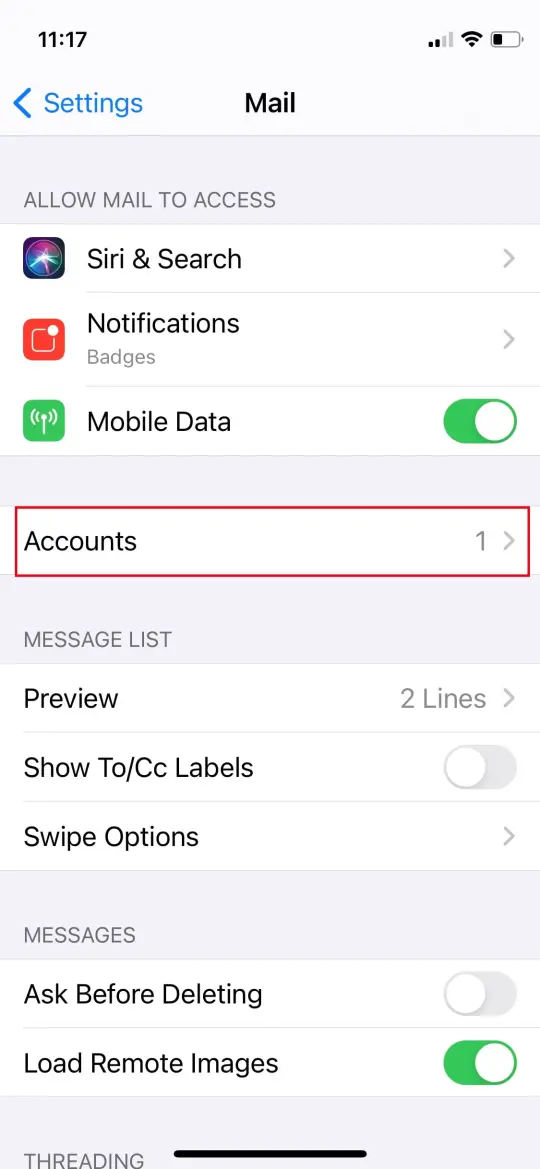
Select Accounts.
-
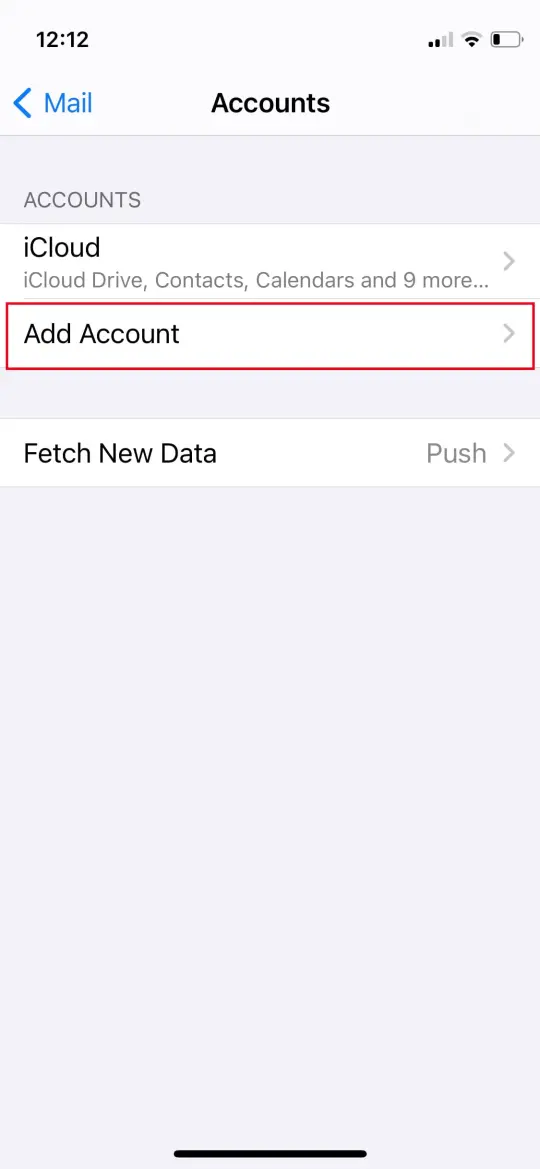
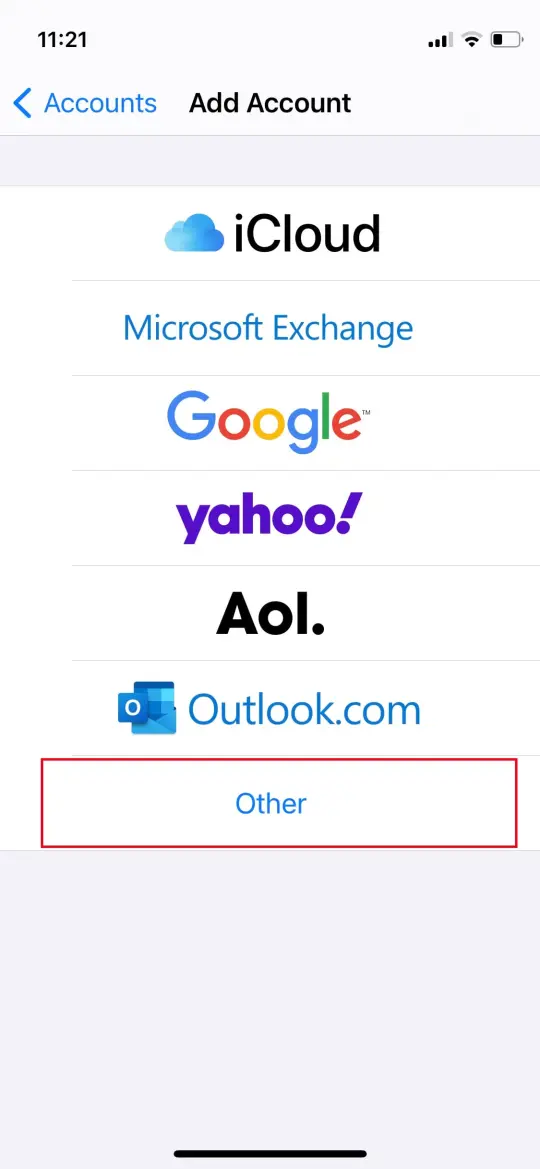
Select Add Account.
-
Select Other.
-
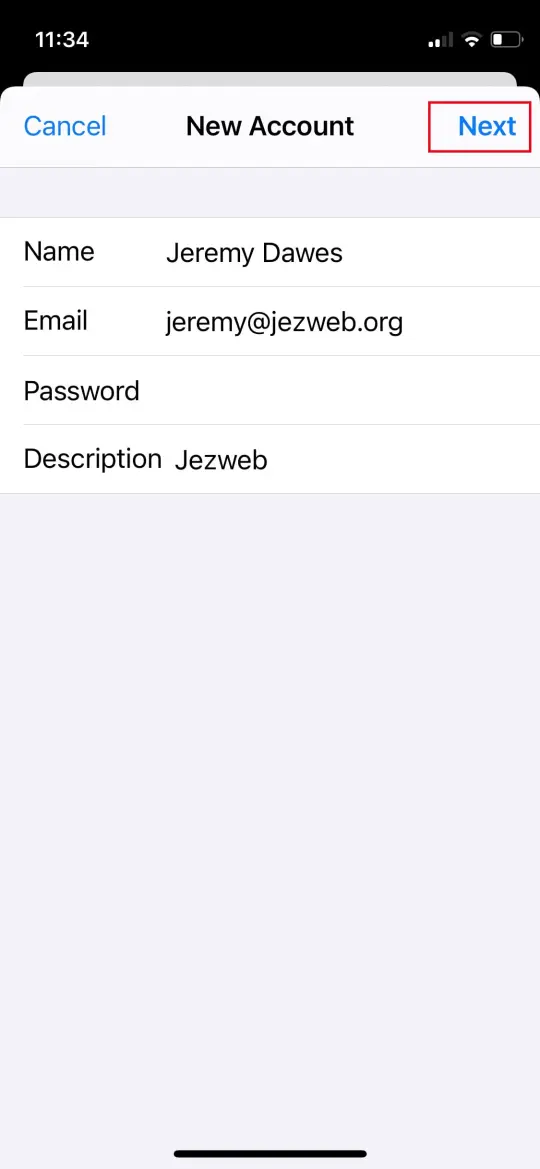
Enter your email account details, then select Next.
-
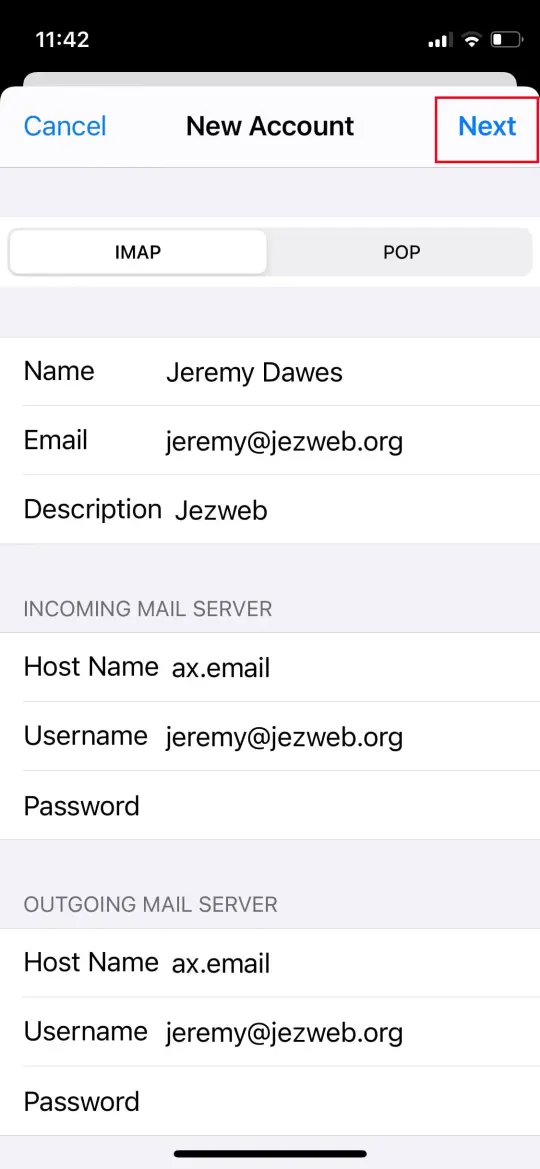
Tap IMAP and enter your email server details, email address and password:
- Incoming
- ax.email
- Outgoing
- ax.email
Select Next.
-
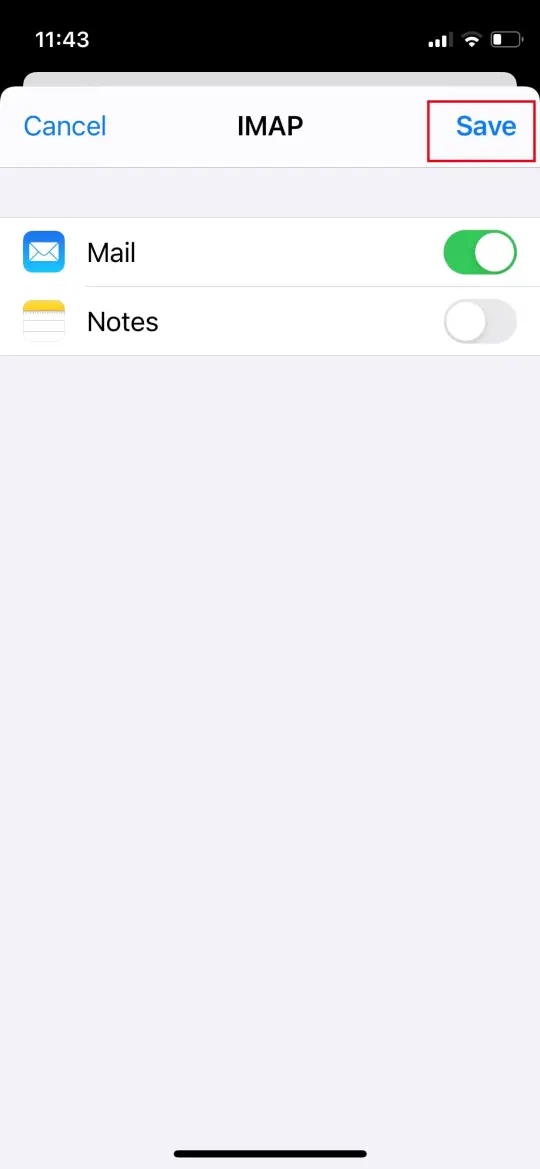
Select Save.
-
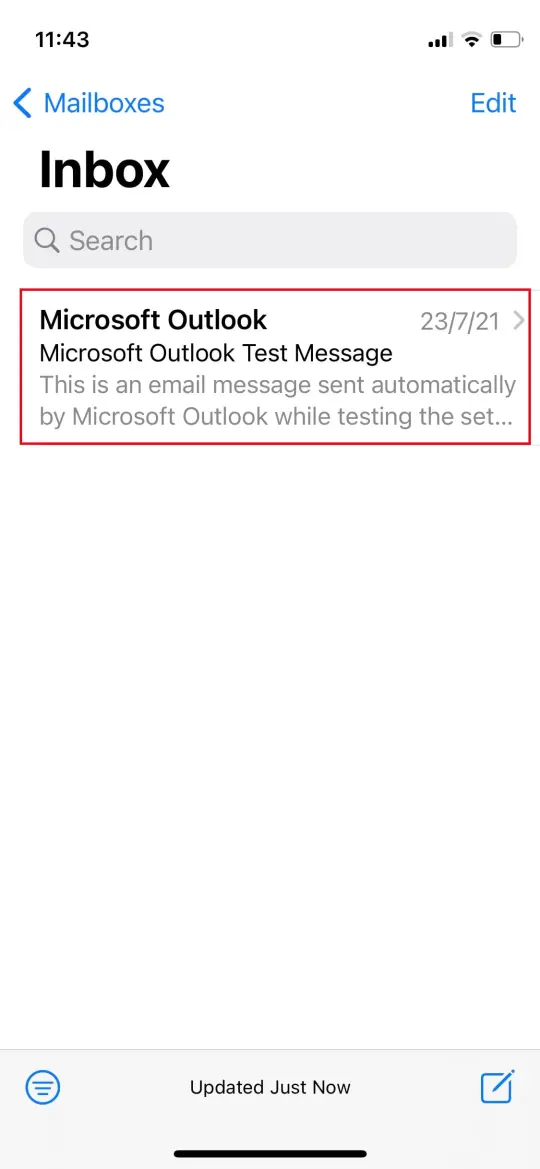
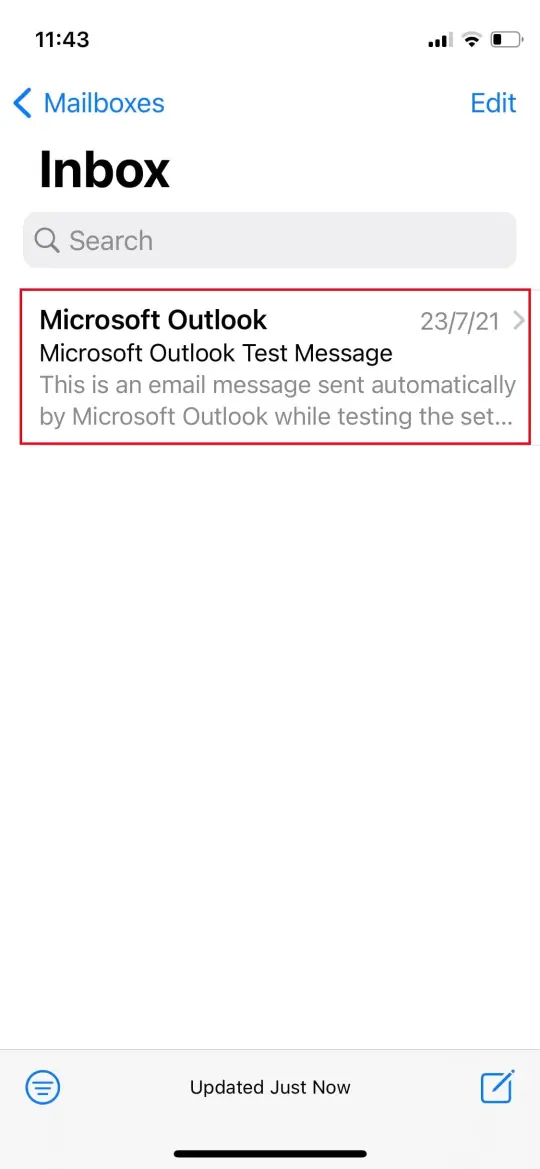
Go back to your home screen and open the Mail app.
If setup worked, your mail starts downloading.
Android (Gmail)
-
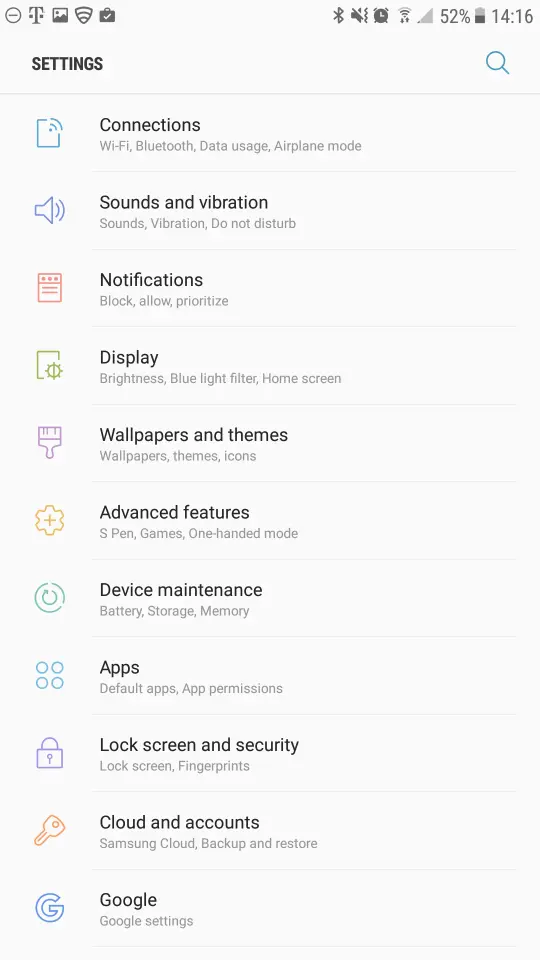
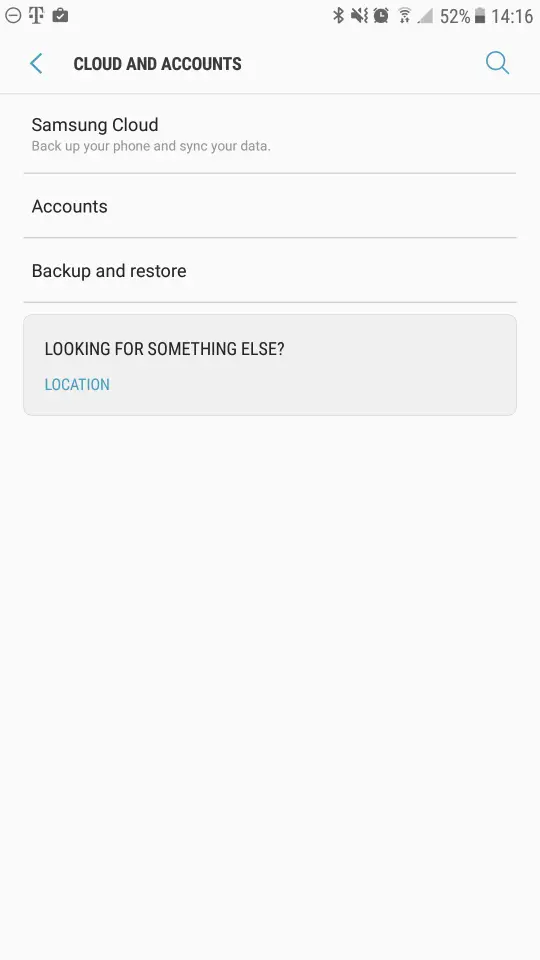
Open the Settings app and tap Cloud and Accounts.
-
Tap Accounts.
-
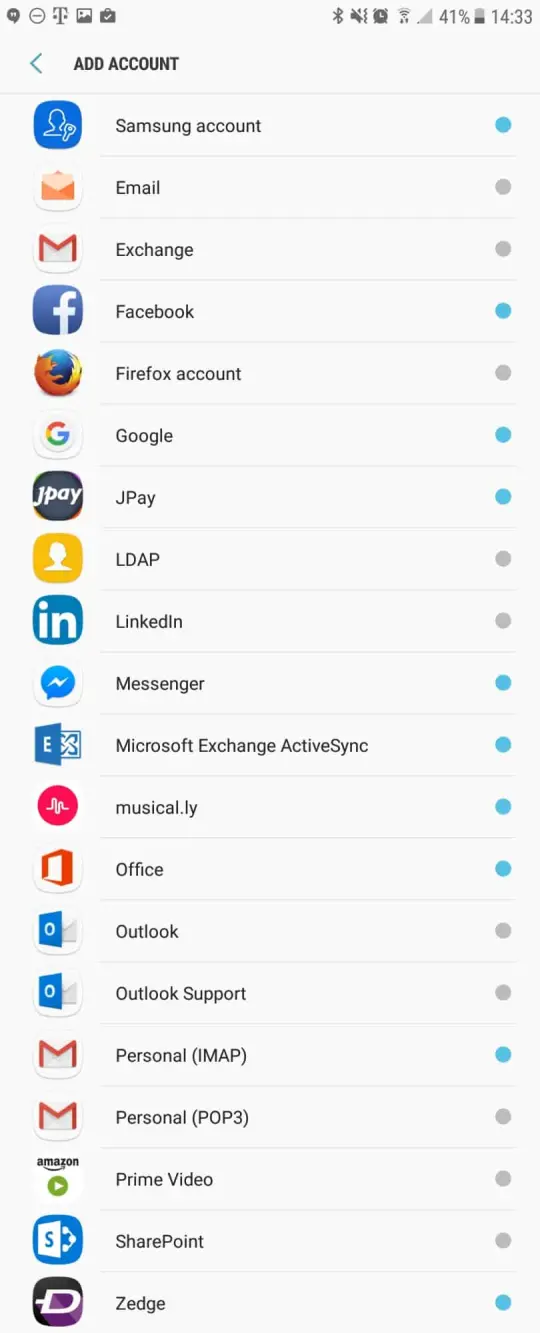
Tap Add Account, then select Personal (IMAP) near the bottom of the screen as the account type.
-
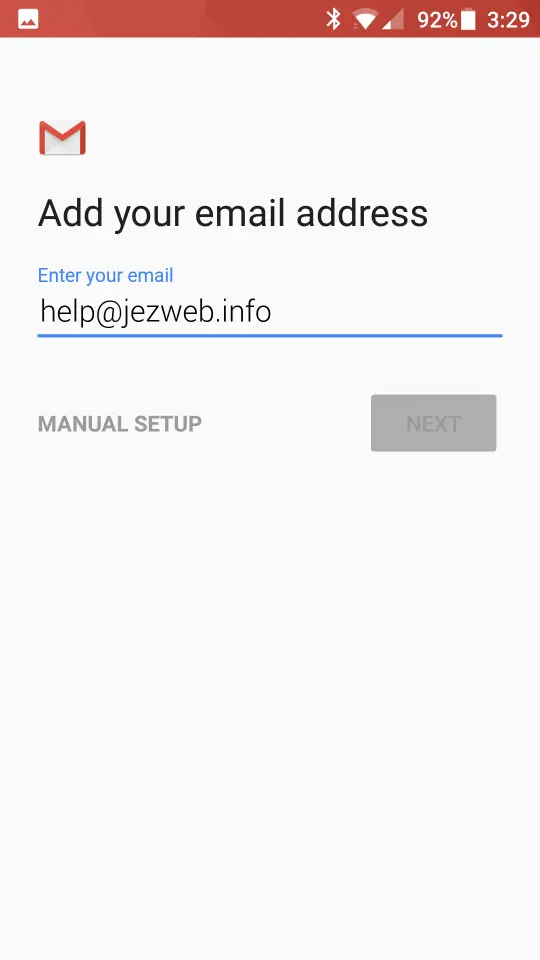
Enter your email address.
-
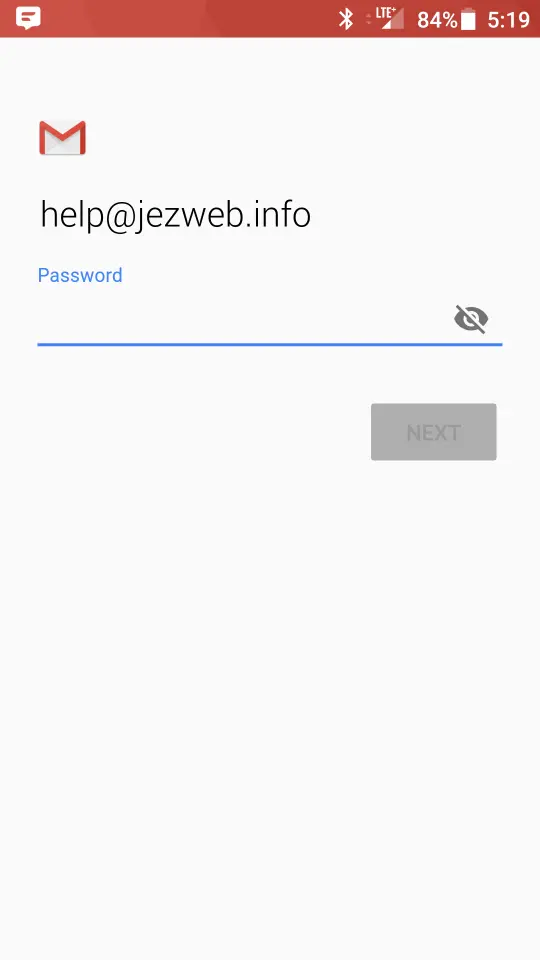
Enter your password.
-
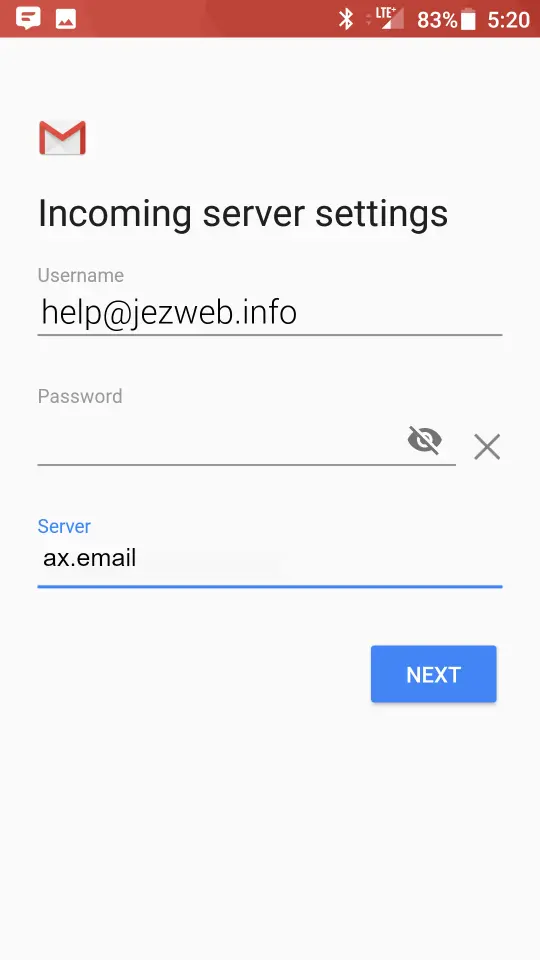
Enter the incoming settings:
- Username
- Your email address
- Password
- Your mailbox password
- Server
- ax.email
Tap Next.
-
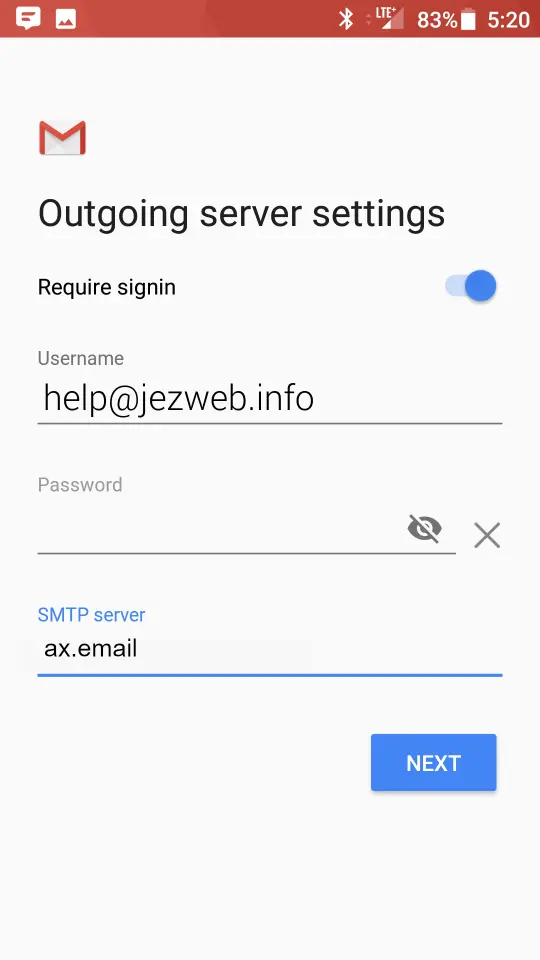
Enter the outgoing settings. Make sure Require signin is turned on.
- Username
- Your email address
- Password
- Your mailbox password
- SMTP server
- ax.email
Tap Next.
-
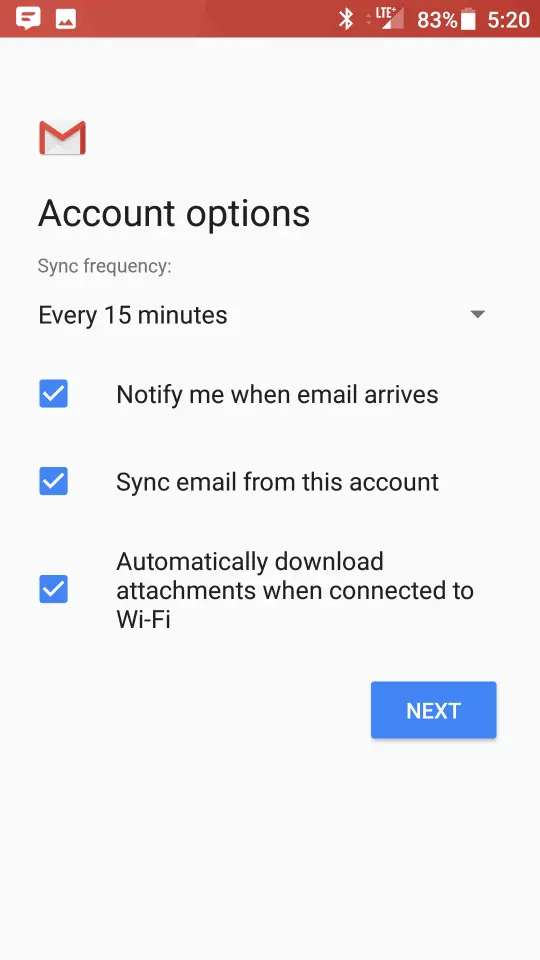
Choose the options you want and tap Next.
-
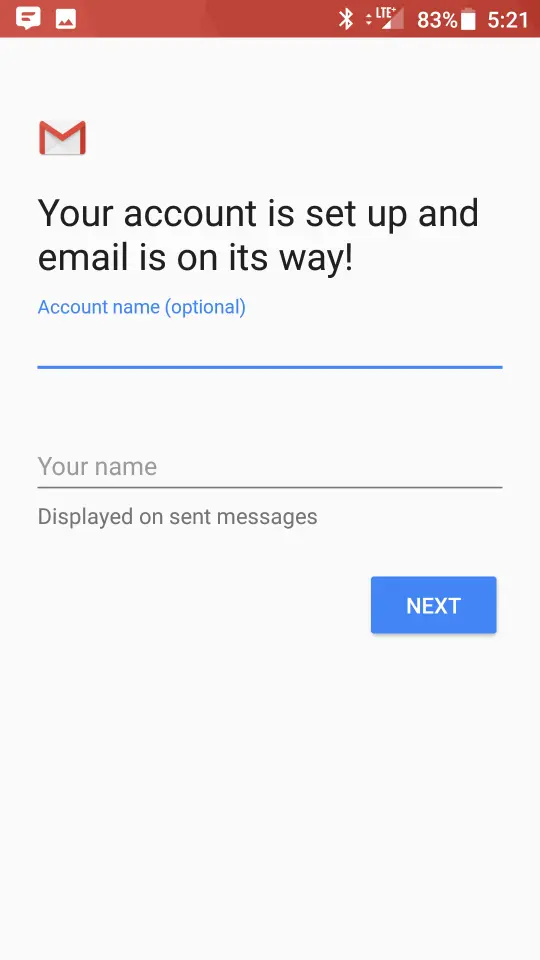
Name the account:
- Account name
- Tells this account apart from others on the device
- Your name
- Shown on your outgoing messages
Tap Next.
-
Open the Gmail app and your messages start syncing.
Give it a few minutes to download before troubleshooting.
Outlook for Windows
-
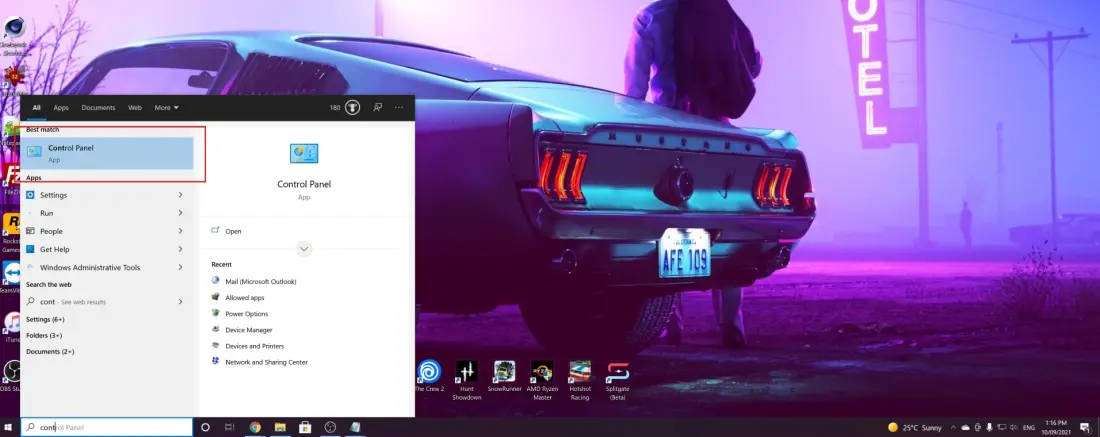
Search for Control Panel in the search bar.
-
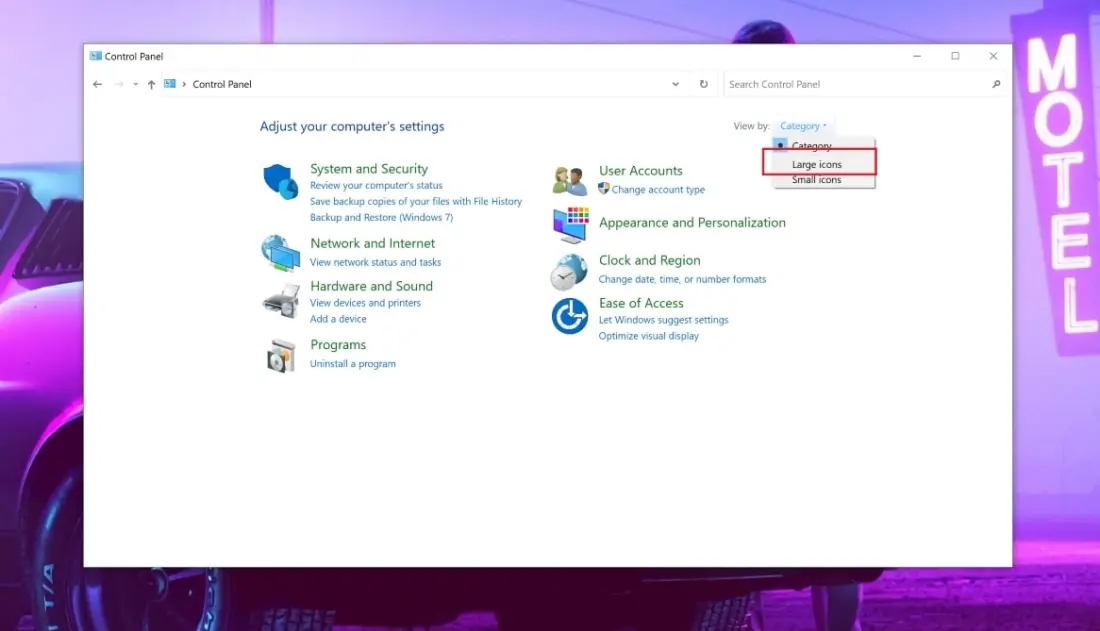
Set View by to Large icons.
-
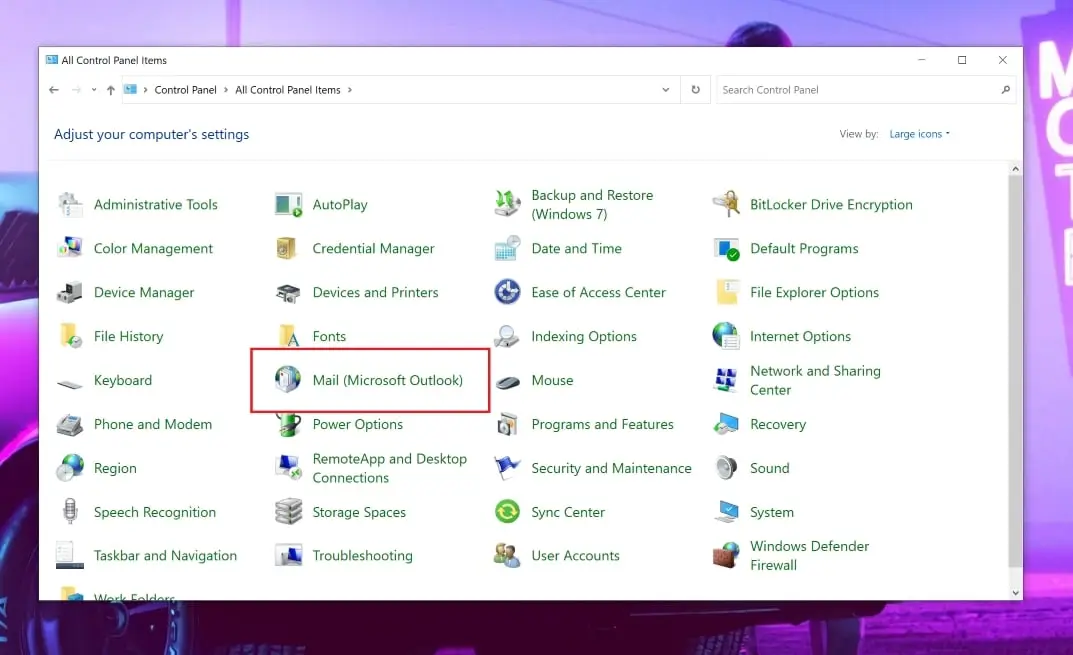
Select the Mail (Microsoft Outlook) icon.
-
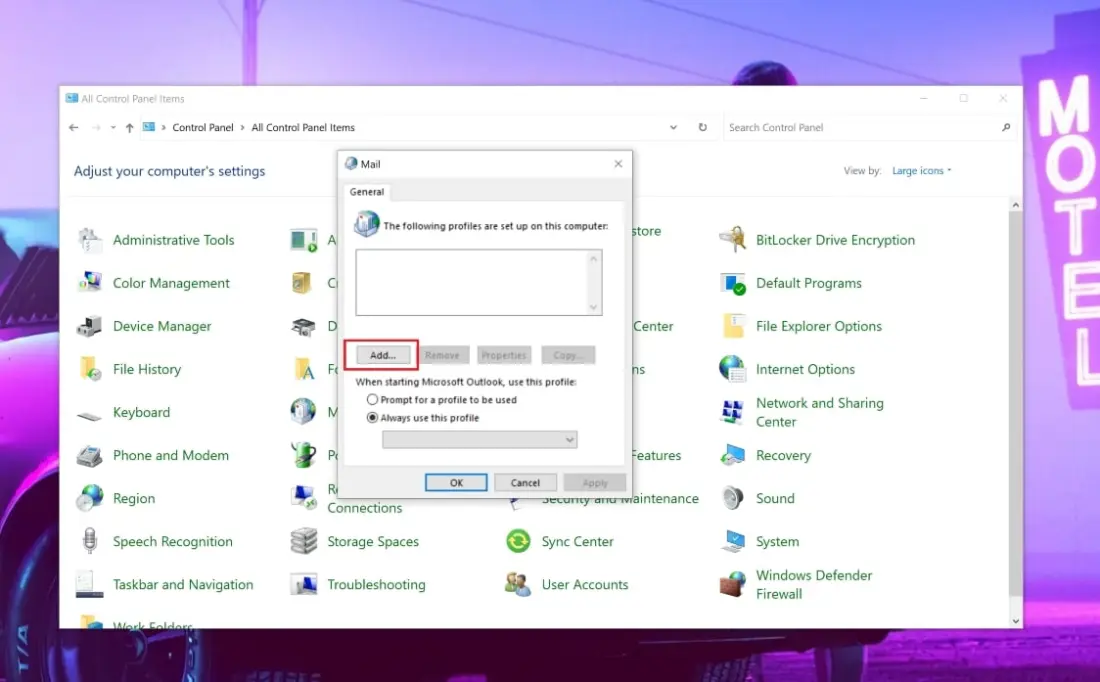
The email profiles window appears. Select Add.
-
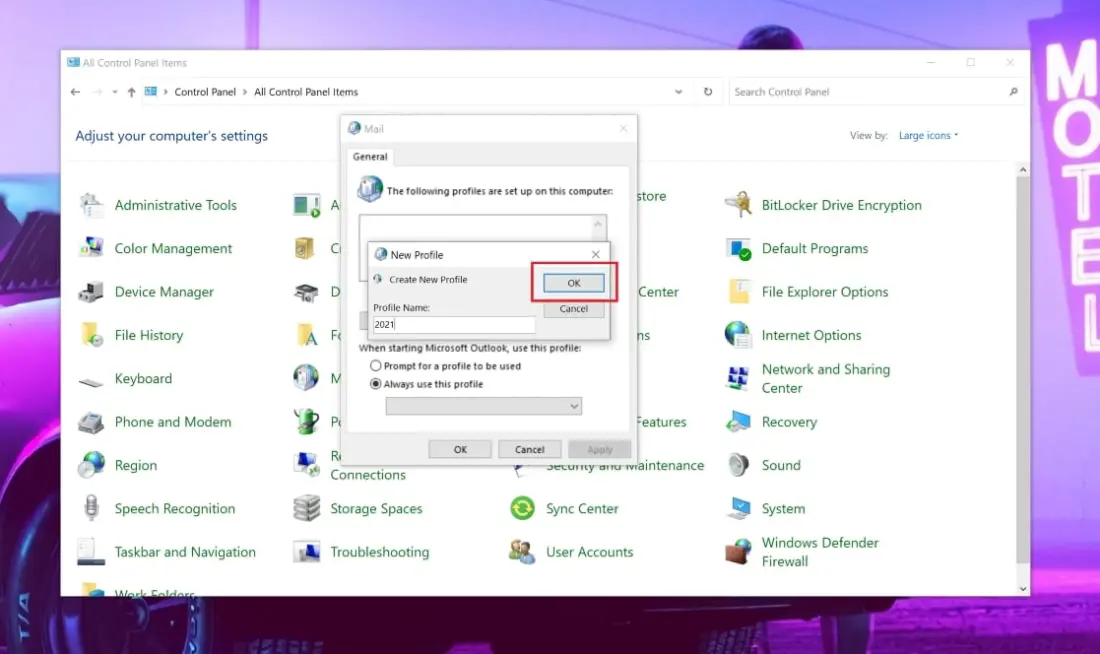
Give your new profile a name and click OK.
-
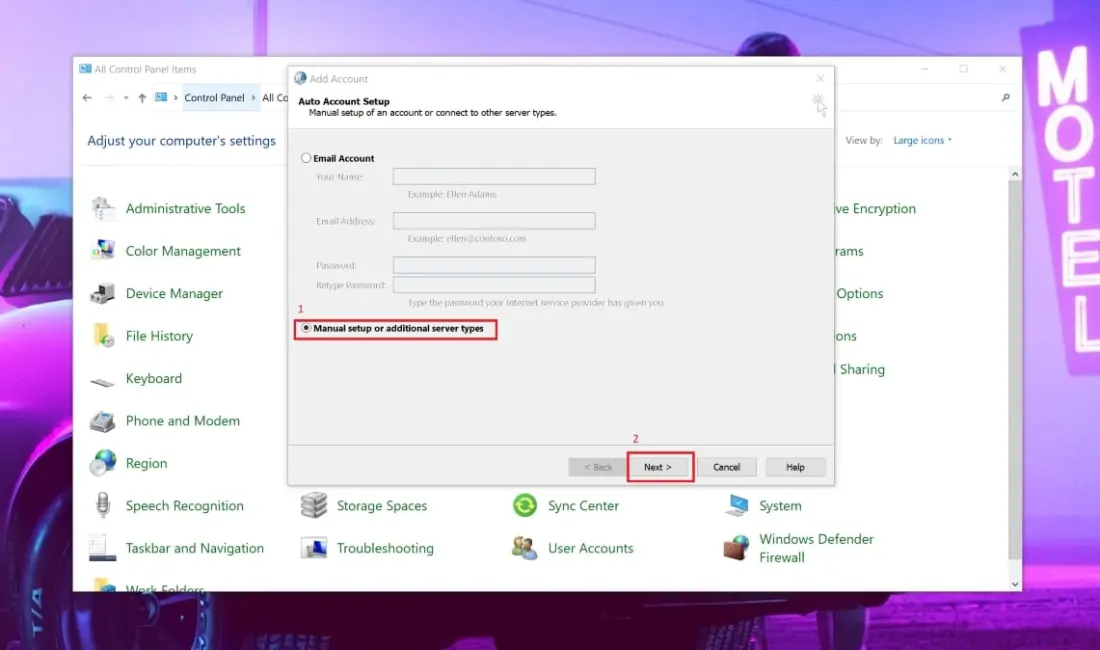
Select Manual setup and click Next.
-
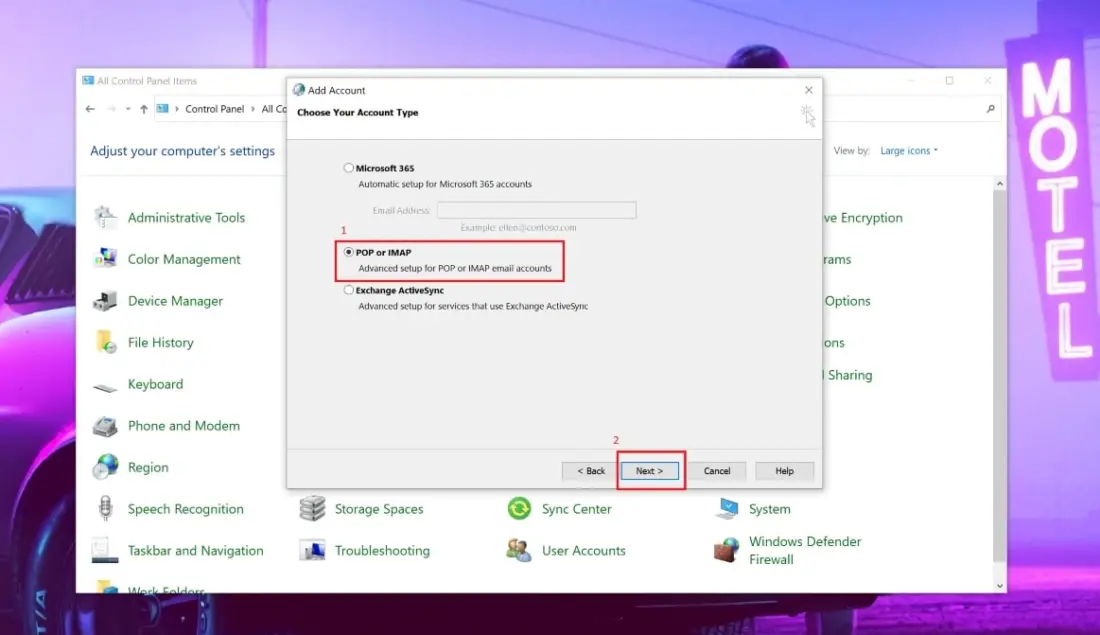
Select POP or IMAP.
-
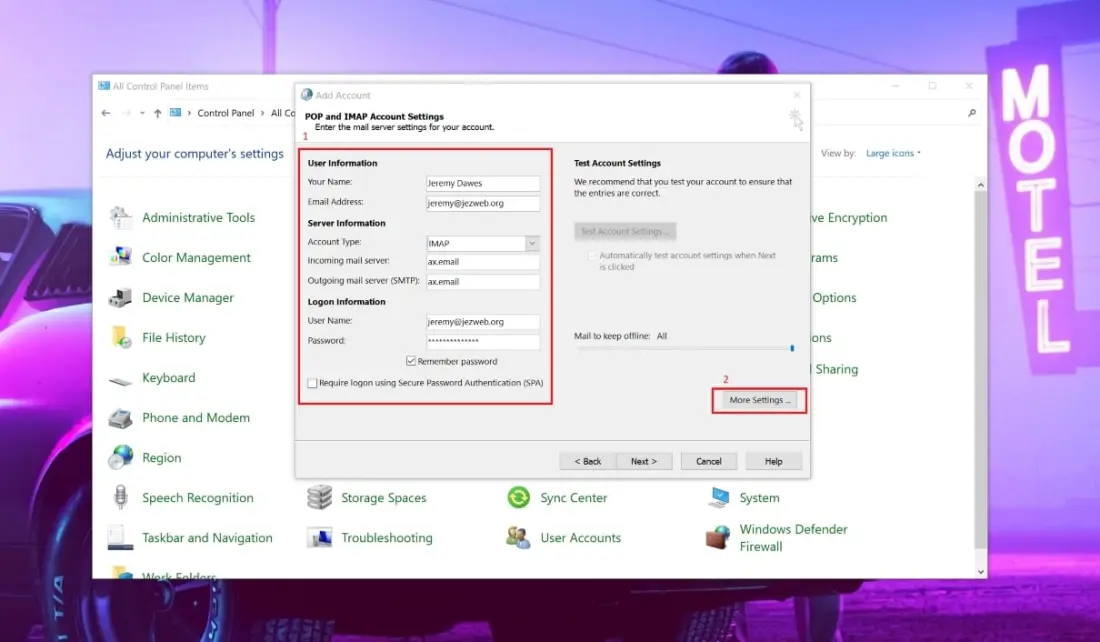
Enter the server details:
- Your name
- Name shown on outgoing emails
- Email address
- Your email address
- Account type
- IMAP
- Incoming server
- ax.email
- Outgoing server (SMTP)
- ax.email
- Username
- Your email address
- Password
- Your mailbox password
-
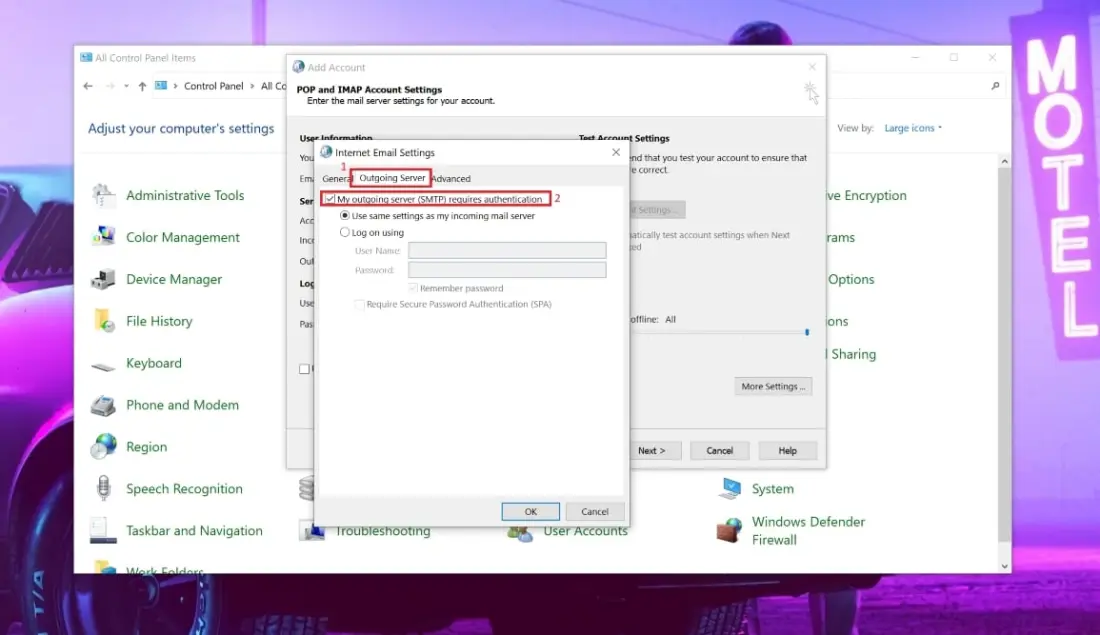
Select More Settings, open the Outgoing Server tab and tick My outgoing server (SMTP) requires authentication.
-
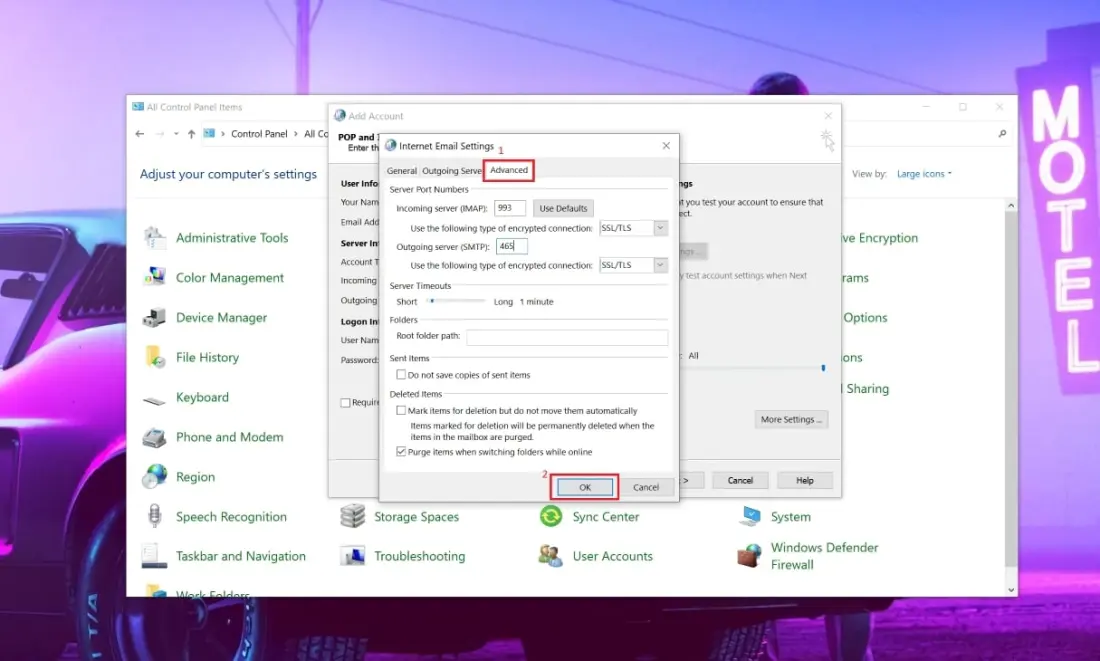
Open the Advanced tab and enter the ports:
- Incoming server
- 993, SSL/TLS
- Outgoing server
- 465, SSL/TLS
Click OK.
-
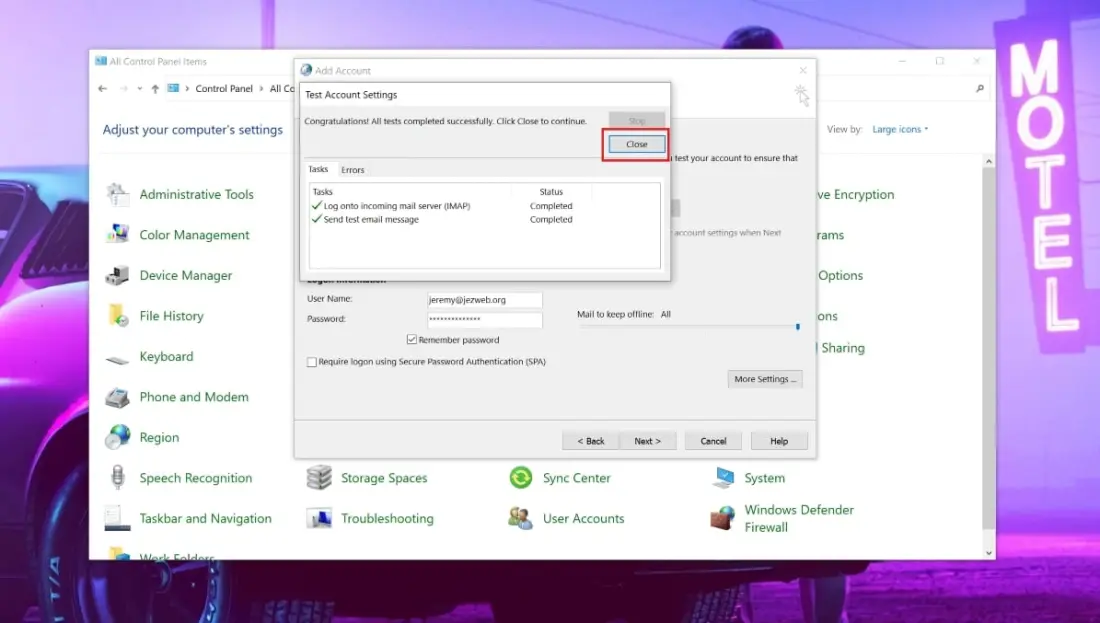
Select Close.
-
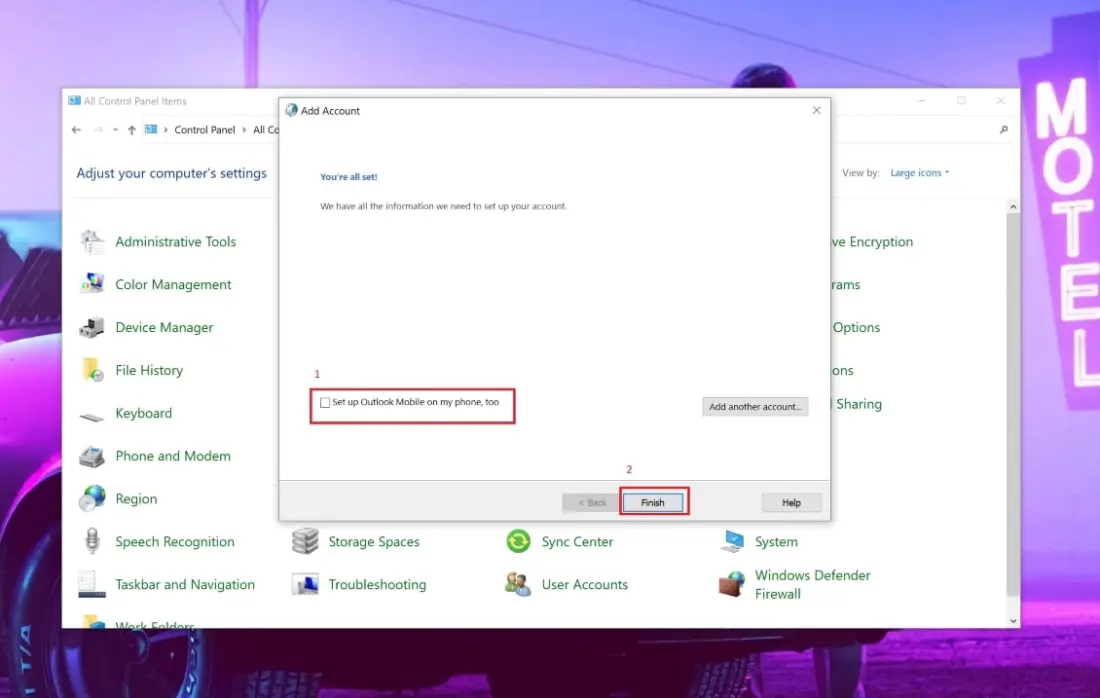
Untick Set up Outlook Mobile on my phone, too, then click Finish.
-
Open Outlook and your messages start syncing.
Give it a few minutes to download before troubleshooting.
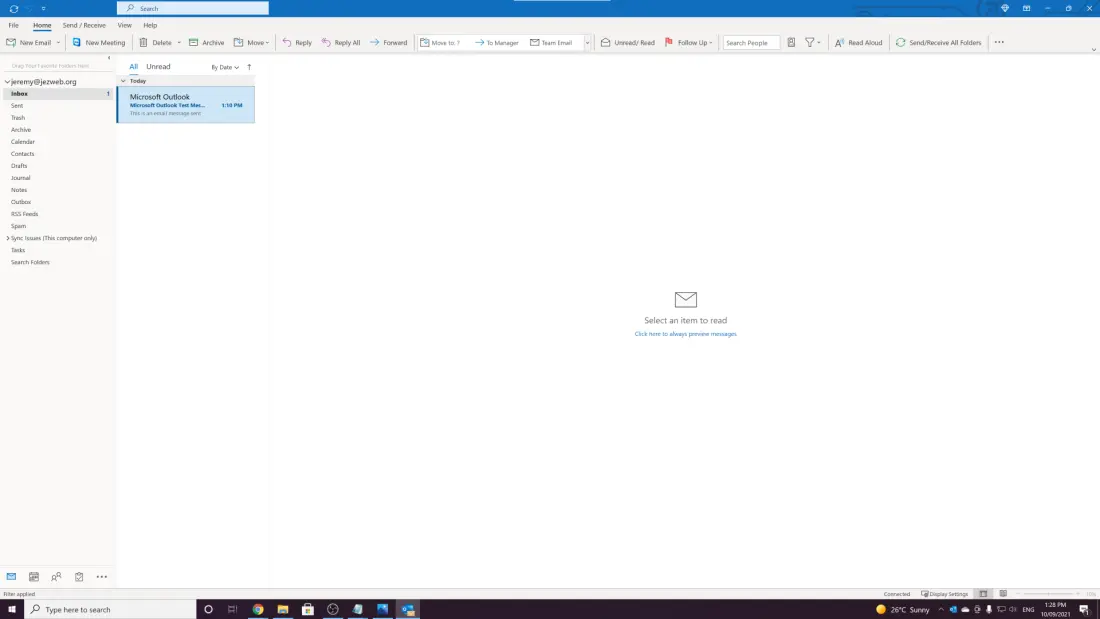
Outlook for iPhone
Download Outlook for iOS from the App Store first.
-
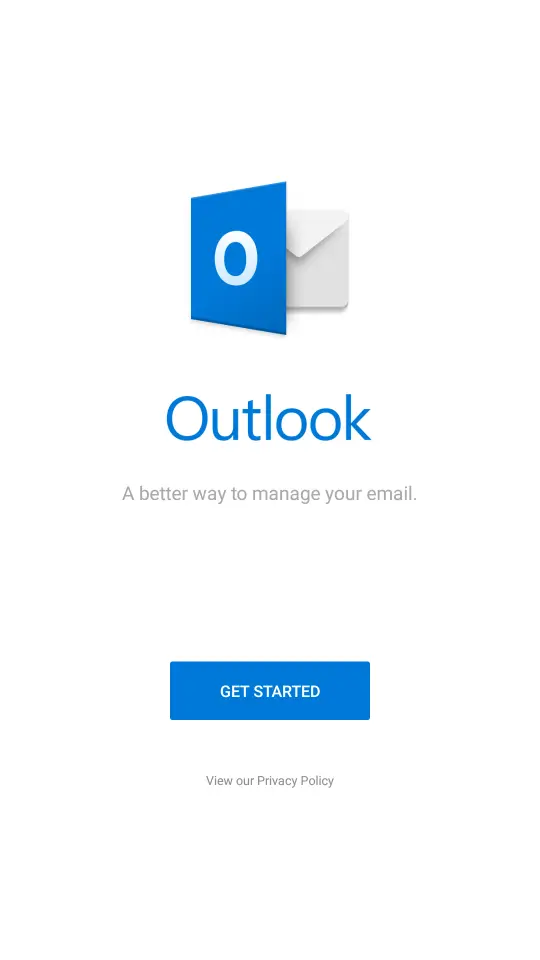
Open Outlook and tap the blue Get Started button.
-
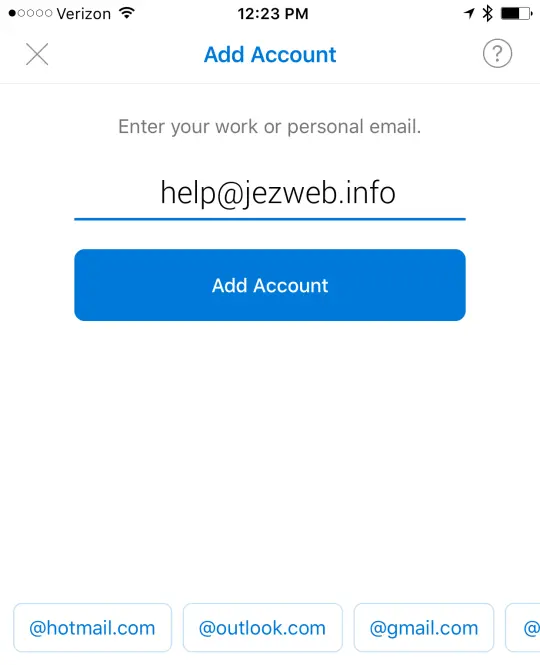
Enter your email address.
-
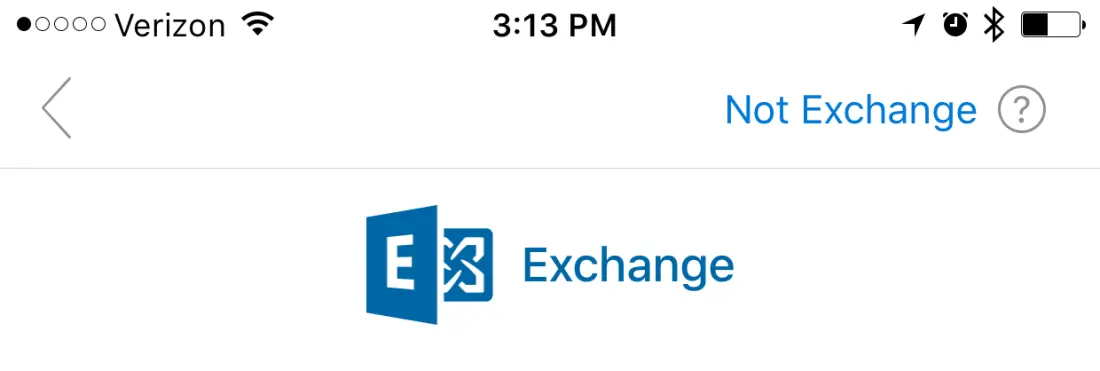
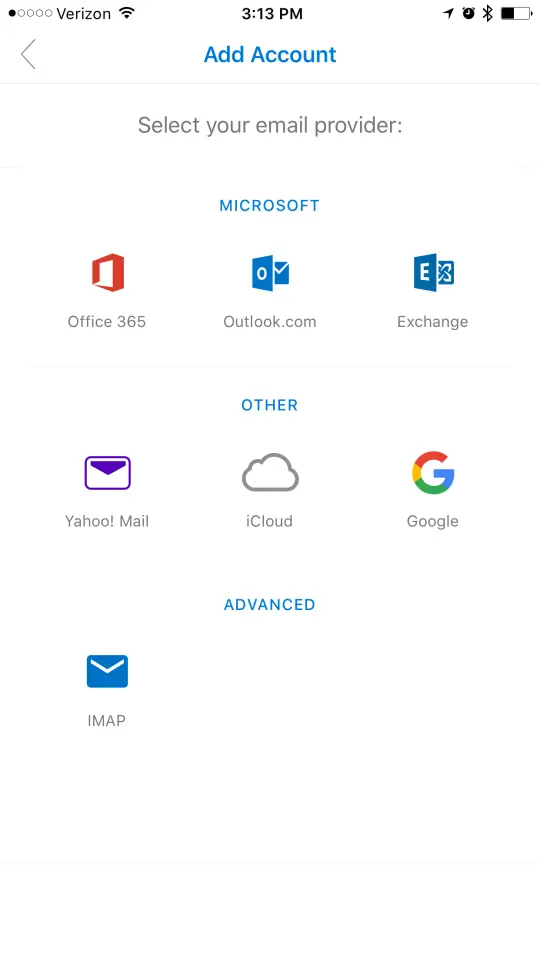
Tap Add Account. Outlook picks Exchange by default, so tap Not Exchange at the top right, then Change Account Provider.
-
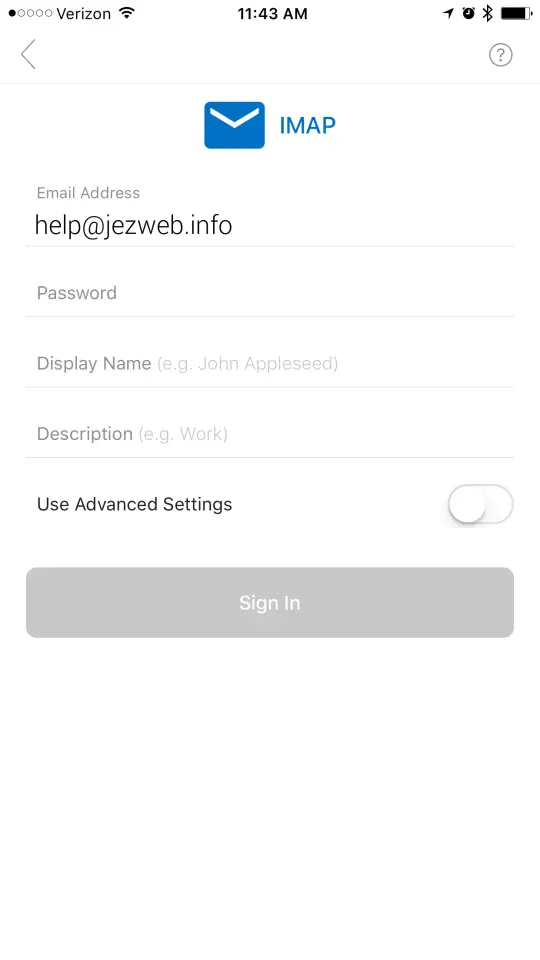
Select IMAP.
-
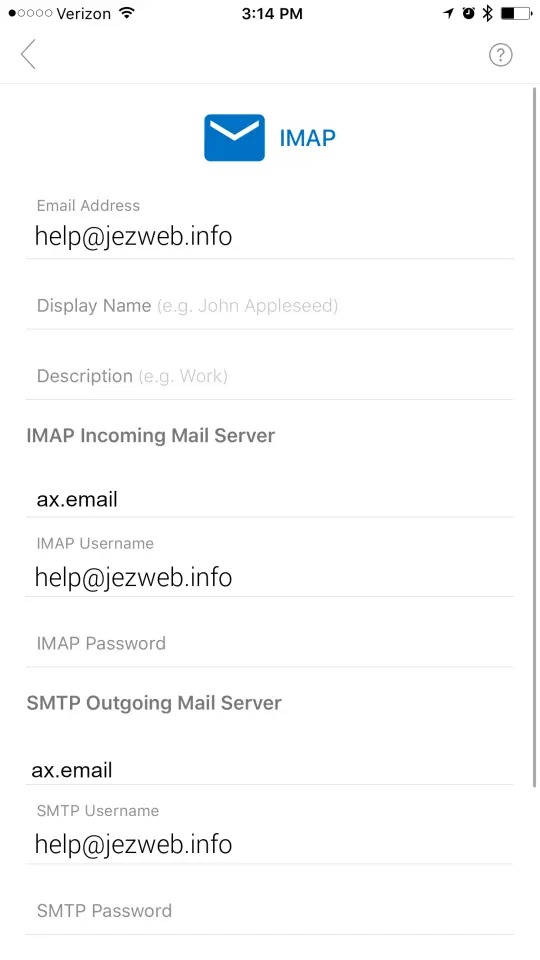
Enter your mailbox password and a description for the account, then turn on the Advanced Settings slider.
-
Enter these settings:
- Your email address
- Display name
- Your name
- Description
- Something to tell the account apart
- IMAP incoming server
- ax.email
- Username
- Your email address
- Password
- Your mailbox password
- SMTP outgoing server
- ax.email
- Username
- Your email address
- Password
- Your mailbox password
Tap the tick at the top right.
-
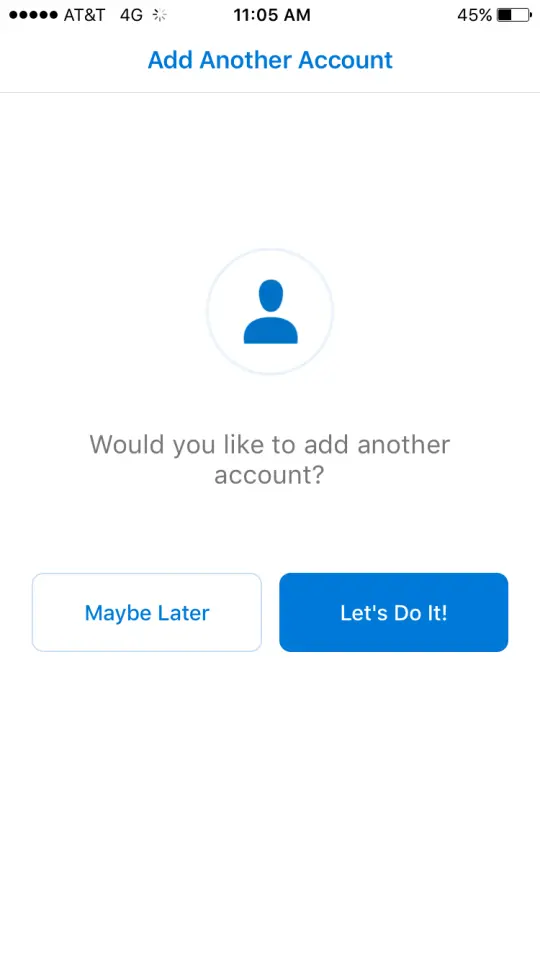
Tap Maybe Later to skip adding another account.
-
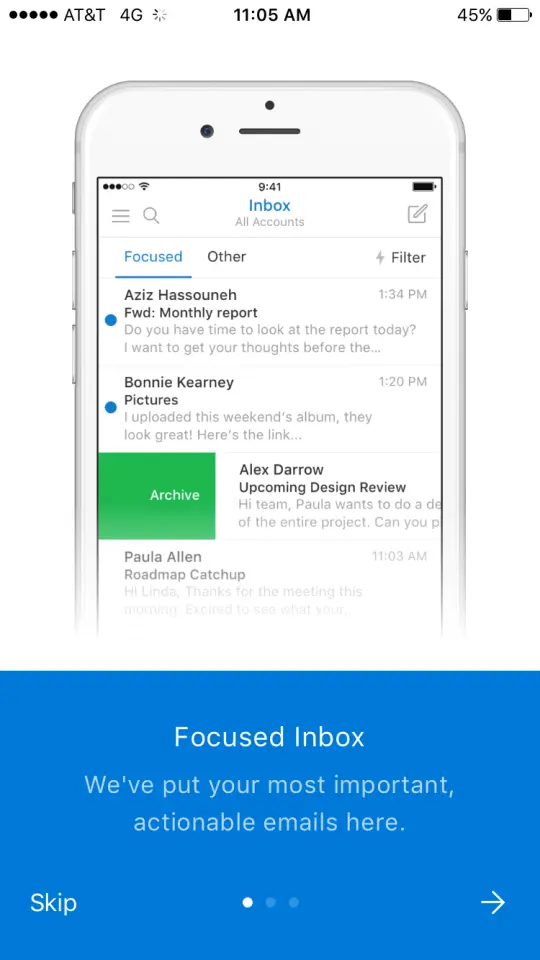
Follow the app tutorial with the arrow at the bottom right, or tap Skip.
-
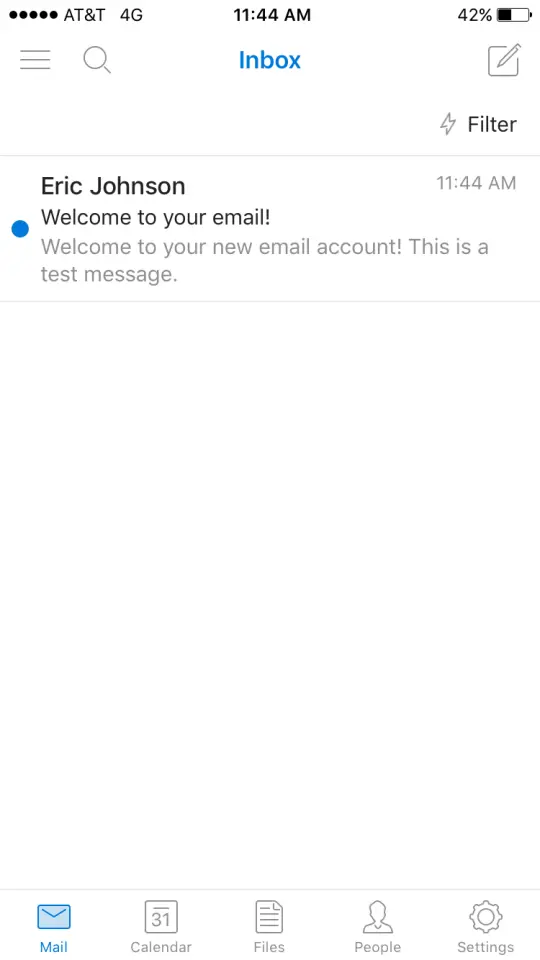
When you see your inbox, you are all set.
Mail can take a few minutes to download.
Outlook for Mac
-
Open Outlook 2016 for Mac and select Preferences from the Outlook menu. If you have no accounts set up in Outlook yet, skip to step 5.
-
Select Accounts.
-
Select Add Email Account.
-
Enter your email address.
-
If Outlook selects Exchange as the account type, click Not Exchange at the top right to switch.
-
Select IMAP/POP at the bottom.
-
Enter these details:
- Type
- IMAP
- Email address
- Your email address
- Username
- Your email address
- Password
- Your mailbox password
- Incoming server
- ax.email for Axigen, secure.emailsrvr.com for Rackspace
- Port
- 993
- Use SSL to connect
- Ticked
- Outgoing server
- ax.email for Axigen, secure.emailsrvr.com for Rackspace
- Port
- 465
- Use SSL to connect
- Ticked
Click Add Account.
-
Click Done.
-
The main Outlook window opens and your email starts downloading.
Allow 15 minutes for email to download before troubleshooting.
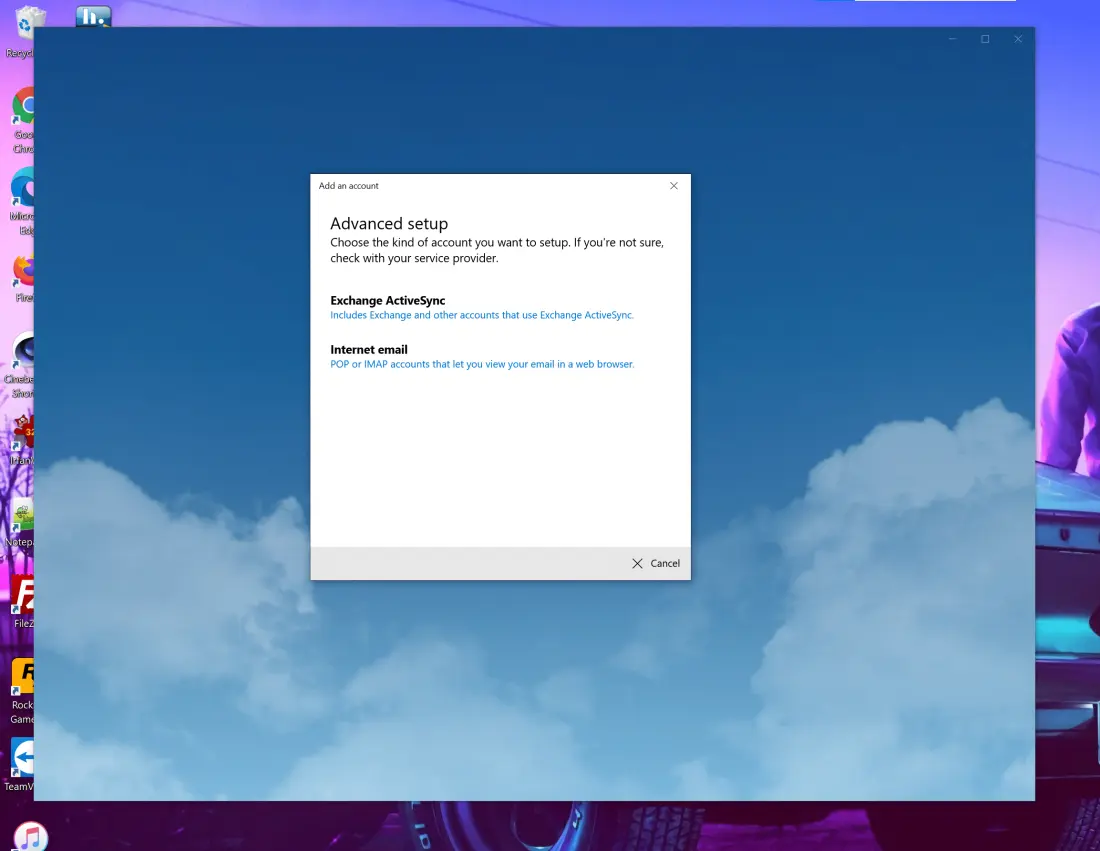
Windows Mail
-
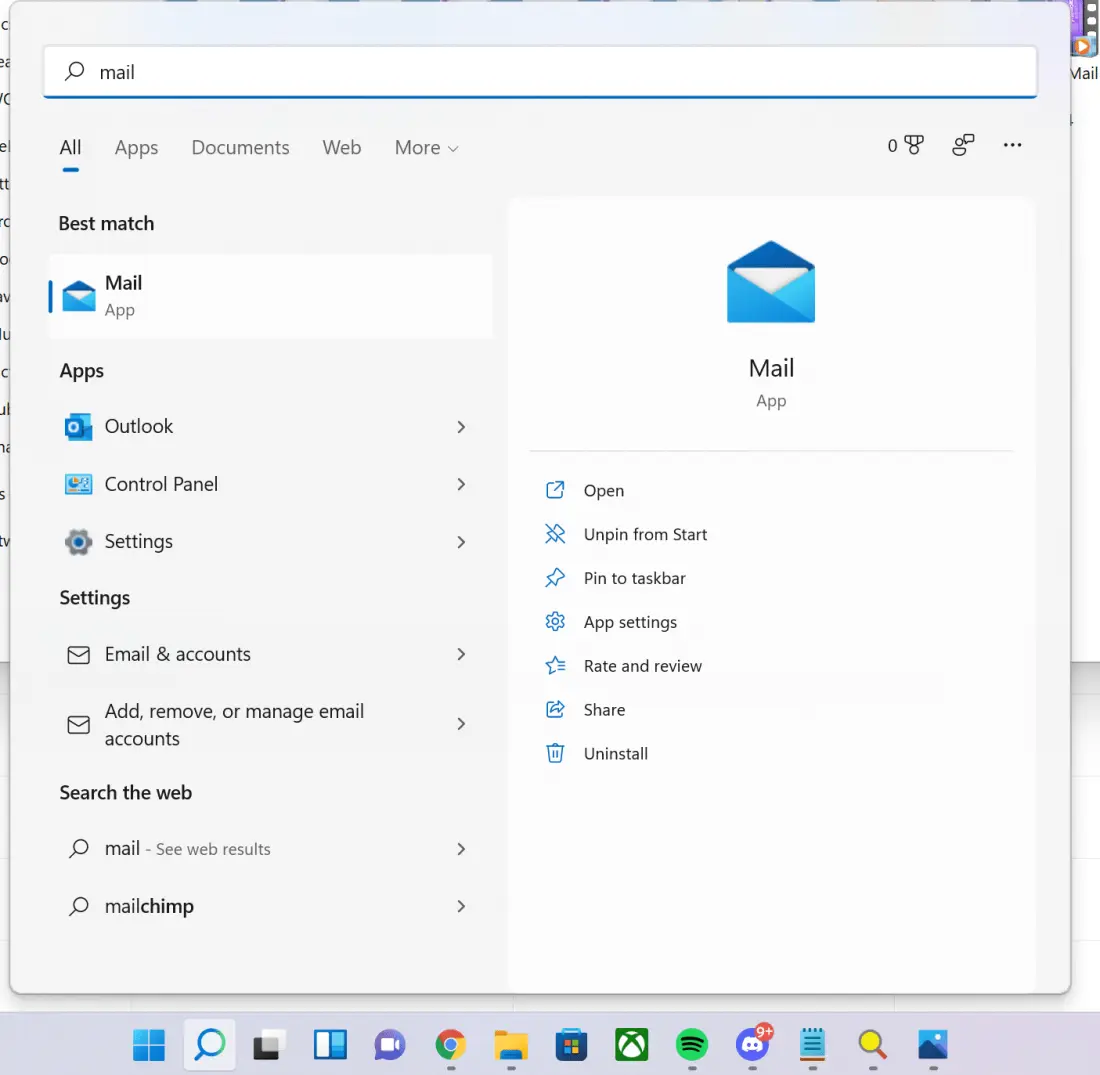
Search for Mail in the search bar.
-
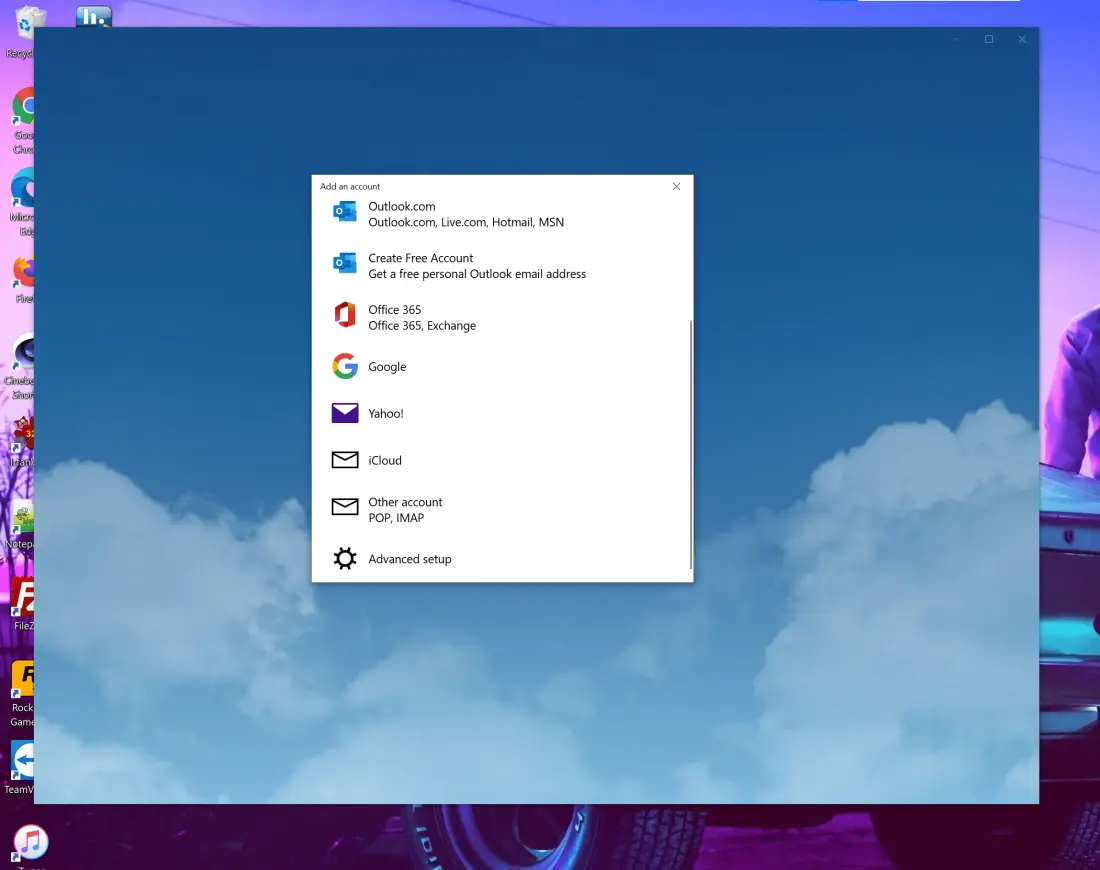
Choose Advanced setup.
-
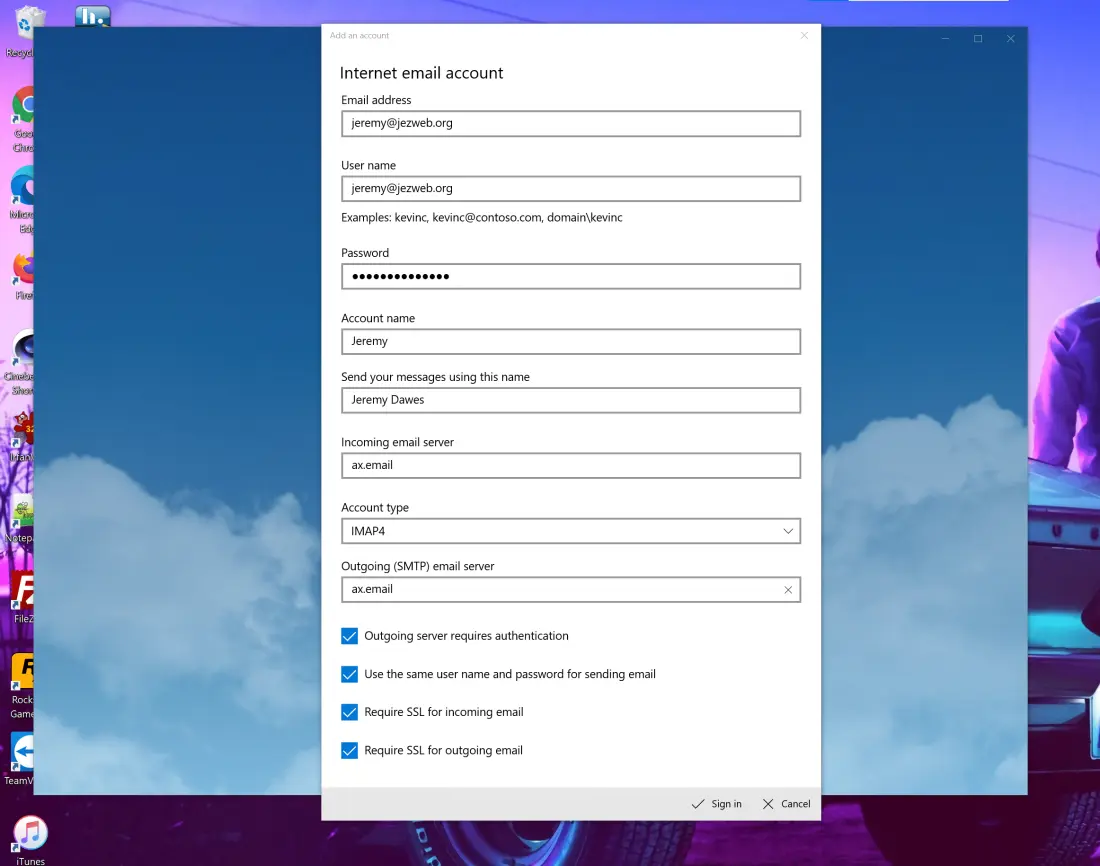
Choose Internet email.
-
Enter the server details:
- Email address
- Your email address
- Username
- Your email address
- Password
- Your password
- Account name
- A name to identify the account on the device
- Send your messages using this name
- Your name or business name
- Incoming email server
- ax.email
- Account type
- IMAP4
- Outgoing (SMTP) email server
- ax.email
Leave all the options ticked.
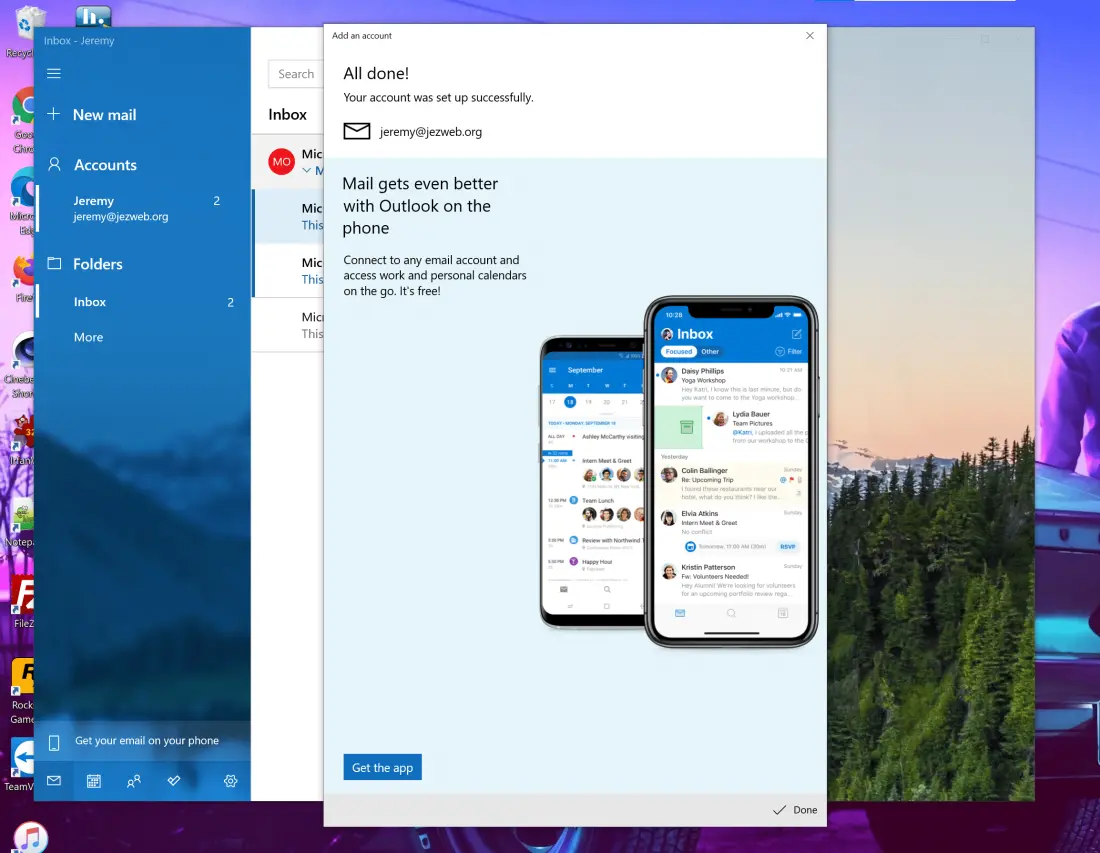
-
Choose Done.
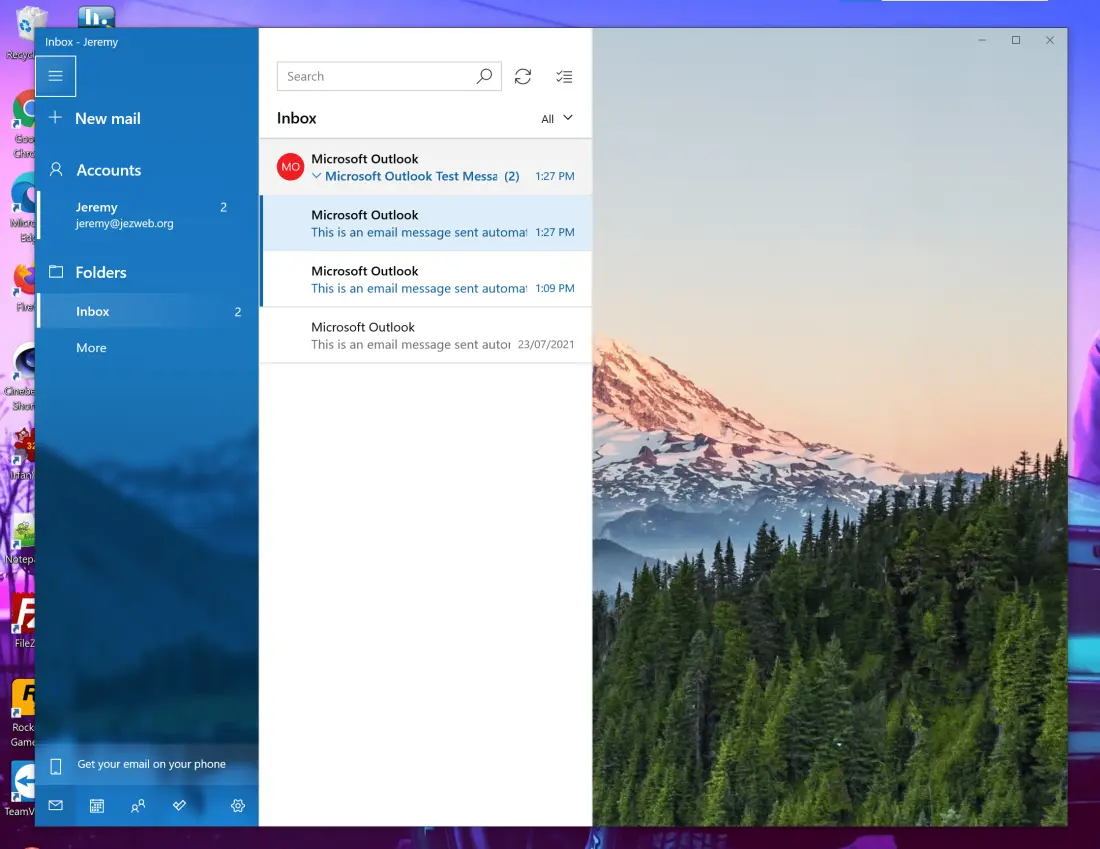
The account is set up and your mail starts downloading.
Thunderbird
-
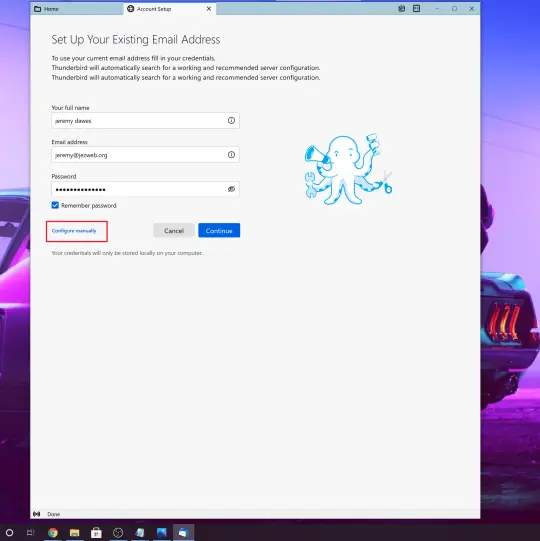
Open Thunderbird, enter your name, email address and password, and select Configure manually.
-
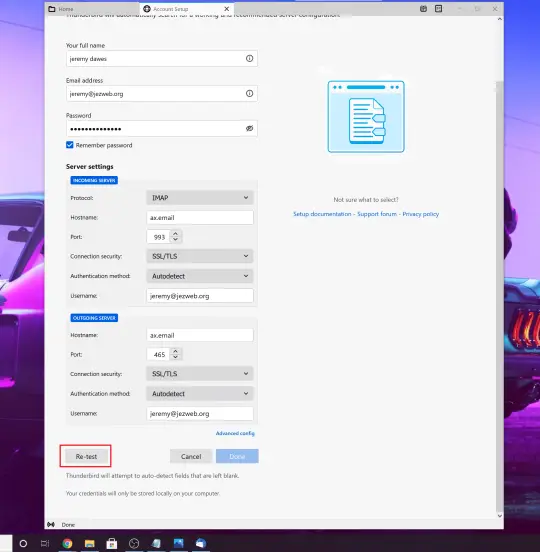
Enter the incoming server:
- Protocol
- IMAP
- Hostname
- ax.email
- Port
- 993
- Connection security
- SSL/TLS
- Authentication method
- Autodetect
- Username
- Your email address
-
Enter the outgoing server:
- Hostname
- ax.email
- Port
- 465
- Connection security
- SSL/TLS
- Authentication method
- Autodetect
- Username
- Your email address
Select Re-test.
-
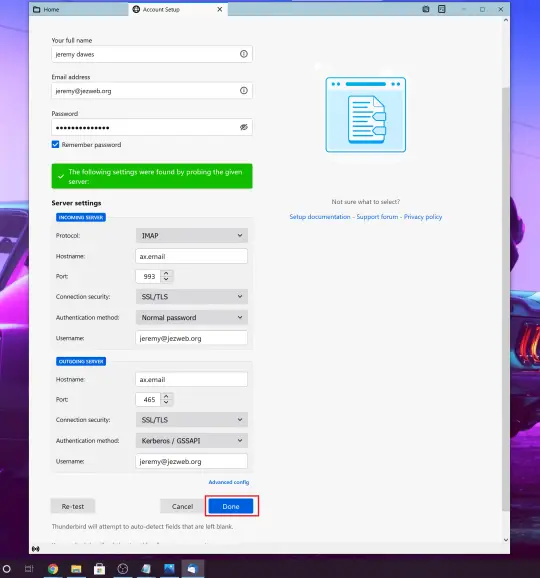
Select Done.
-
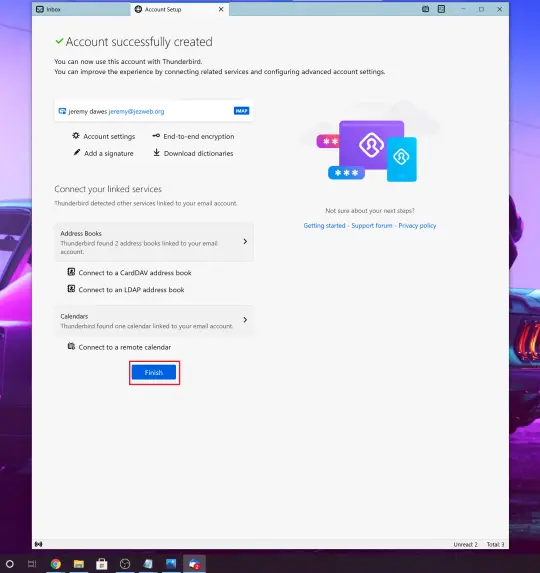
Select Finish.
-
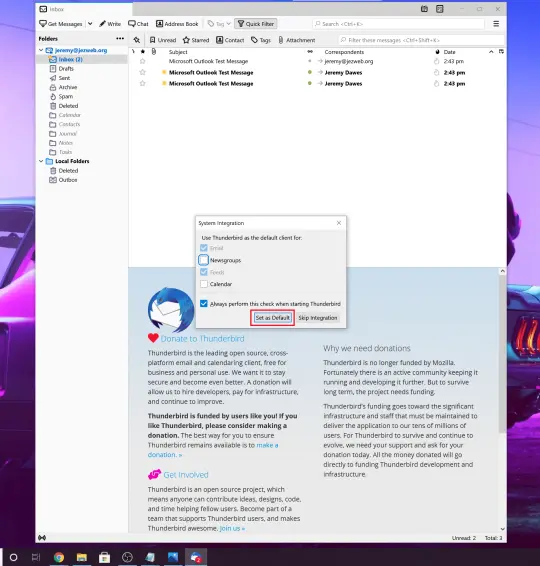
Select Set as default.
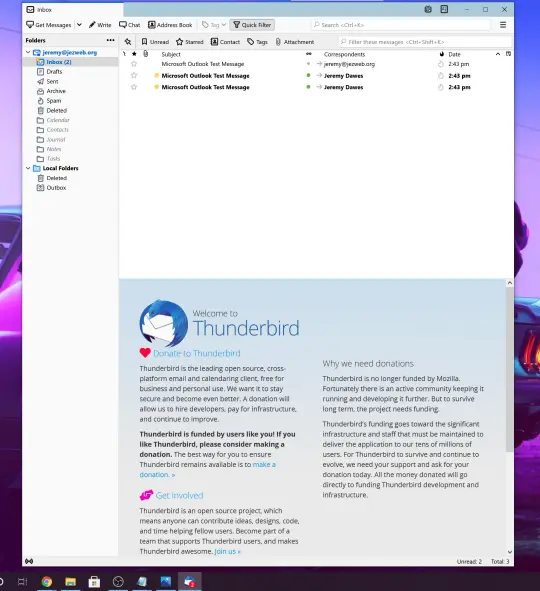
Your messages start syncing. Give it a few minutes before troubleshooting.
Still stuck? Call 1300 27 81 27 and the team will help you get set up.