> site manage // email setup // cpanel
cPanel email
setup.
Your mail server is mail.yourdomain.com. Open the guide for your device or app.
// The settings
- Incoming server
- mail.yourdomain.com
- IMAP port
- 993, SSL/TLS
- POP3 port
- 995, SSL/TLS
- Outgoing (SMTP) server
- mail.yourdomain.com
- SMTP port
- 465, SSL/TLS
- Username
- Your full email address
- Authentication
- Outgoing server requires authentication
// Step by step
iPhone and iPad
-
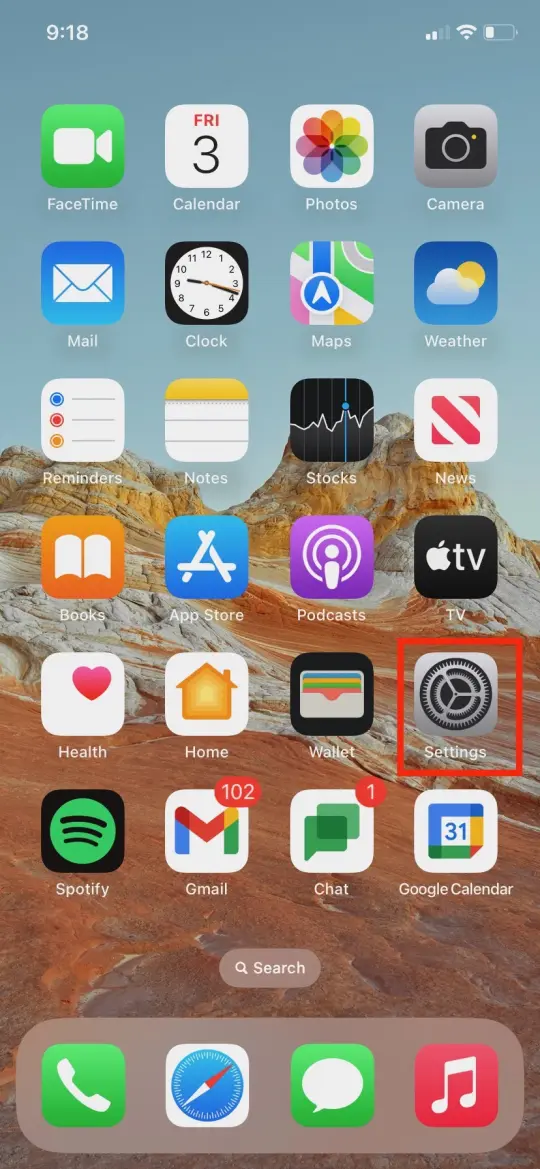
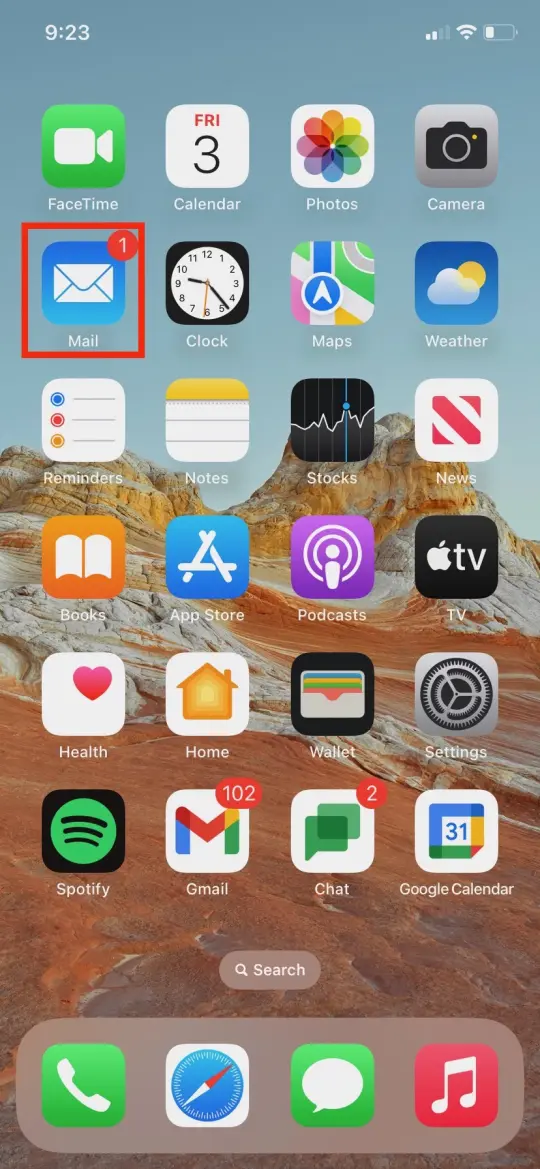
Open the Settings app.
-
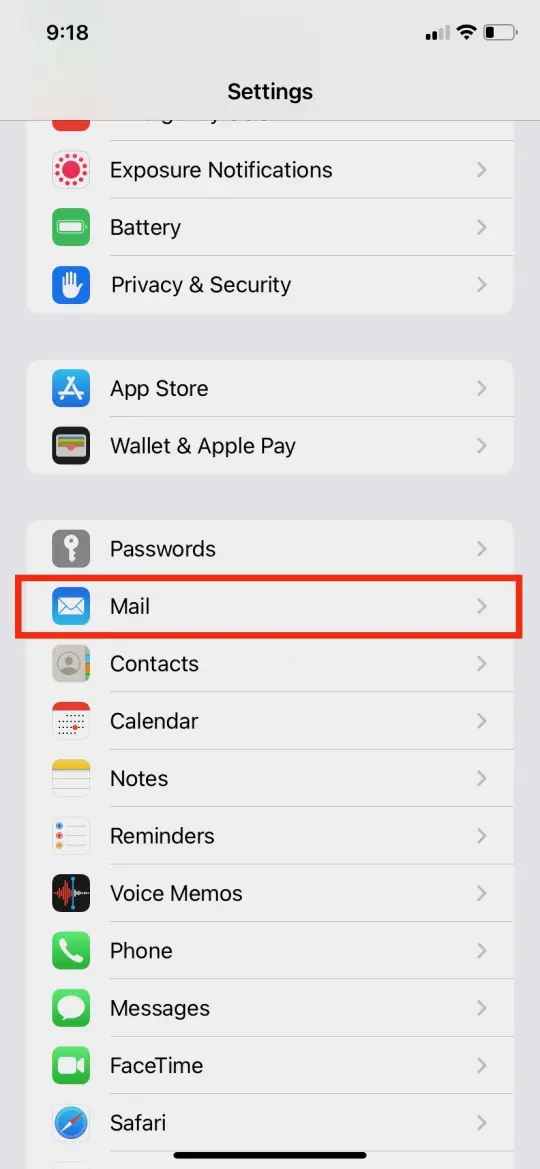
Scroll down and tap Mail.
-
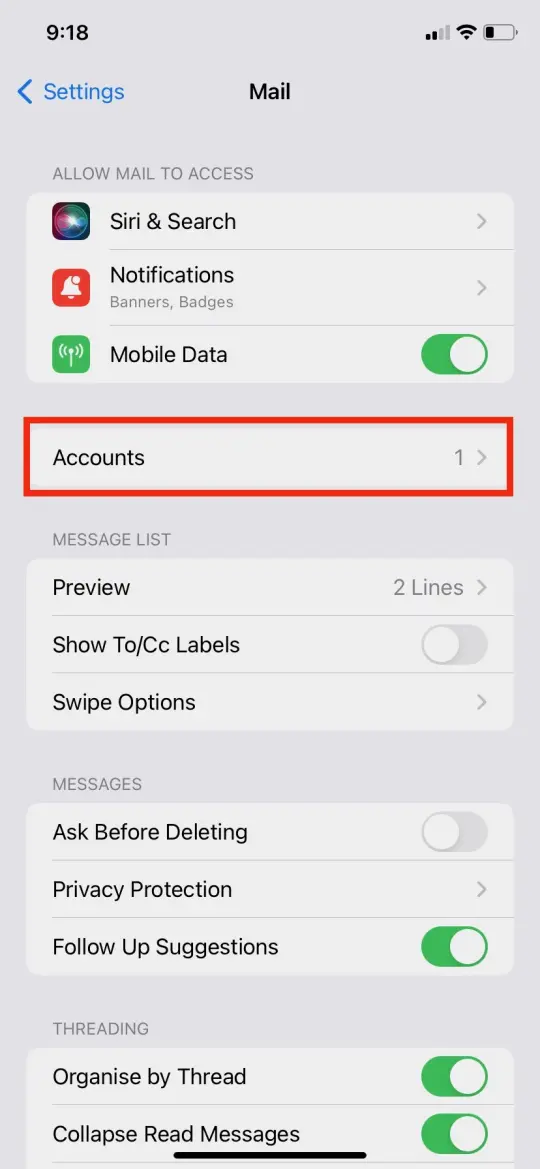
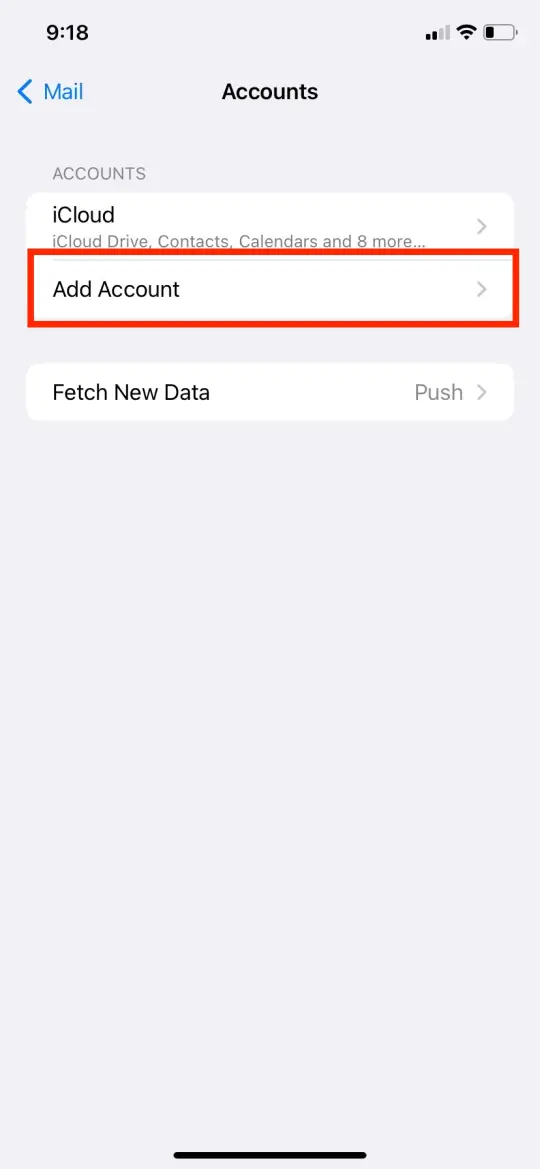
Tap Accounts, then Add Account.
-
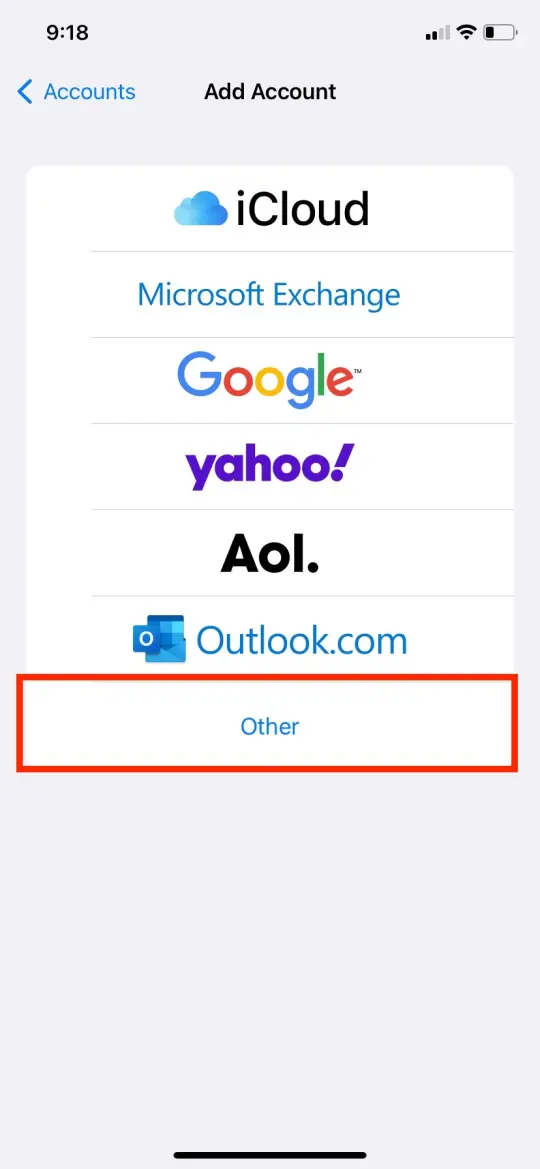
Tap Other at the bottom of the list.
-
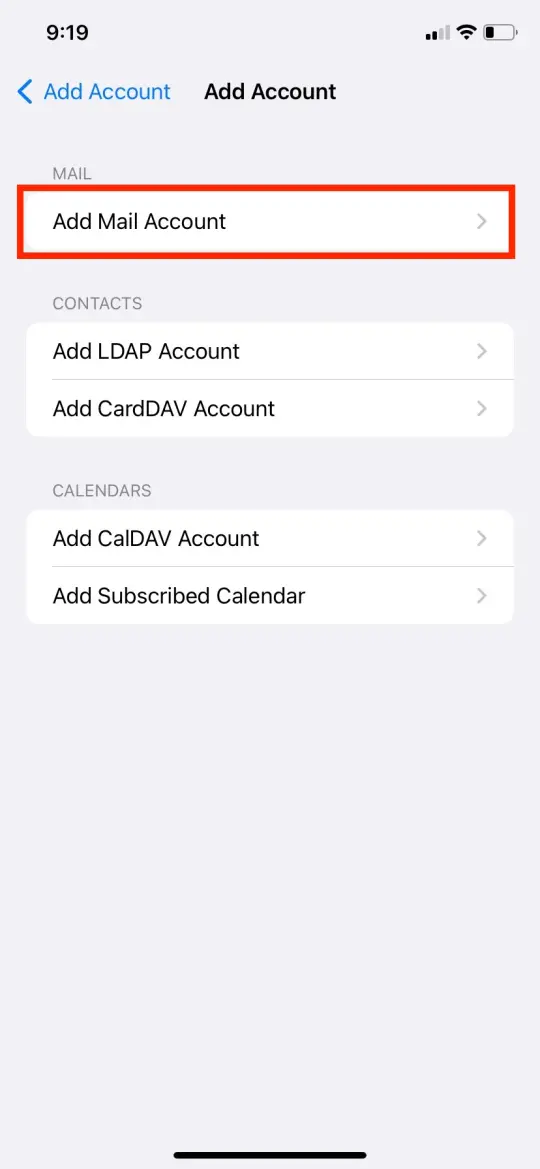
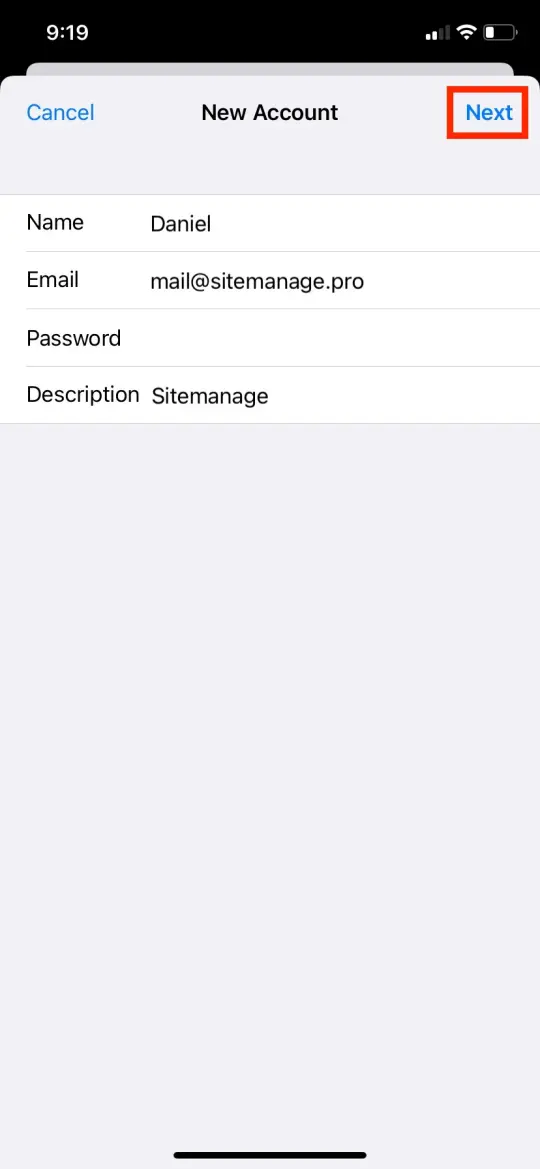
Tap Add Mail Account and enter your name, email address, password and a description for the account.
-
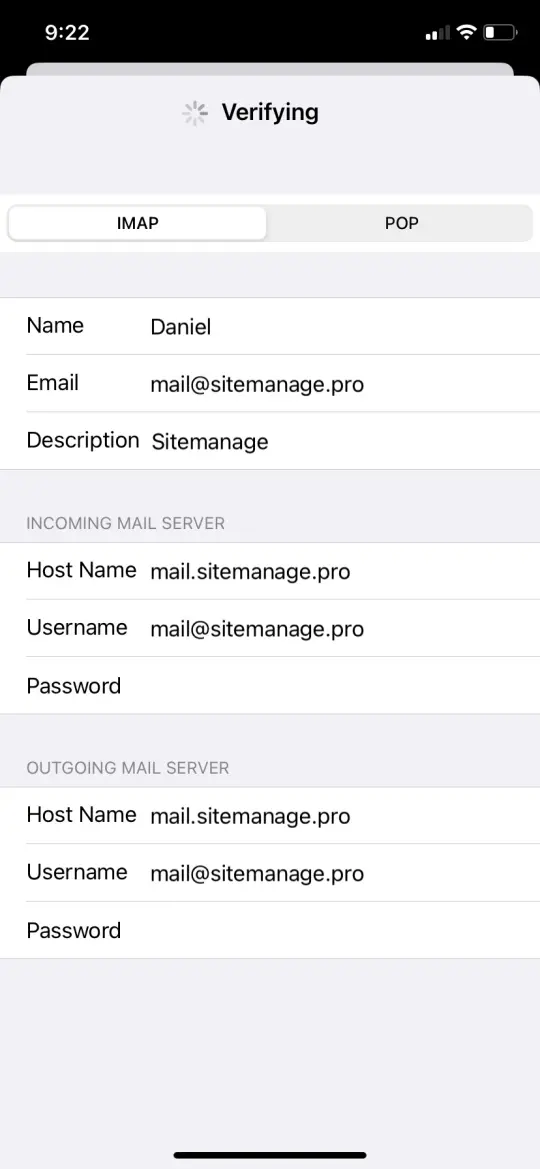
Choose IMAP or POP. We recommend IMAP: it keeps your mail in sync across all your devices.
-
Under Incoming Mail Server, enter:
- Host name
- Your domain name (e.g. mail.yourdomain.com)
- Username
- Your full email address
- Password
- Your email account password
-
Under Outgoing Mail Server, enter:
- Host name
- Your domain name (e.g. mail.yourdomain.com)
- Username
- Your full email address
- Password
- Your email account password
-
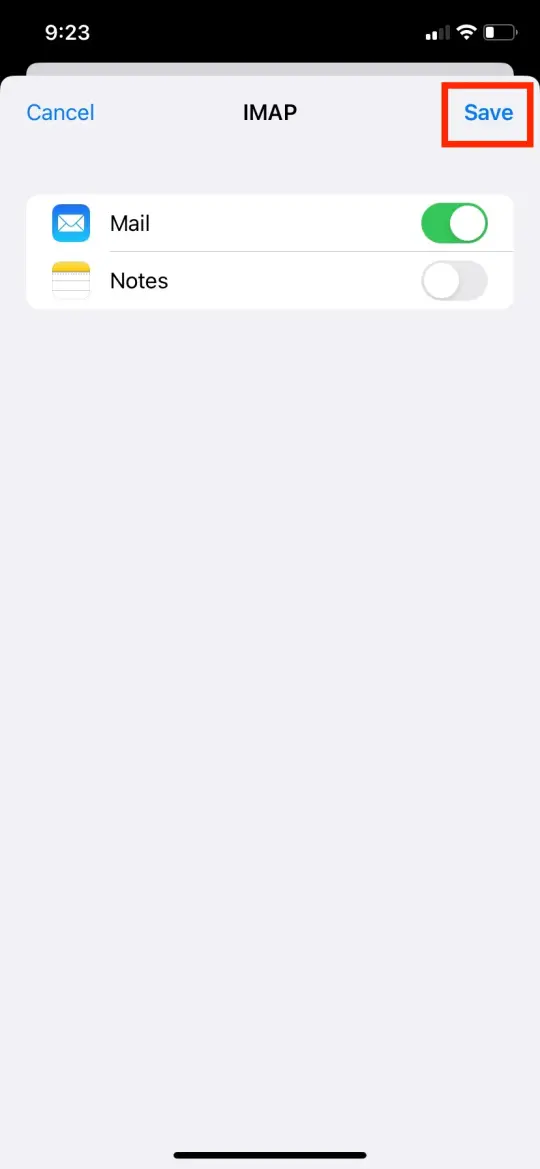
Tap Next to verify your account, then choose what to sync with your iPhone (Mail, Contacts, Calendars and so on).
-
Tap Save.
Your email is now set up in the iPhone Mail app.
Android (Gmail)
-
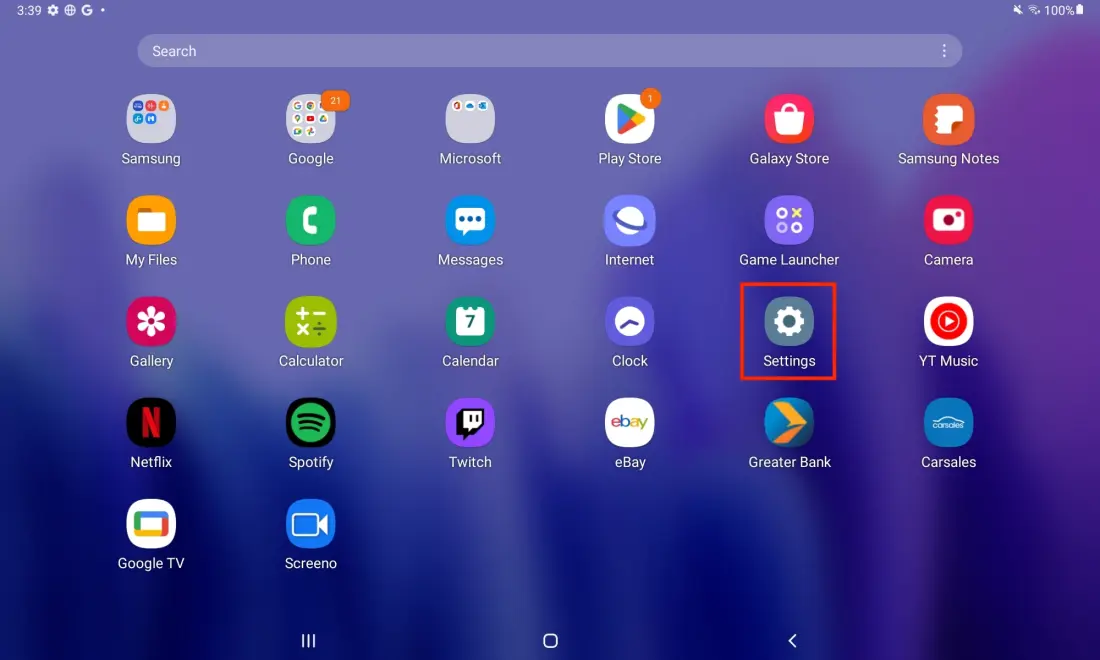
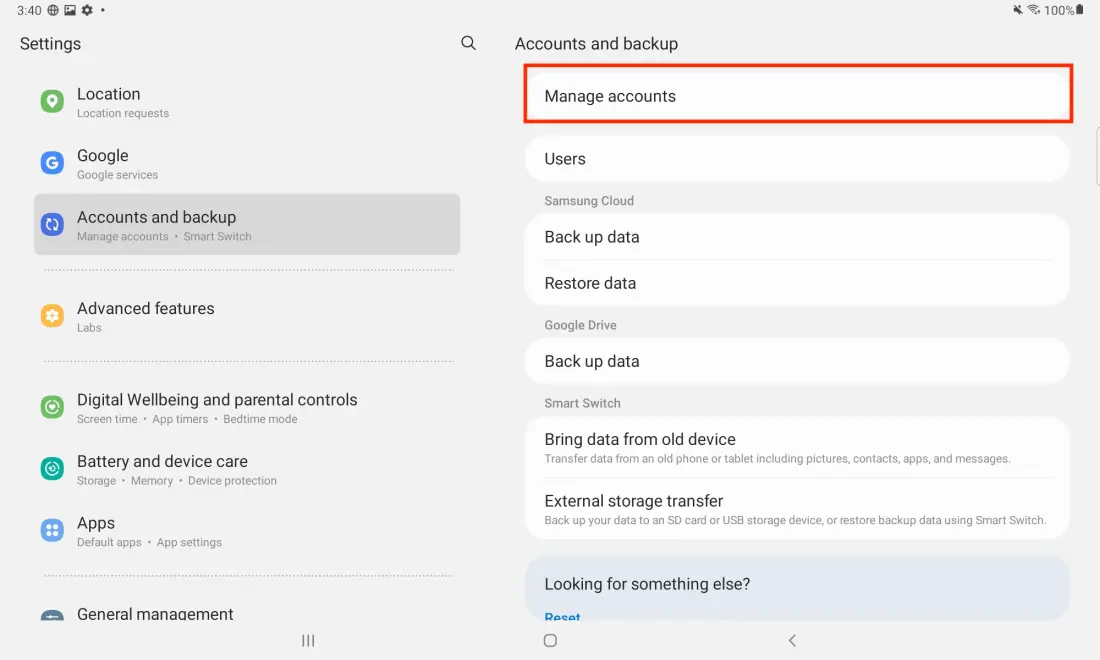
Open the Settings app.
-
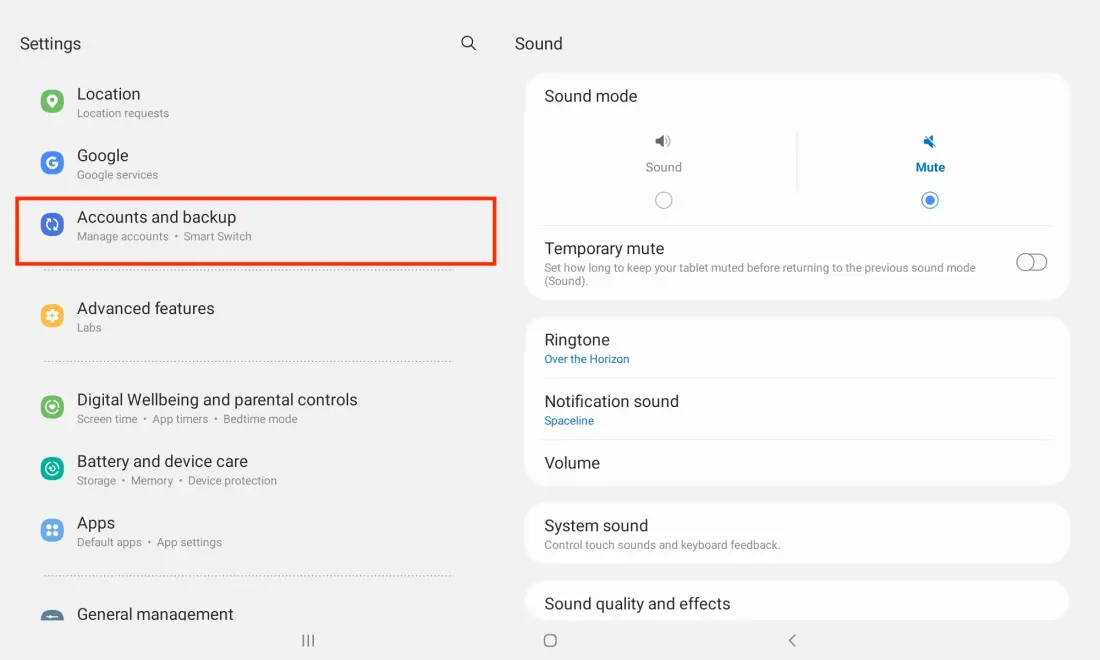
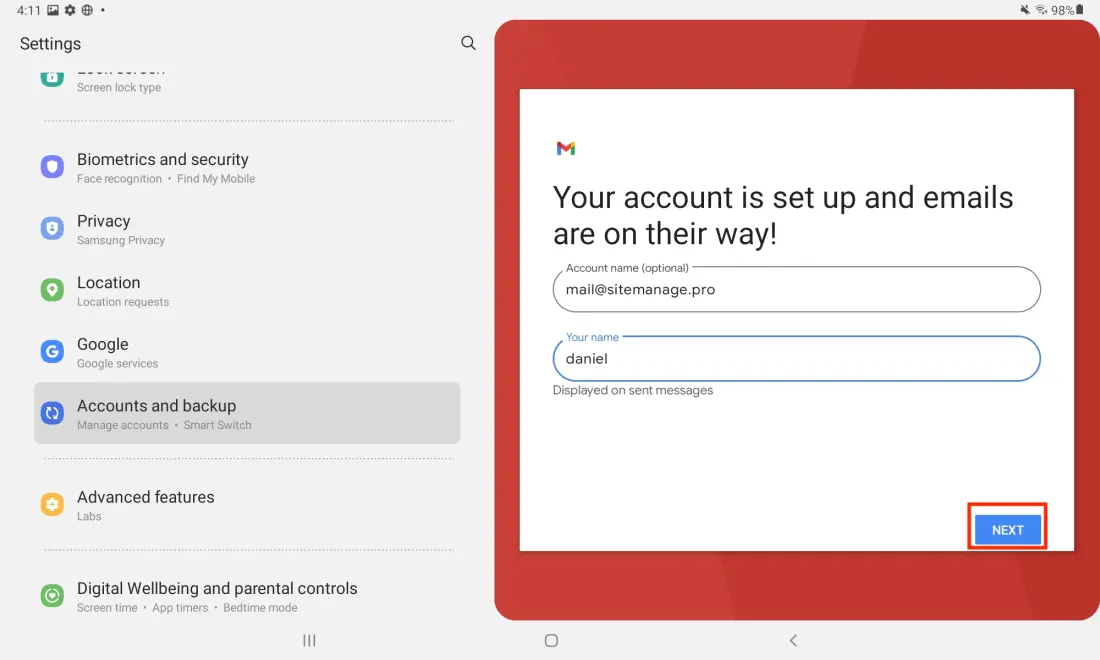
Tap Accounts and Backup.
-
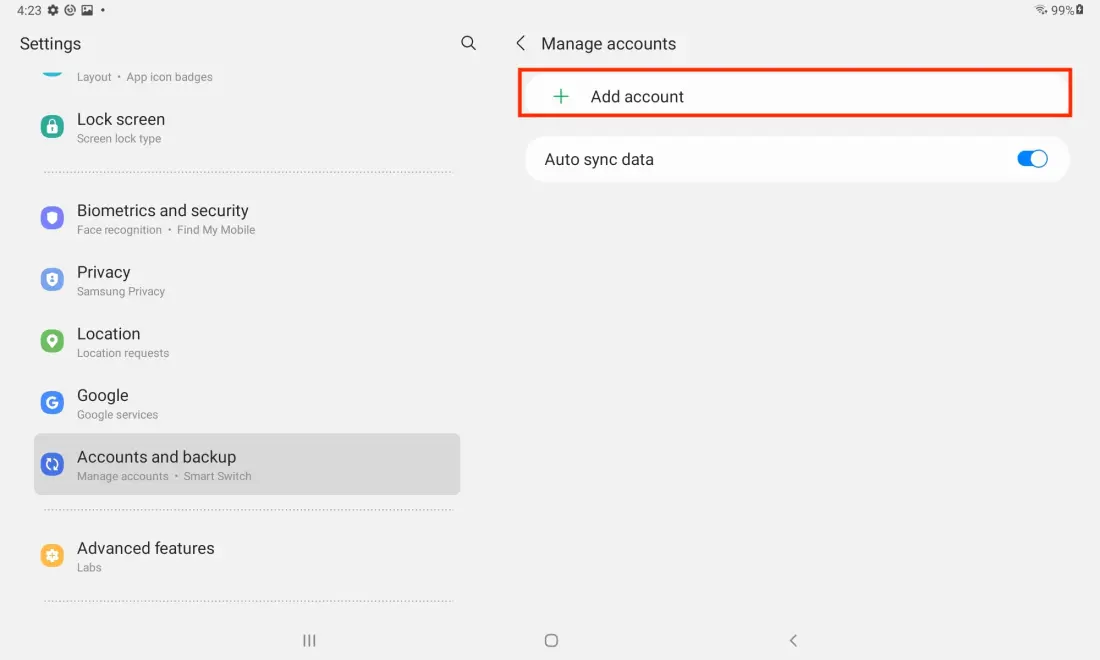
Tap Manage Accounts.
-
Tap Add account.
-
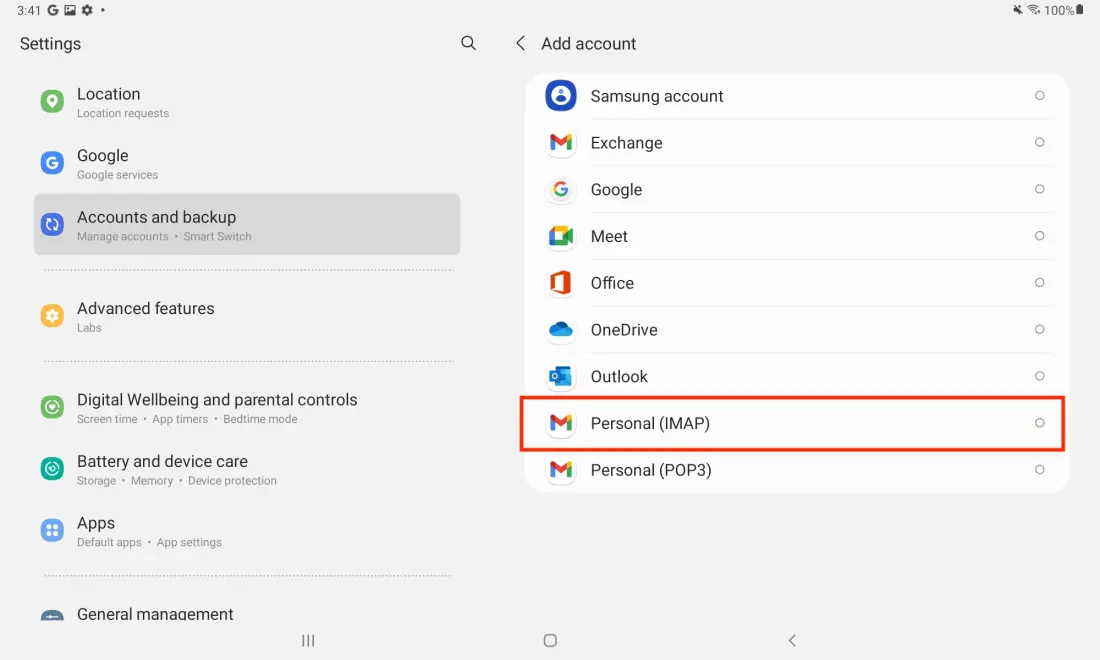
Select Personal (IMAP/POP).
-
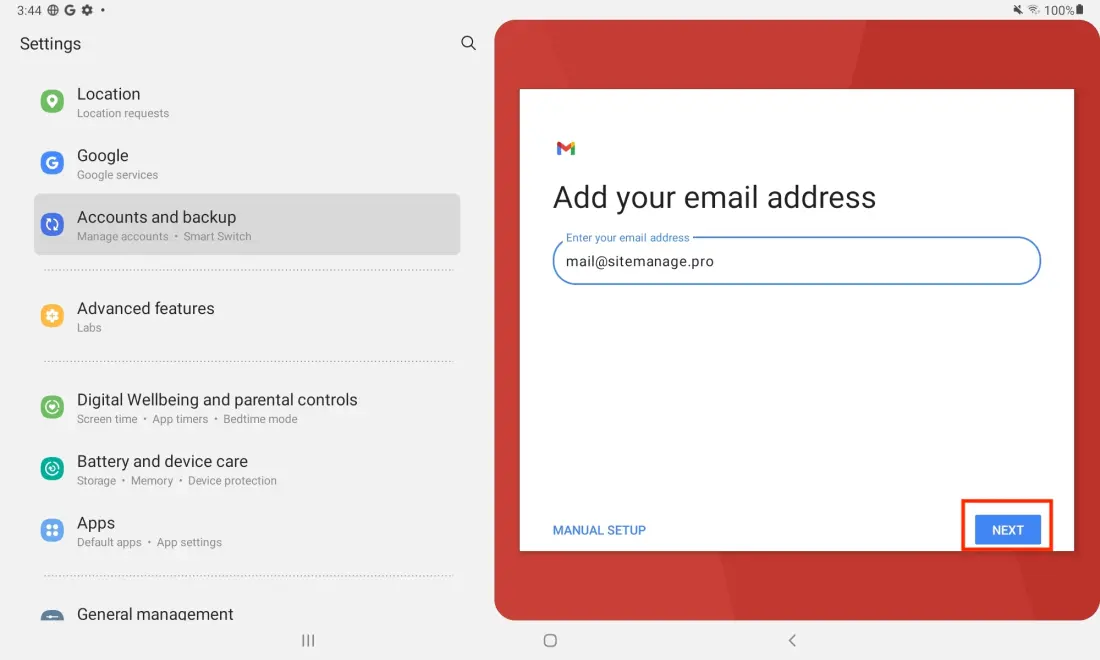
Enter your email address and tap Next.
-
Select Personal (IMAP) and tap Next.
-
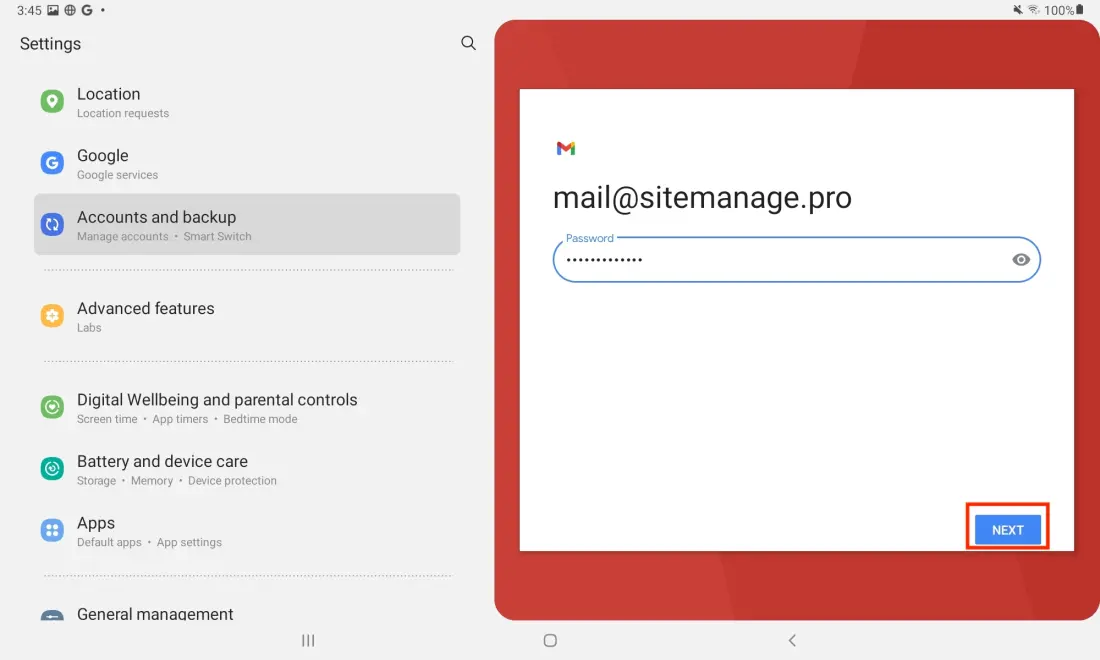
Enter your email password and tap Next.
-
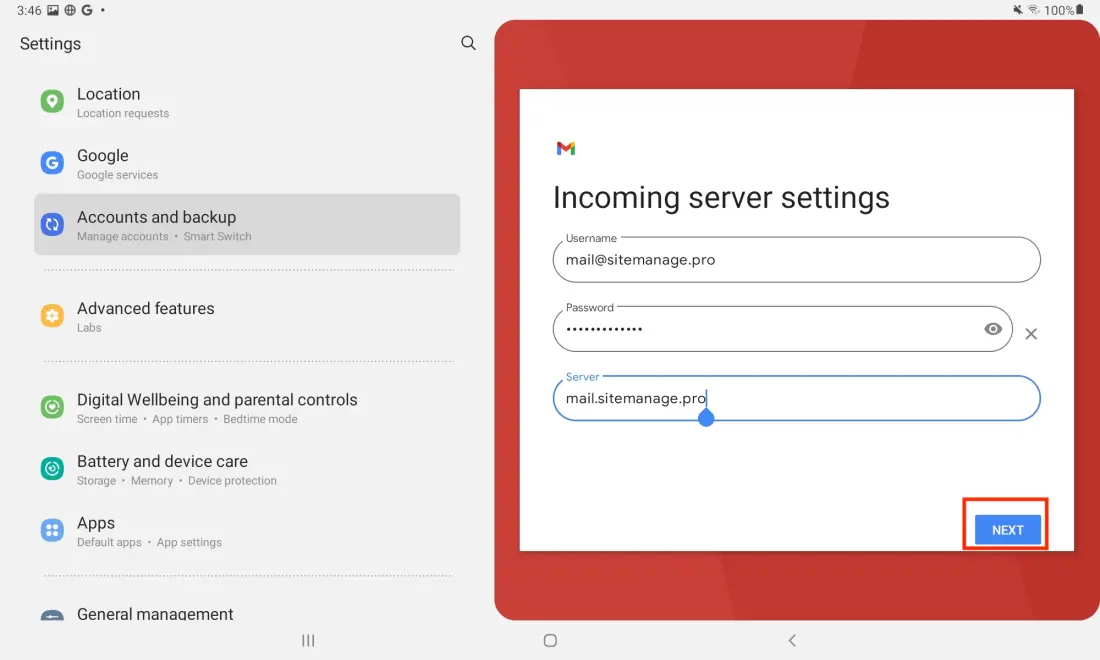
In Incoming server settings, enter:
- Username
- Your full email address
- Password
- Your email password
- IMAP server
- Your server's hostname (e.g. mail.yourdomain.com)
- Security type
- SSL/TLS
- Port
- 993 (if asked)
Tap Next.
-
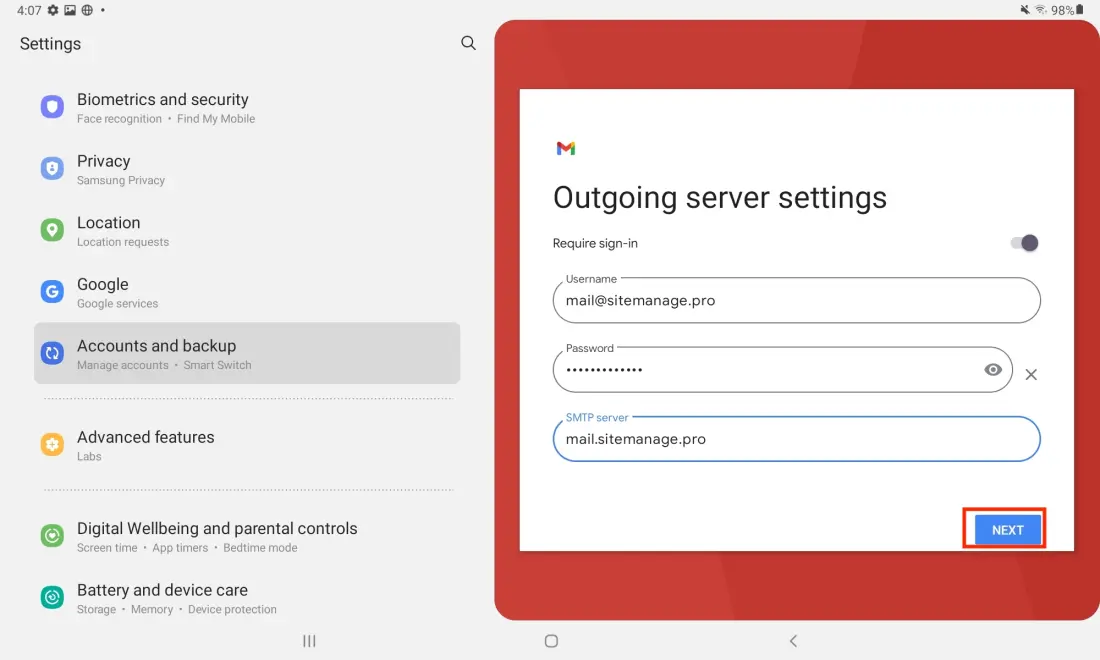
In Outgoing server settings, enter:
- SMTP server
- Your server's hostname (e.g. mail.yourdomain.com)
- Security type
- SSL/TLS
- Port
- 465 (if asked)
Tap Next.
-
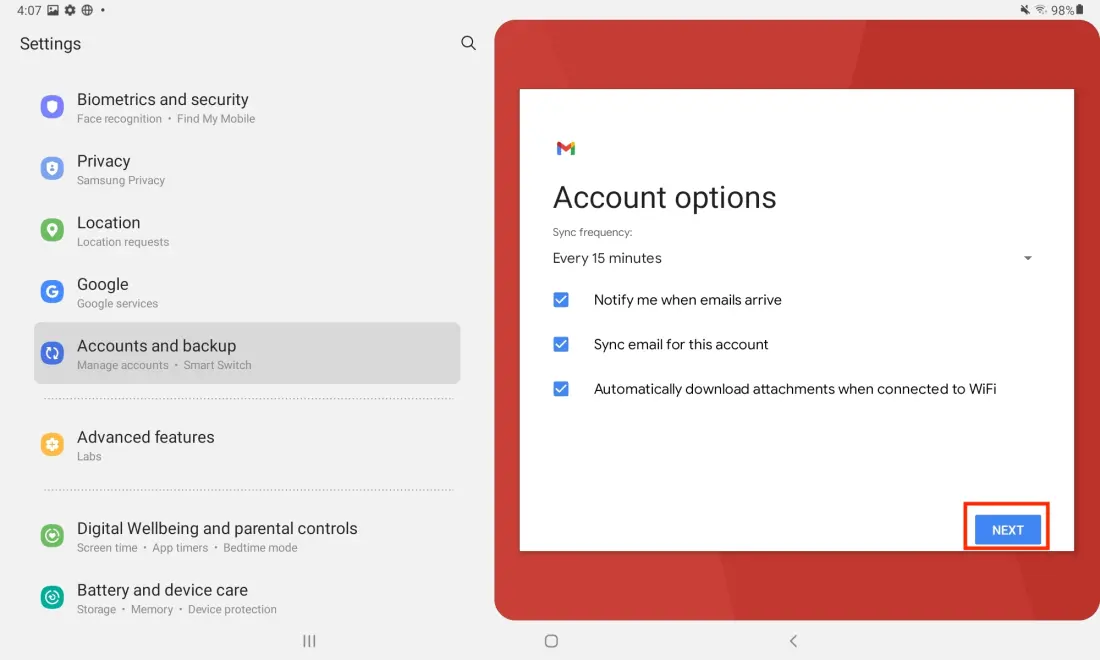
Choose your account options and tap Next.
-
Enter your name and tap Next.
You can now send and receive email in Gmail. The exact screens vary a little between Gmail versions, but the steps are the same.
Outlook for Windows
-
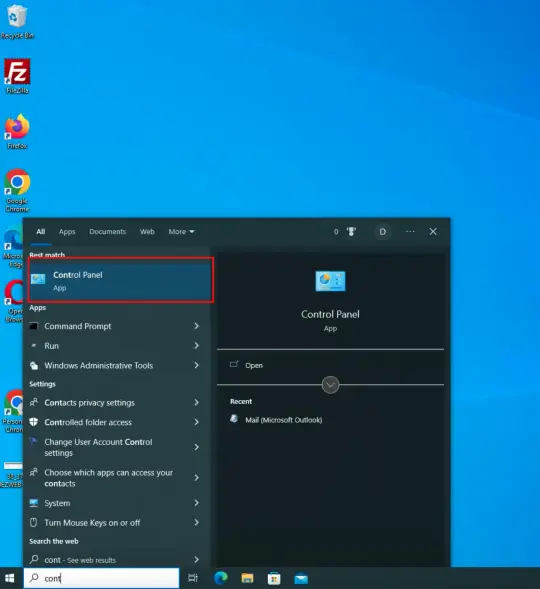
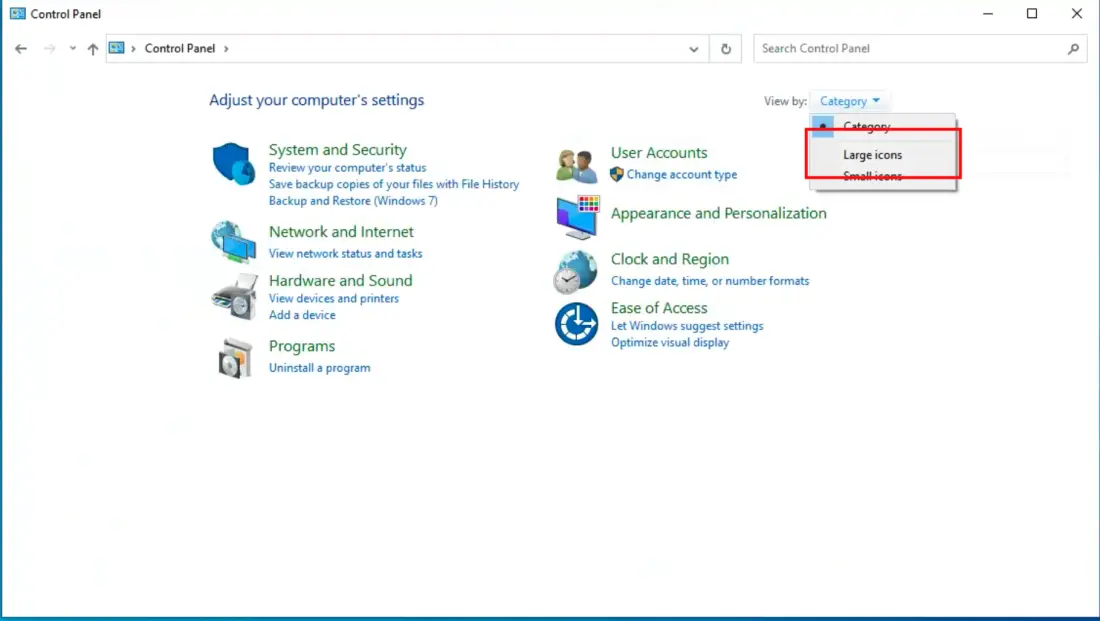
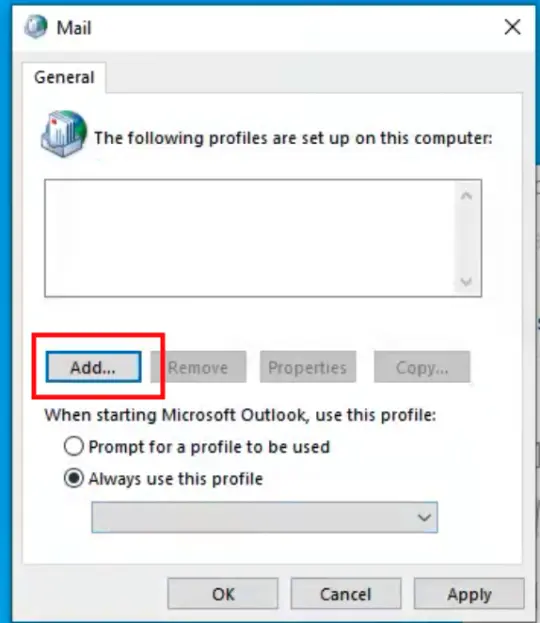
Open the Control Panel.
-
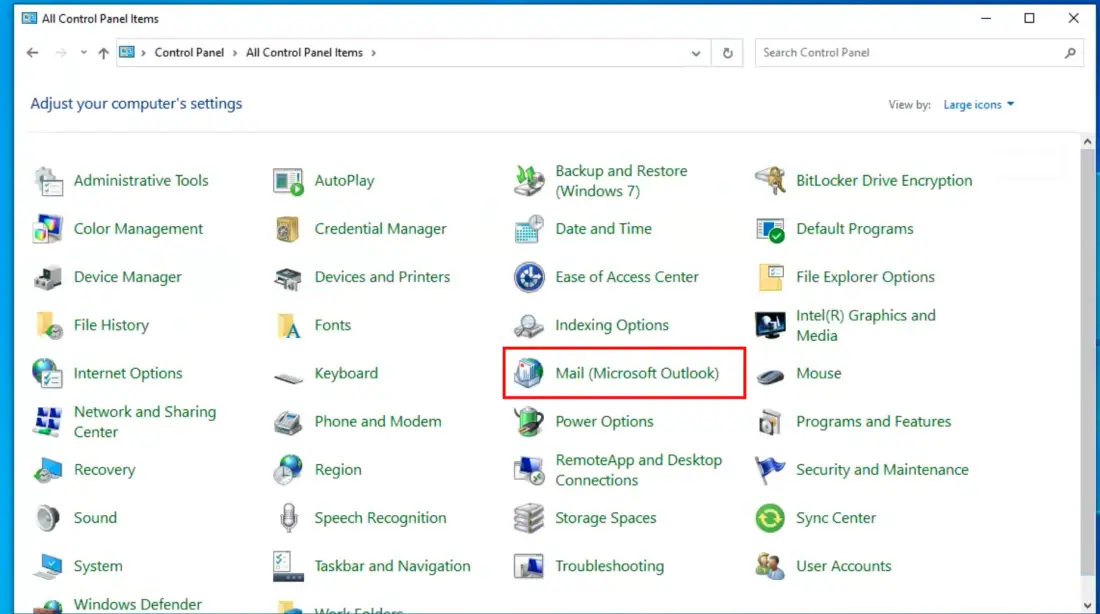
Click Mail or Mail (32-bit), depending on your version of Windows.
-
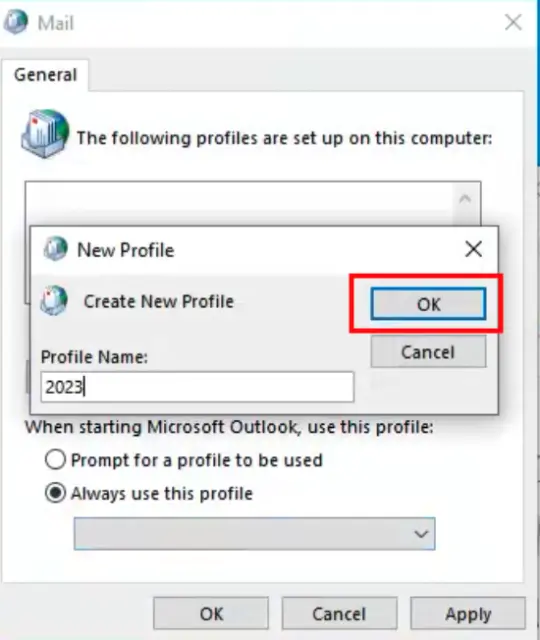
If there are no email accounts yet, the Profiles window appears. Add a new profile and give it a name.
-
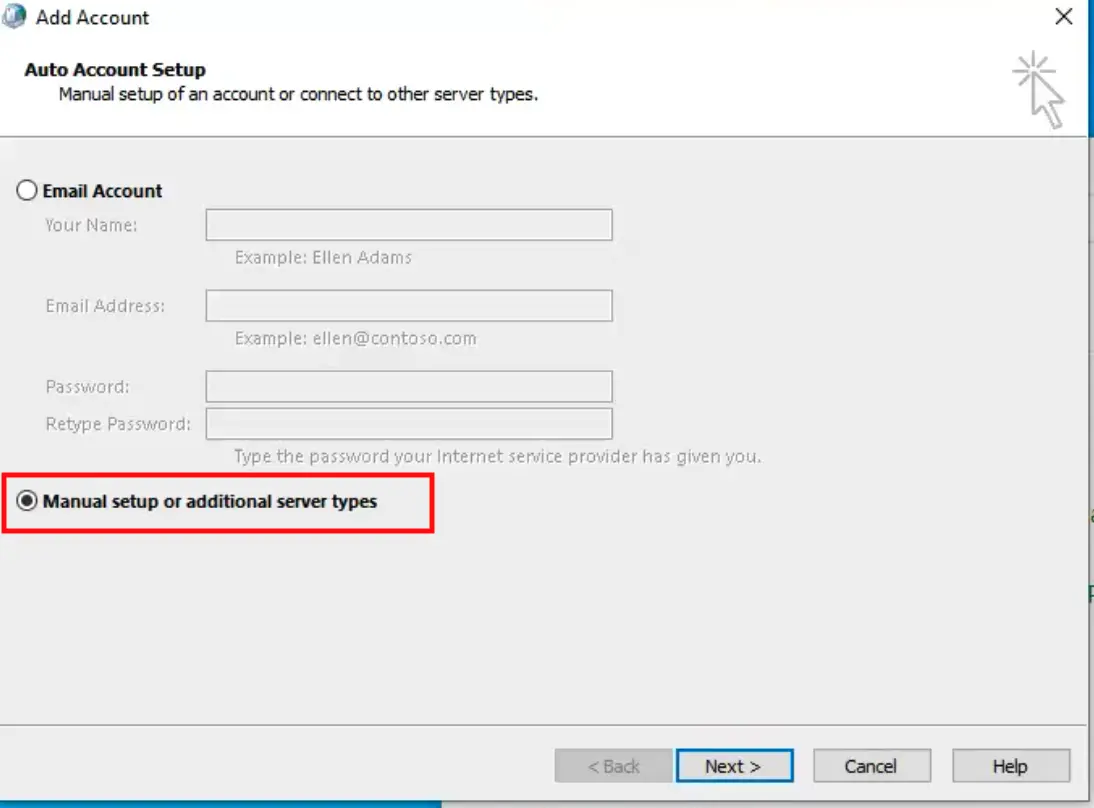
The Email Accounts window appears.
-
Choose Manual setup or additional server types and click Next.
-
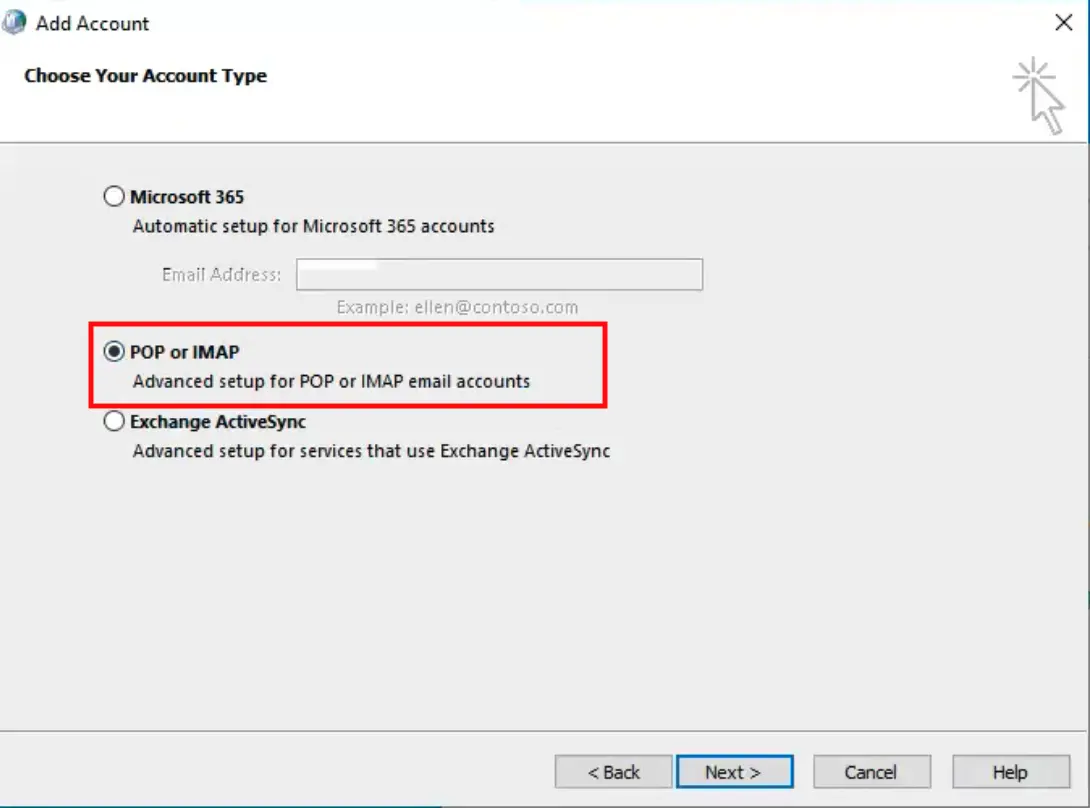
Select POP or IMAP and click Next.
-
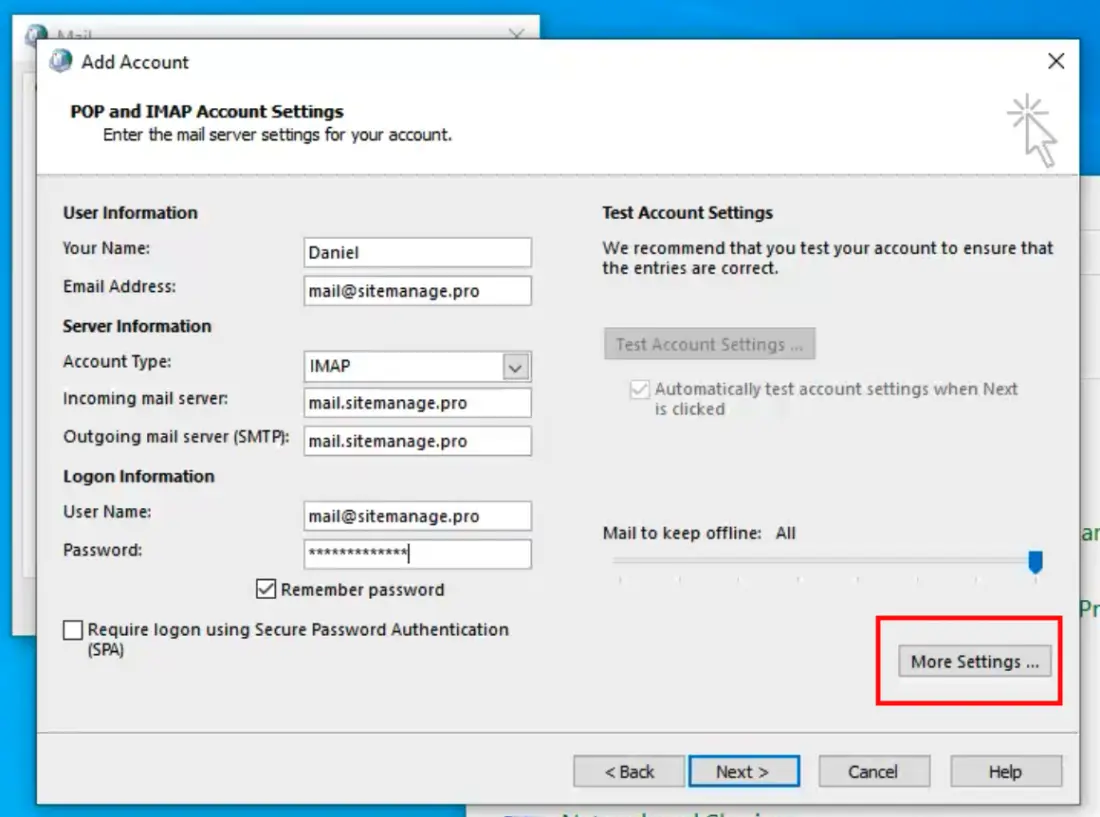
Fill in:
- Your name
- Your name
- Email address
- Your email address
- Account type
- IMAP
- Incoming mail server
- Your server's hostname, such as mail.yourdomain.com
- Outgoing mail server (SMTP)
- Your server's hostname, such as mail.yourdomain.com
- User name
- Your full email address
- Password
- Your email password
-
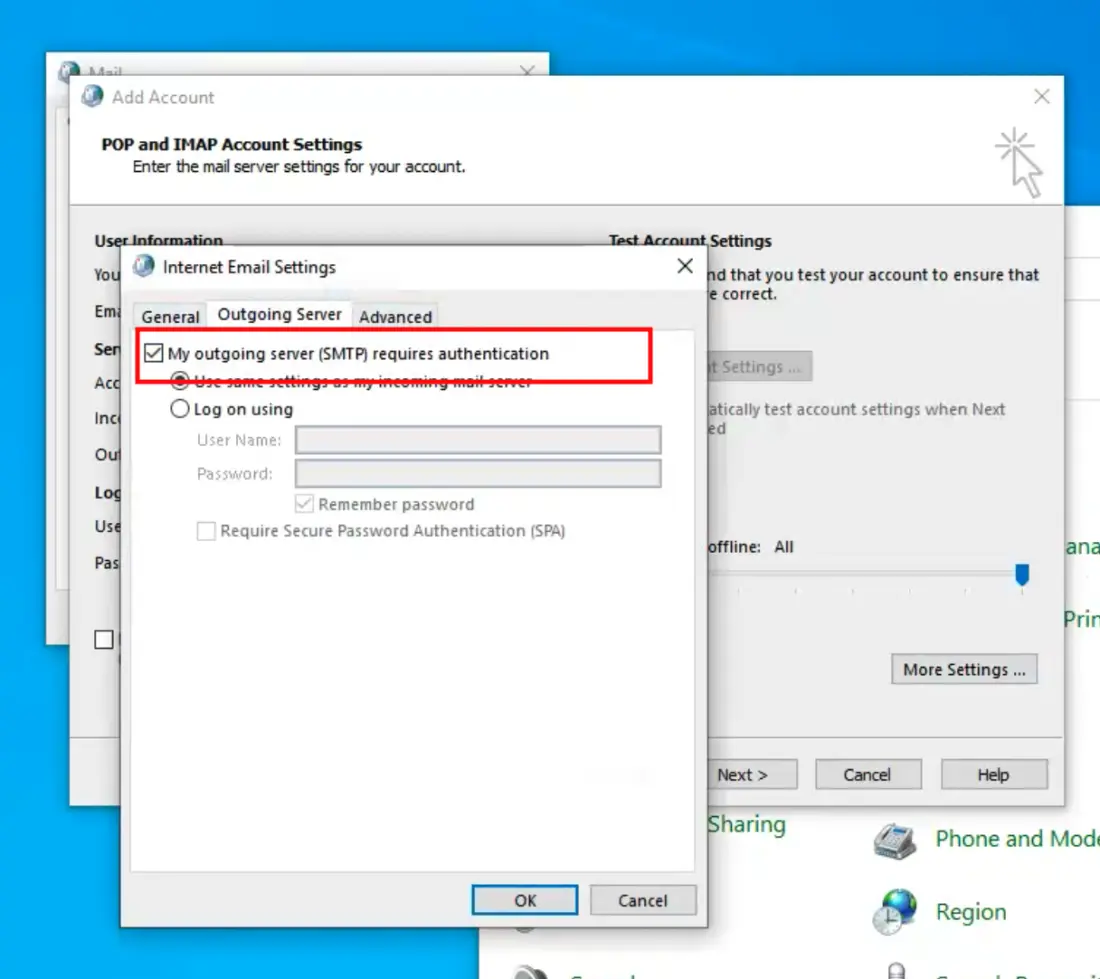
Click More Settings and open the Outgoing Server tab.
-
Tick My outgoing server (SMTP) requires authentication and select Use same settings as my incoming mail server.
-
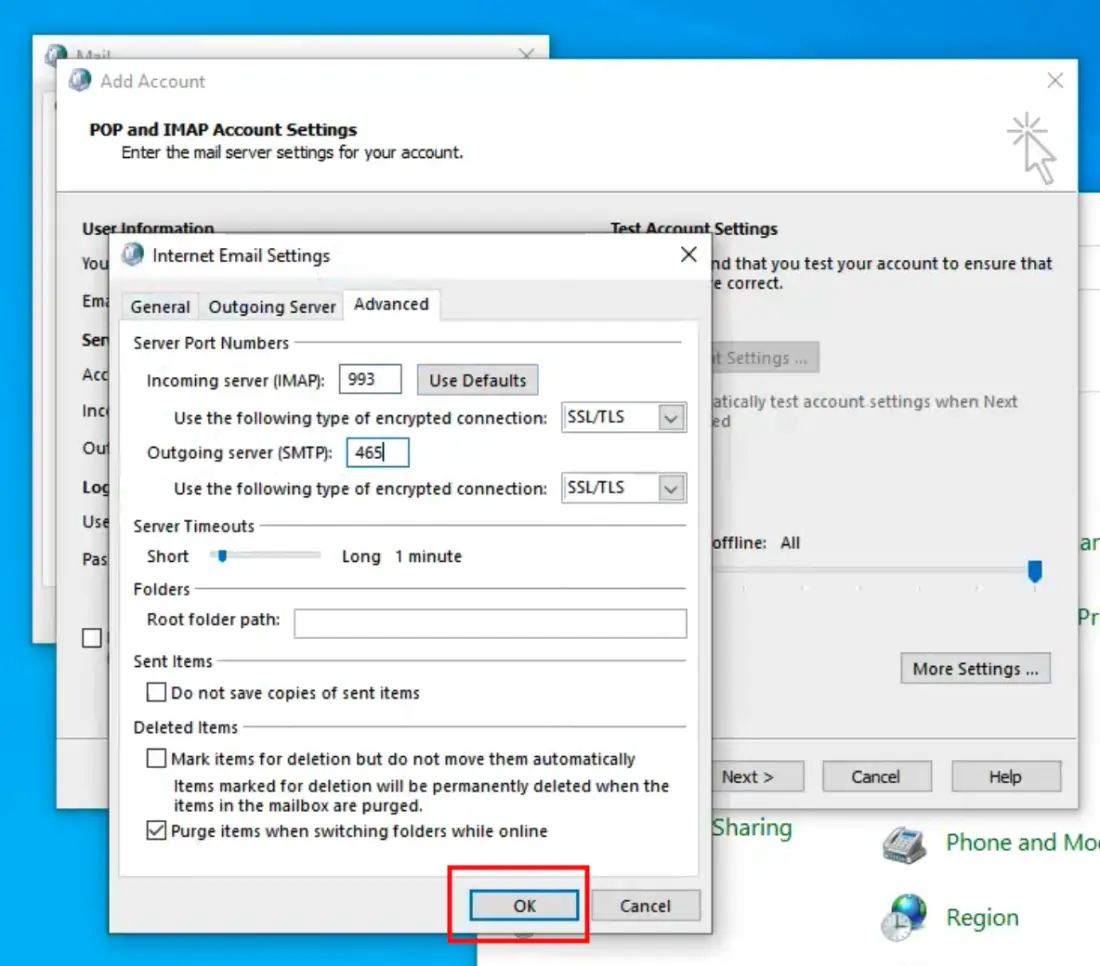
Open the Advanced tab and enter:
- Incoming server (IMAP)
- 993
- Encrypted connection
- SSL
- Outgoing server (SMTP)
- 465
- Encrypted connection
- SSL
-
Click OK to save.
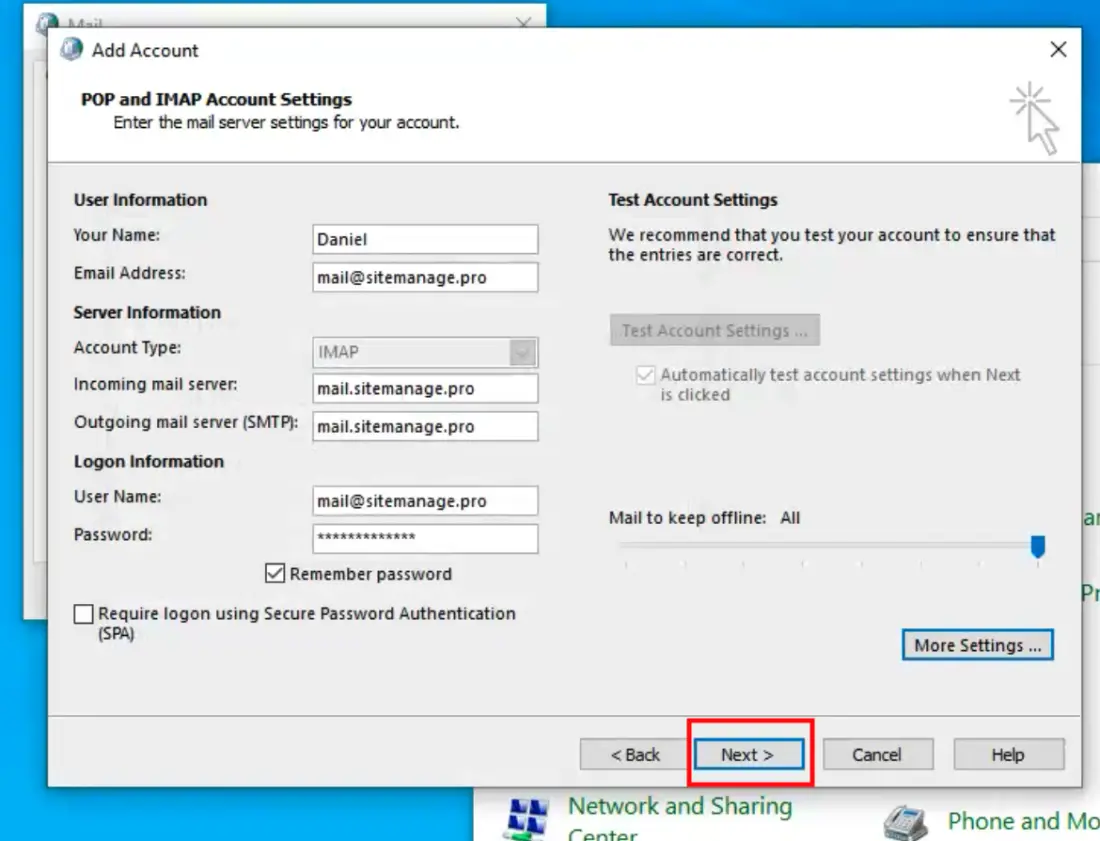
-
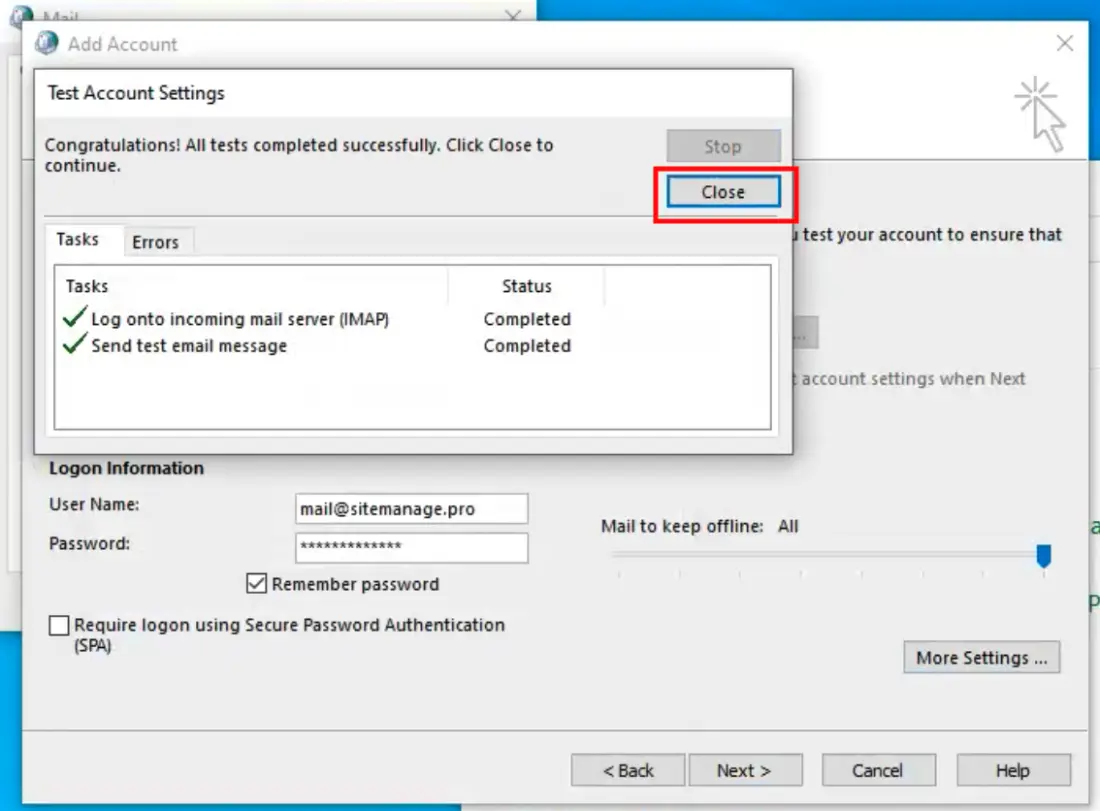
Click Next and Outlook tests your settings.
-
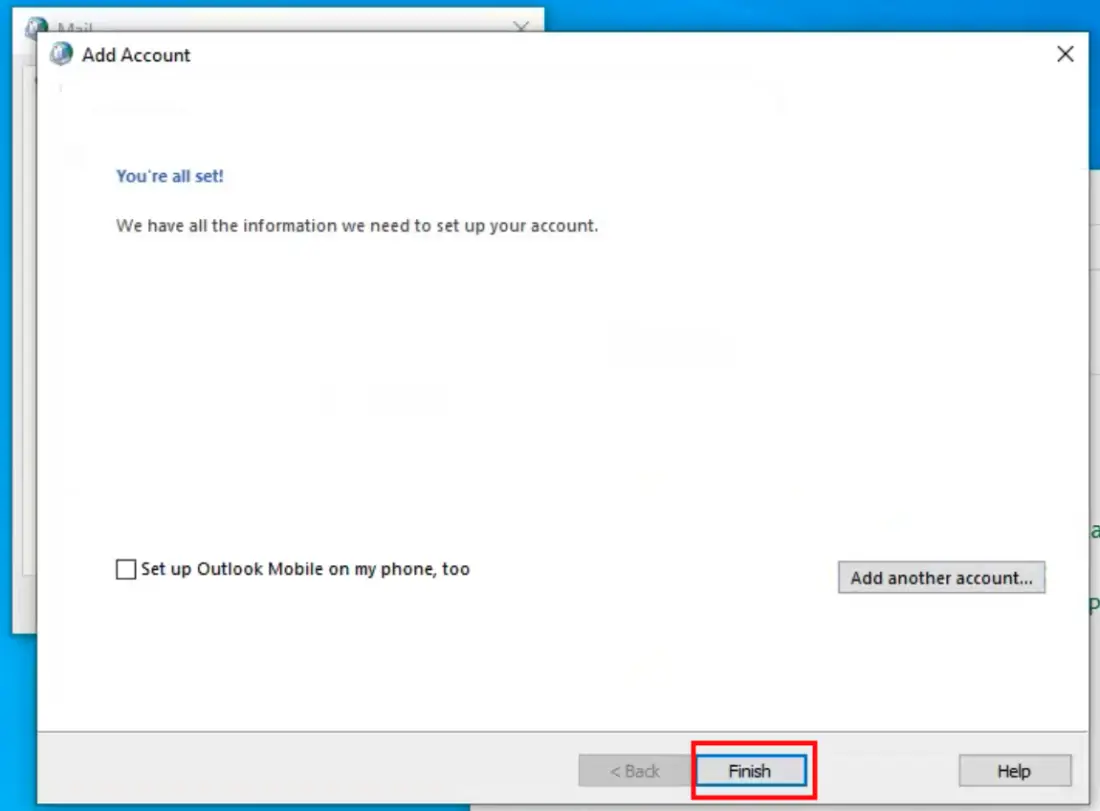
When the test passes, click Close, then Finish.
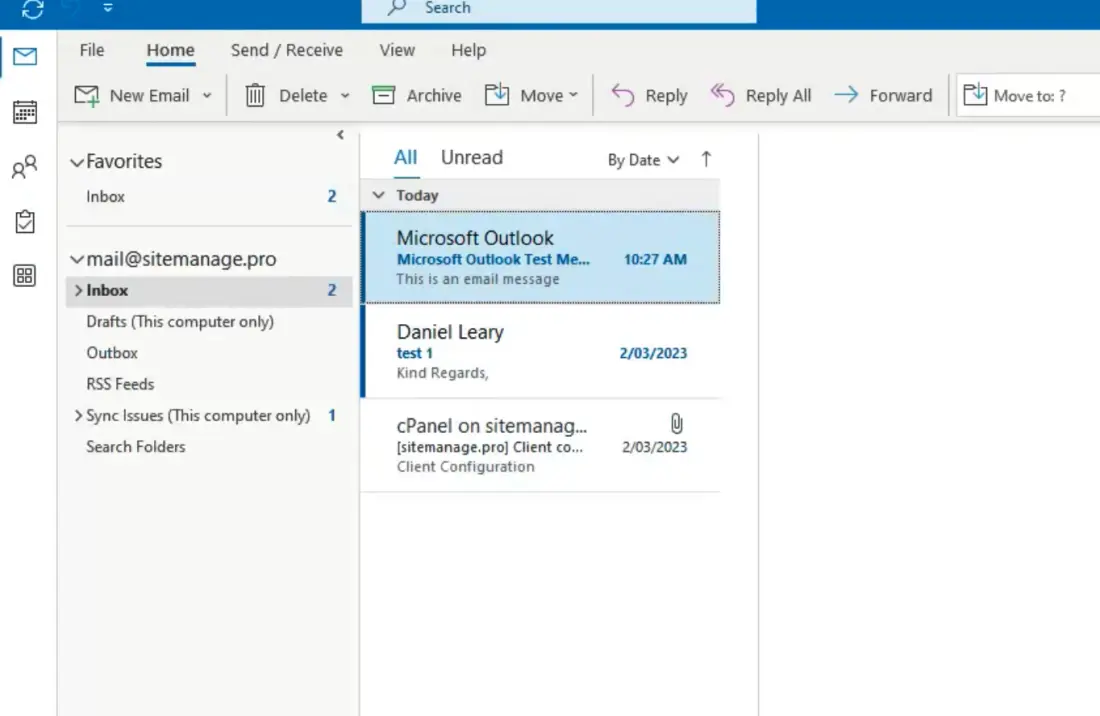
Your IMAP account is now set up in Outlook.
Outlook for Mac
-
Open Outlook.
-
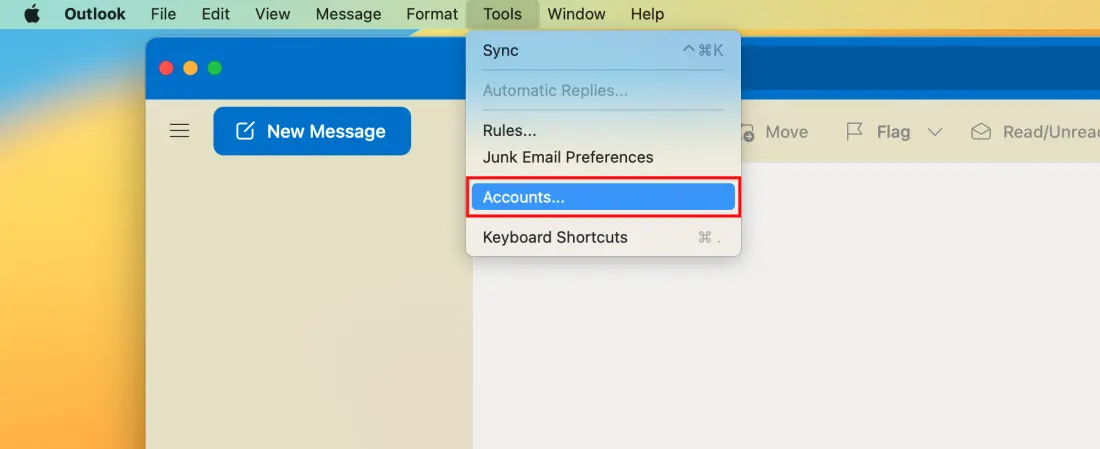
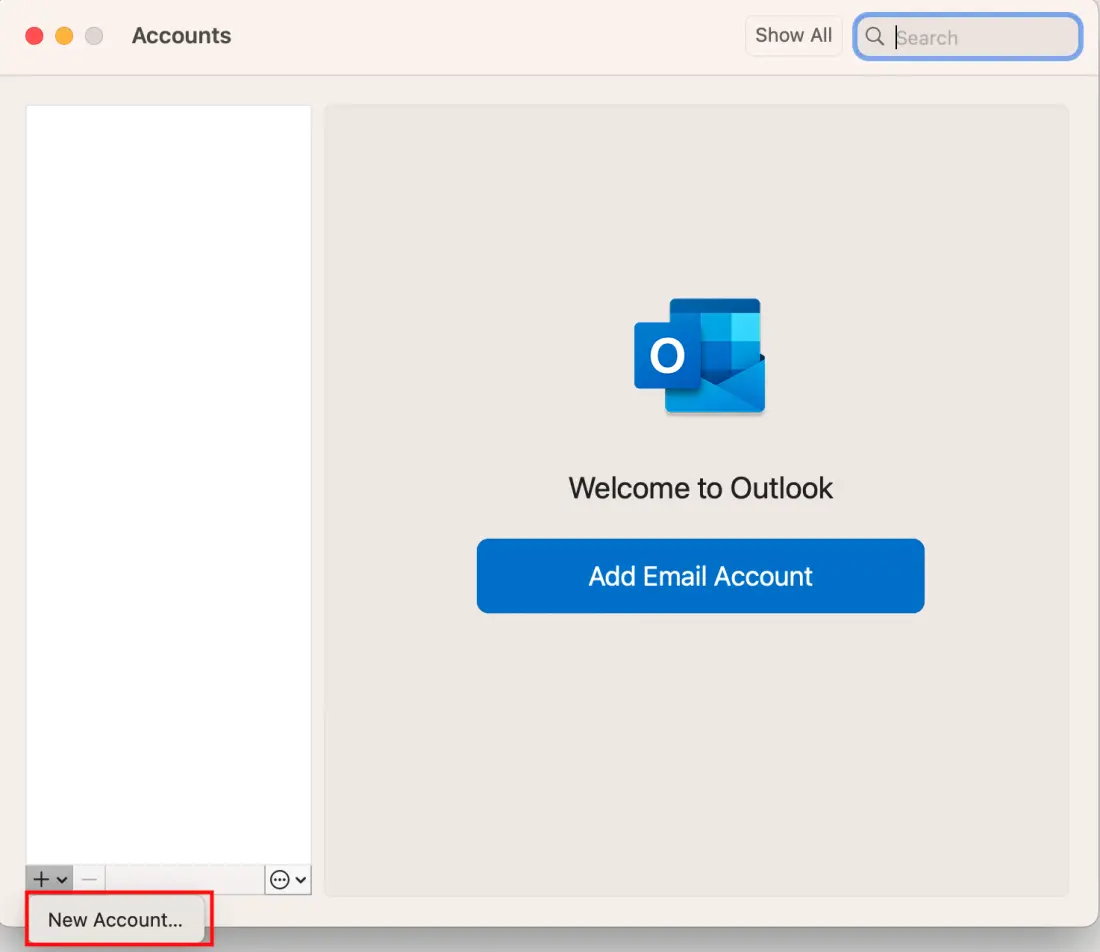
Click Tools in the menu bar and select Accounts.
-
Click the + button at the bottom left to add a new account.
-
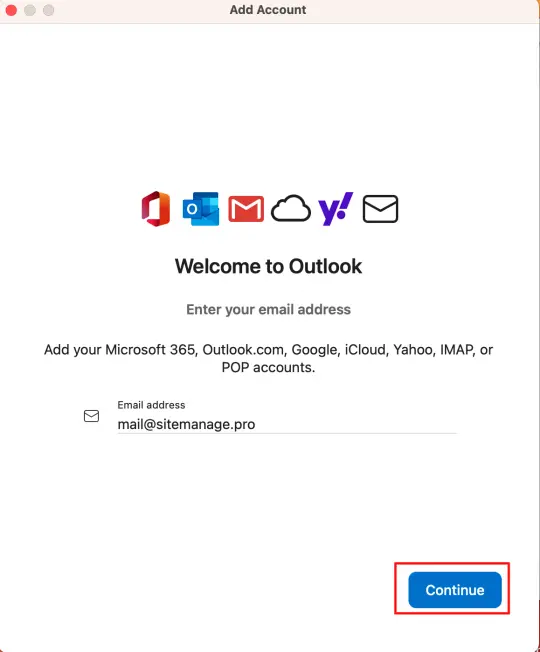
Select Email and enter your email address and password.
-
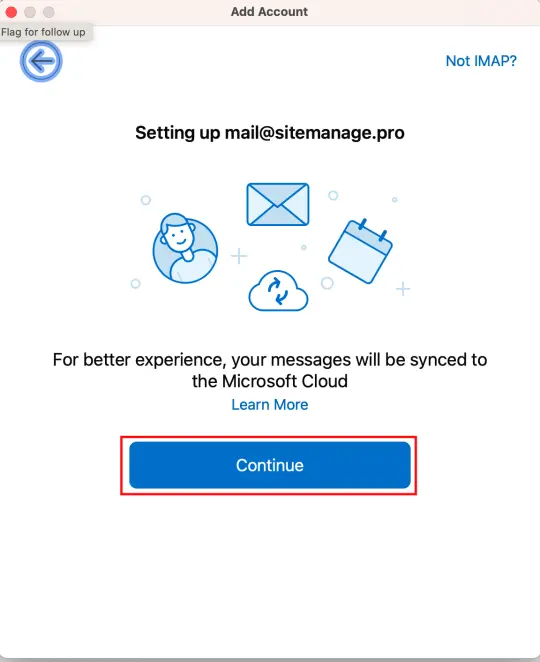
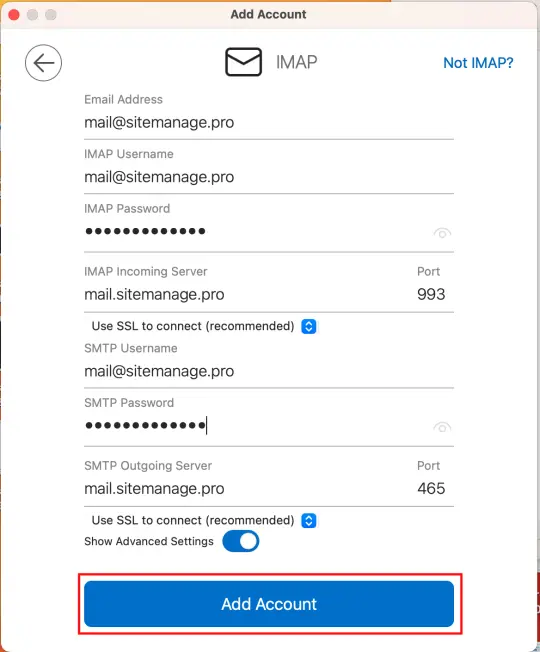
Click Add Account.
-
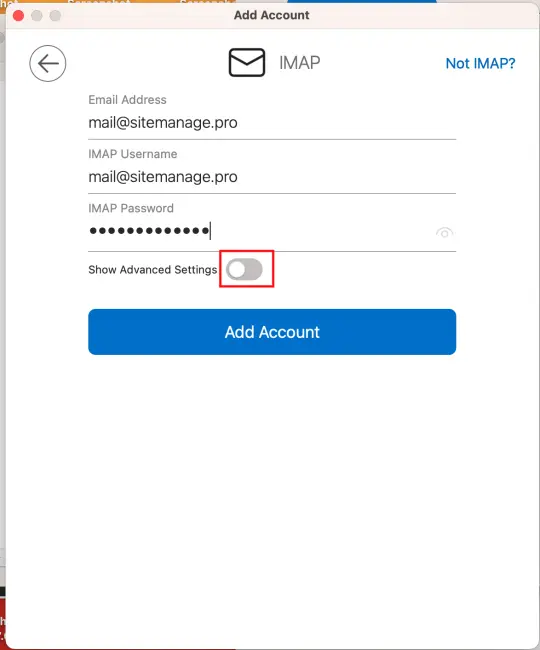
In the Incoming Server section, select IMAP as the account type.
-
In the Incoming Server field, enter your server's hostname, such as mail.yourdomain.com.
-
Enter your email address and password again.
-
In the Outgoing Server field, enter your server's hostname.
-
Tick Use SSL to connect for both incoming and outgoing servers.
-
Set the ports:
- Incoming server port
- 993
- Outgoing server port
- 465
-
Click Add Account and Outlook tests your settings.
-
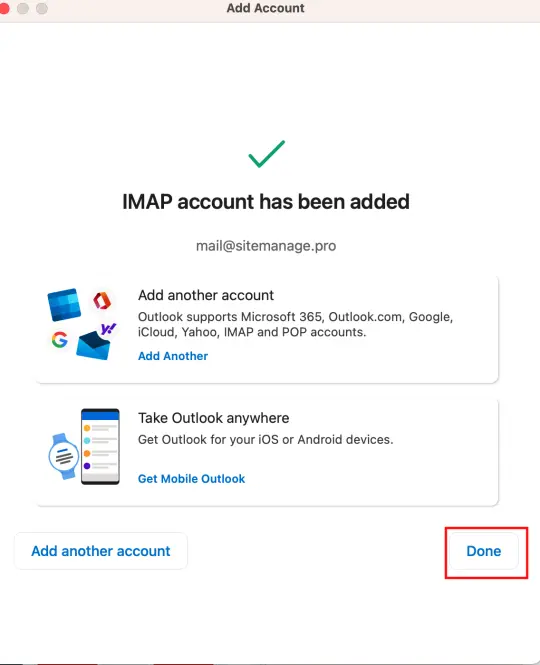
When the test passes, click Done.
Your email is now set up in Outlook for Mac.
Apple Mail (Mac)
-
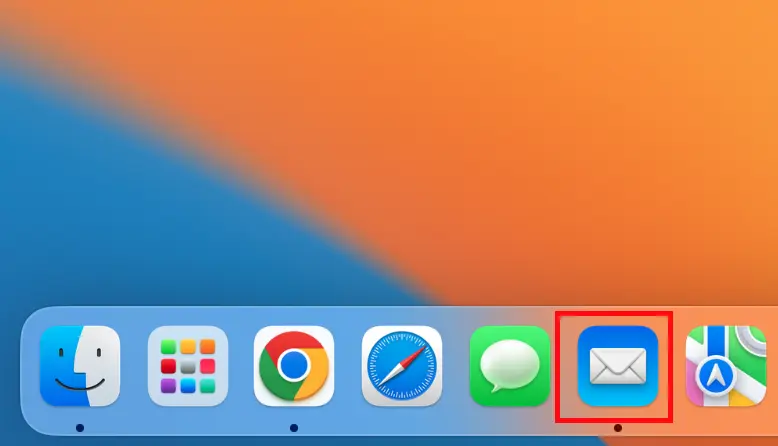
Open Apple Mail.
-
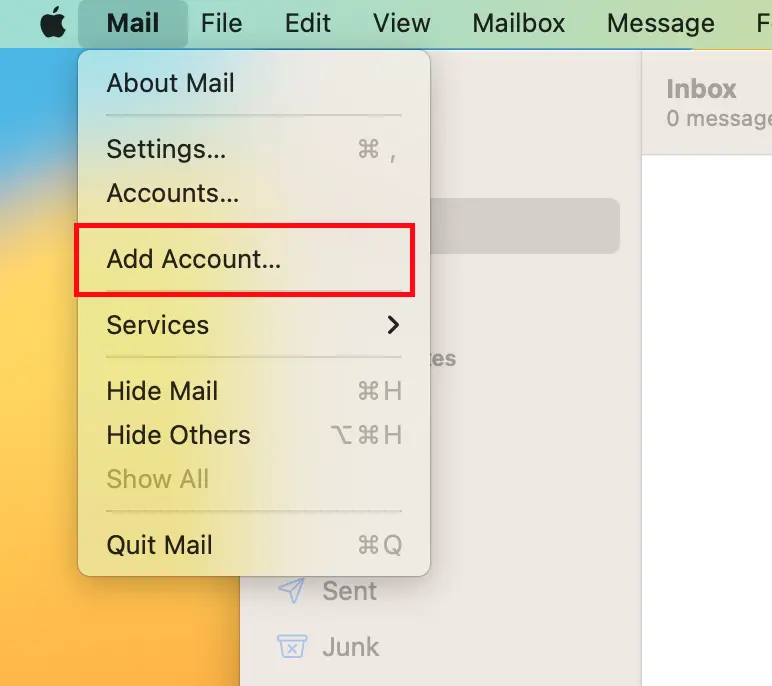
Click Mail in the menu bar and select Preferences.
-
Select Accounts.
-
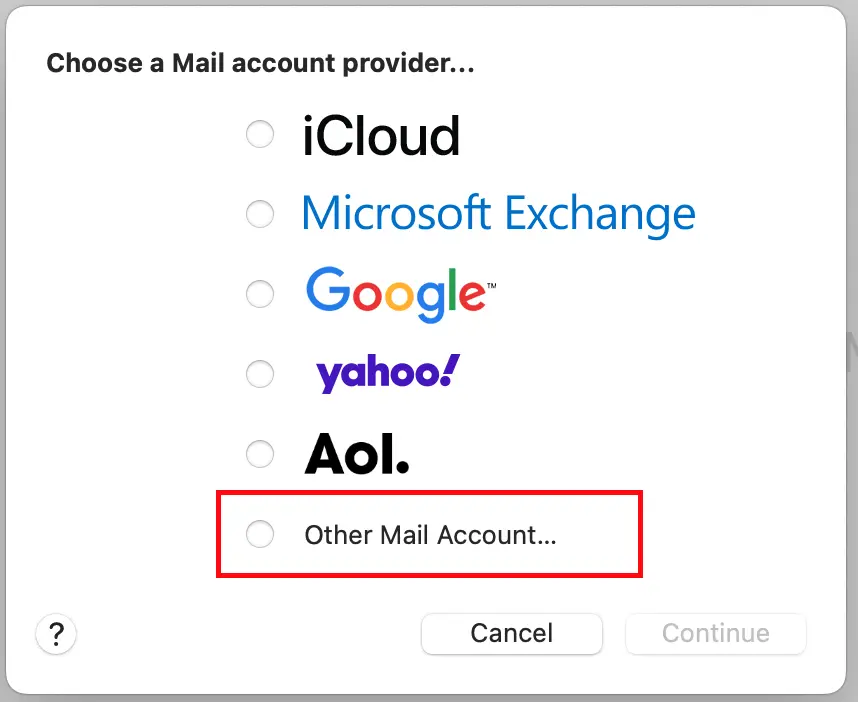
Click the + button at the bottom left to add a new account.
-
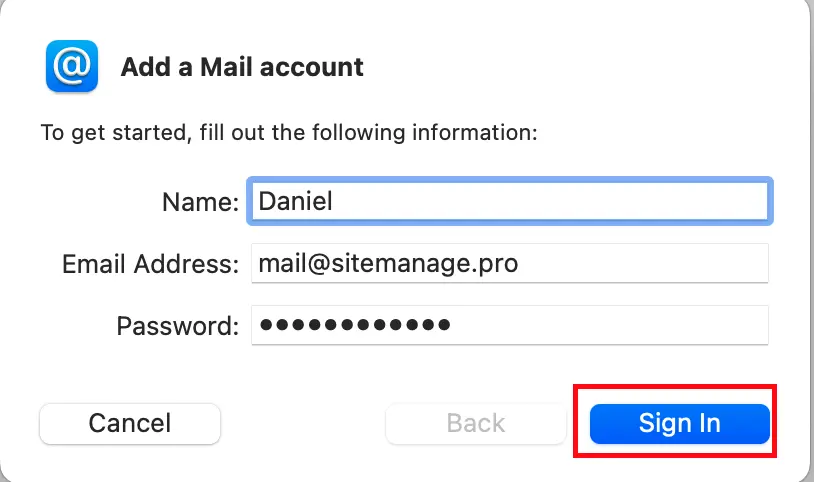
Select Email and enter your email address and password.
-
Click Add Account.
-
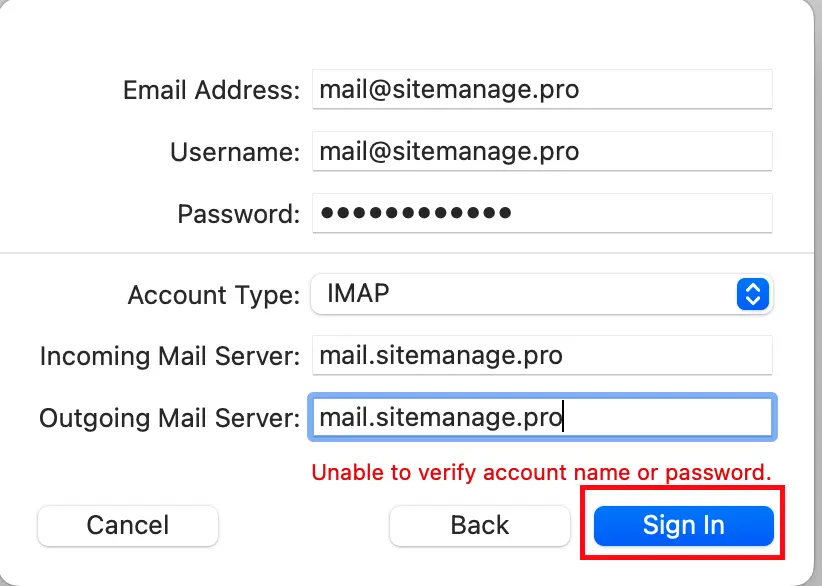
In the Incoming Server section, select IMAP as the account type.
-
In the Incoming Server field, enter your server's hostname: mail.mydomain.com.au (with your own domain).
-
Enter your email address and password again.
-
In the Outgoing Server field, enter your server's hostname.
-
Tick Use SSL to connect for both incoming and outgoing servers.
-
Set the ports:
- Incoming server port
- 993
- Outgoing server port
- 465
-
Click Add Account and Mail tests your settings.
-
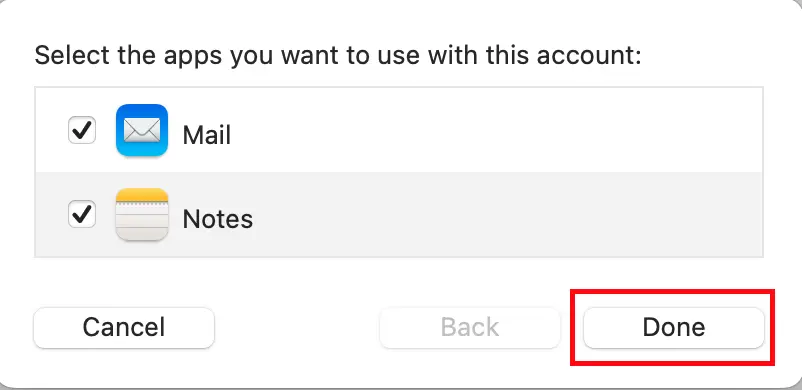
When the test passes, click Done.
Your email is now set up in Apple Mail.
Thunderbird
-
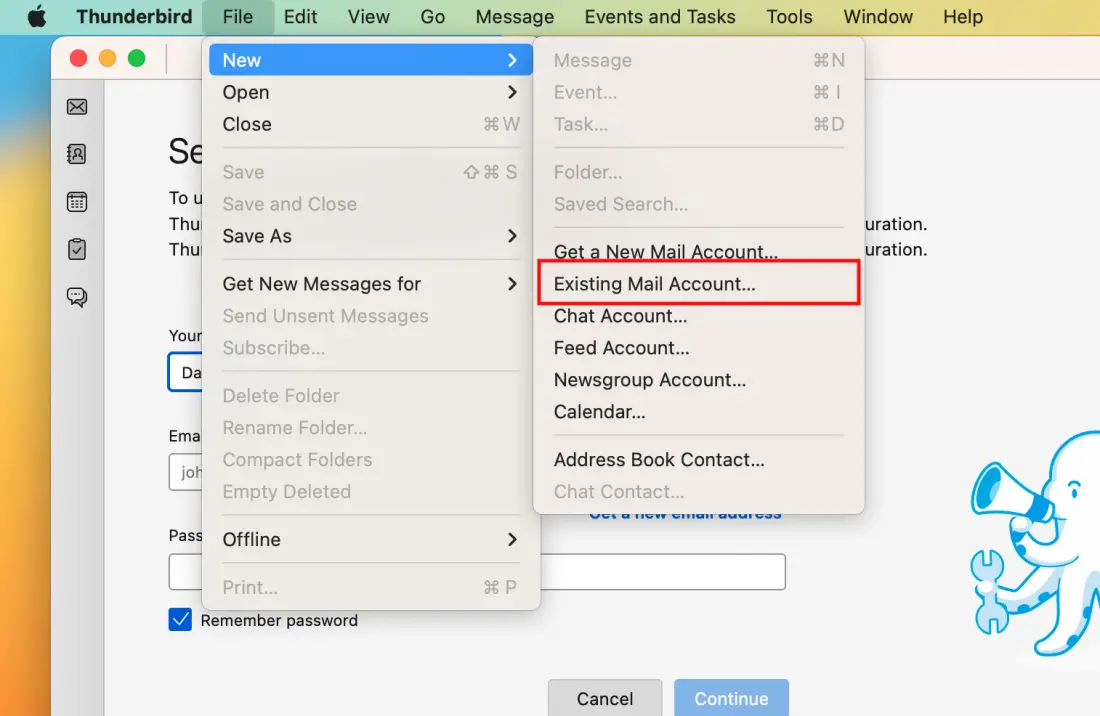
Open Thunderbird.
-
Open the File menu at the top left and select New, then Existing Mail Account.
-
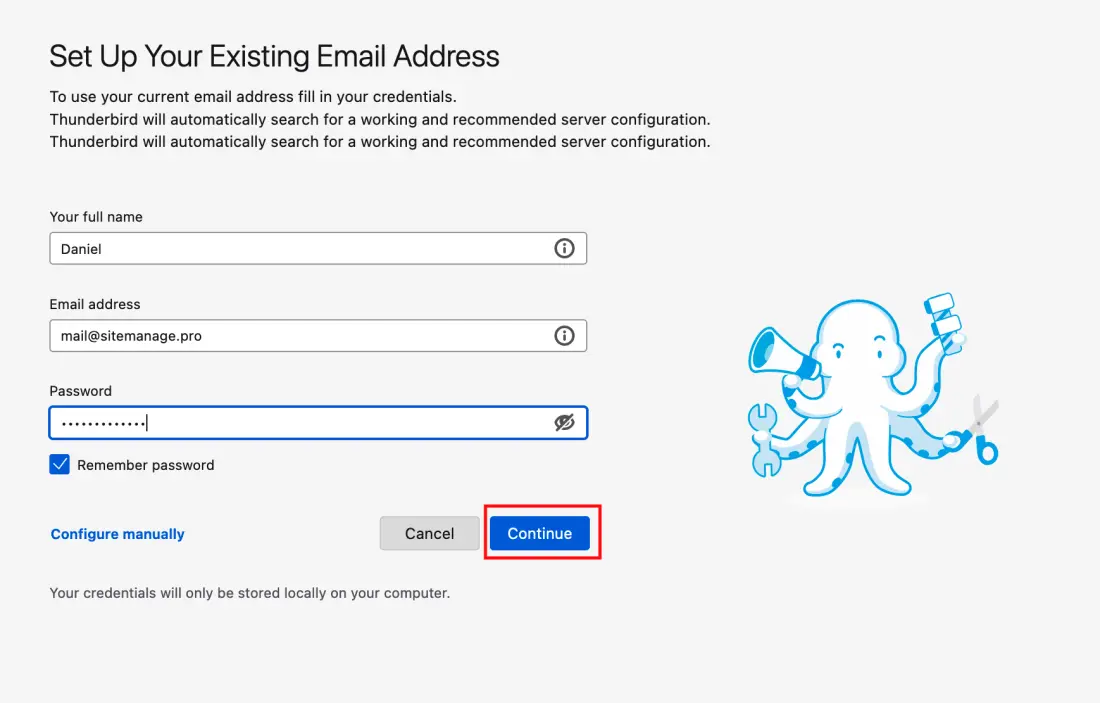
In the Mail Account Setup window, enter your name, email address and password. Click Continue.
-
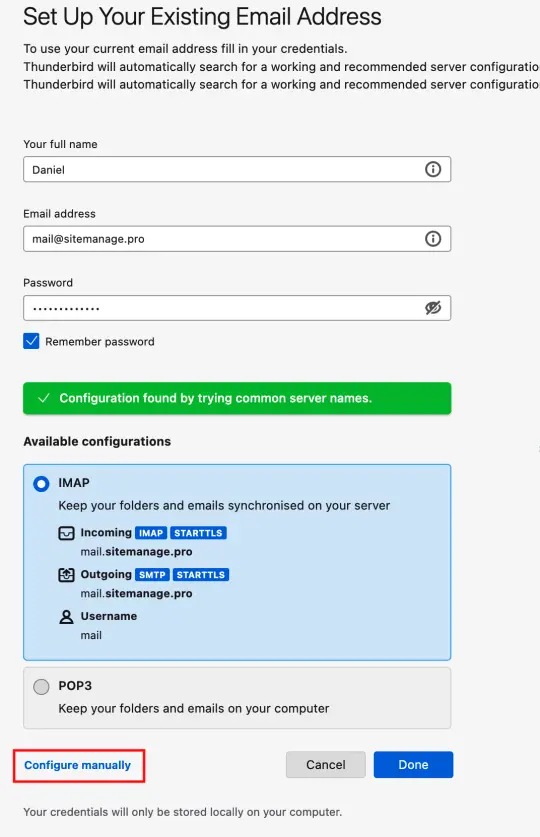
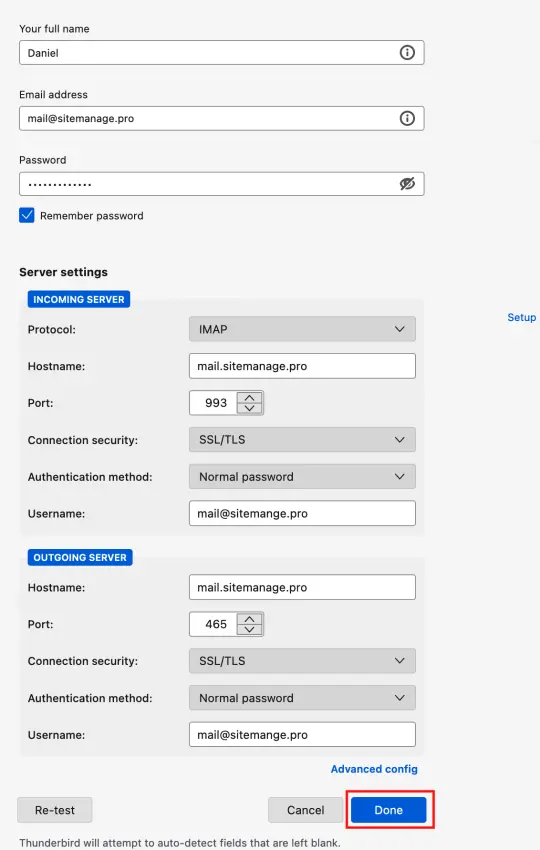
Thunderbird tries to detect your settings. If it cannot, select Manual Config at the bottom left and enter the incoming server:
- Incoming server
- IMAP or POP3, your choice
- Server hostname
- Typically mail.yourdomain.com
- Port
- Typically 993 for IMAP, 995 for POP3
- SSL
- SSL/TLS
- Authentication
- Normal password
- Username
- Your full email address
-
Then the outgoing server:
- Server hostname
- Typically mail.yourdomain.com
- Port
- Typically 465
- SSL
- SSL/TLS
- Authentication
- Normal password
- Username
- Your full email address
-
Click Done. Thunderbird connects to your account and downloads your messages.
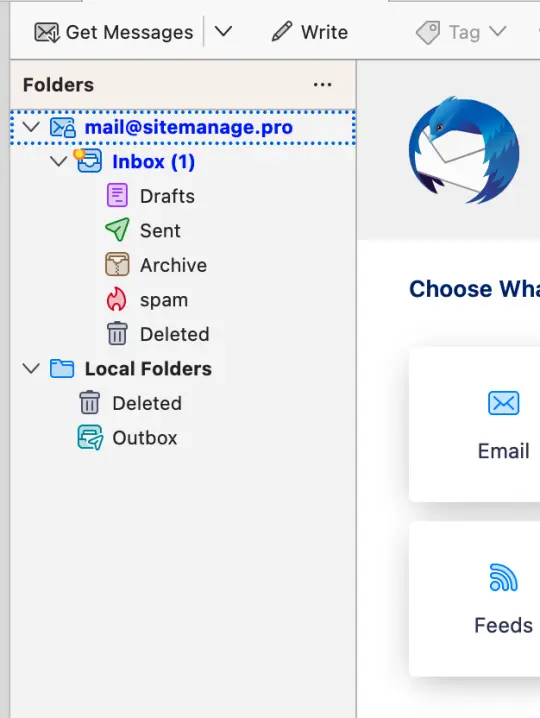
Your email is now set up in Thunderbird.
Windows Mail
-
Open Windows Mail.
-
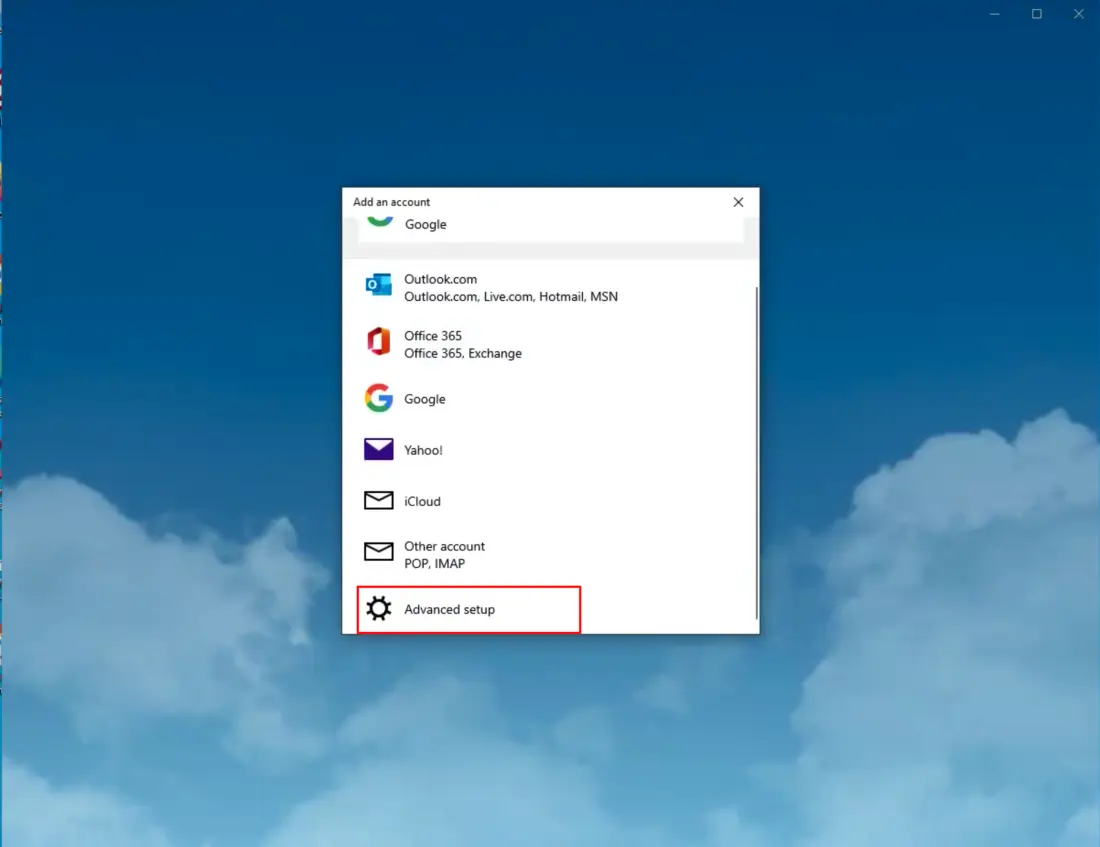
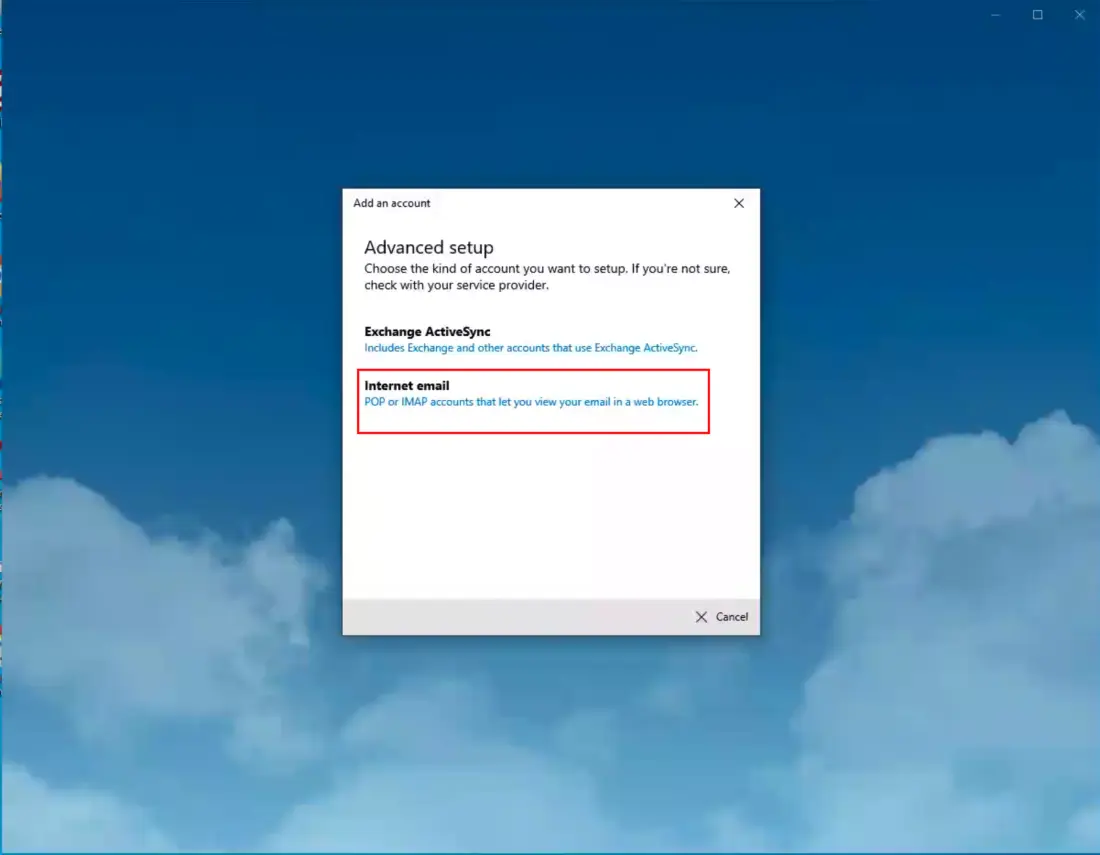
Select Advanced setup, then Internet email.
-
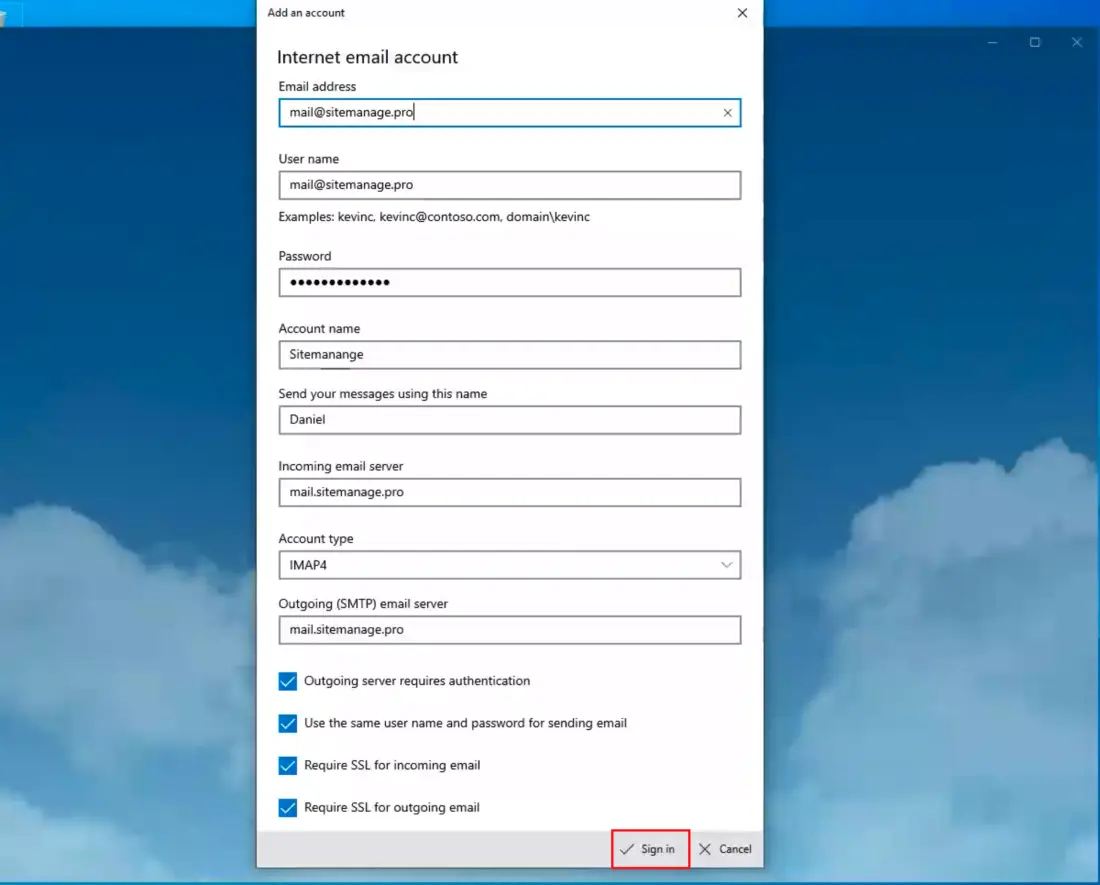
Enter your email address, password, and the name you want to identify the account by.
-
Choose IMAP as the account type.
-
For the incoming mail server, enter your domain name followed by port 993, for example mail.yourdomain.com:993.
-
For the outgoing mail server, enter your domain name followed by port 465, for example mail.yourdomain.com:465.
-
Tick Outgoing server requires authentication and Use the same username and password for sending mail.
-
Click Sign in.
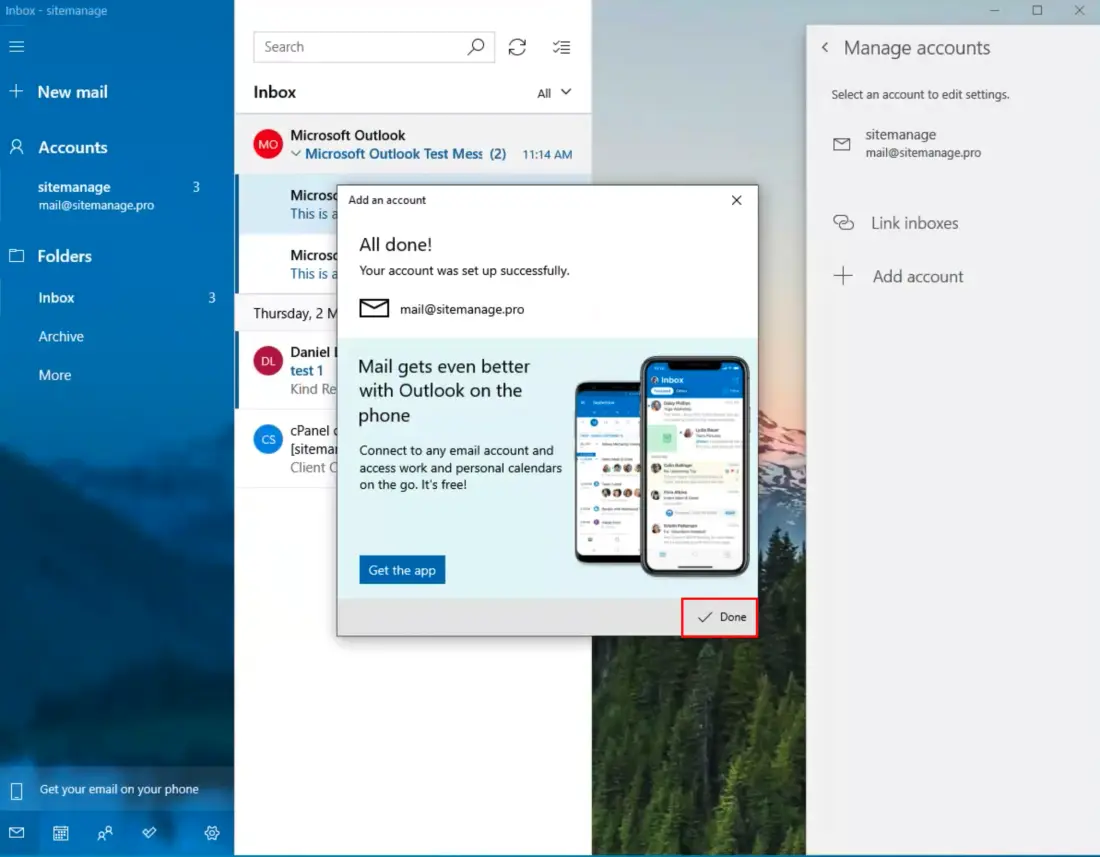
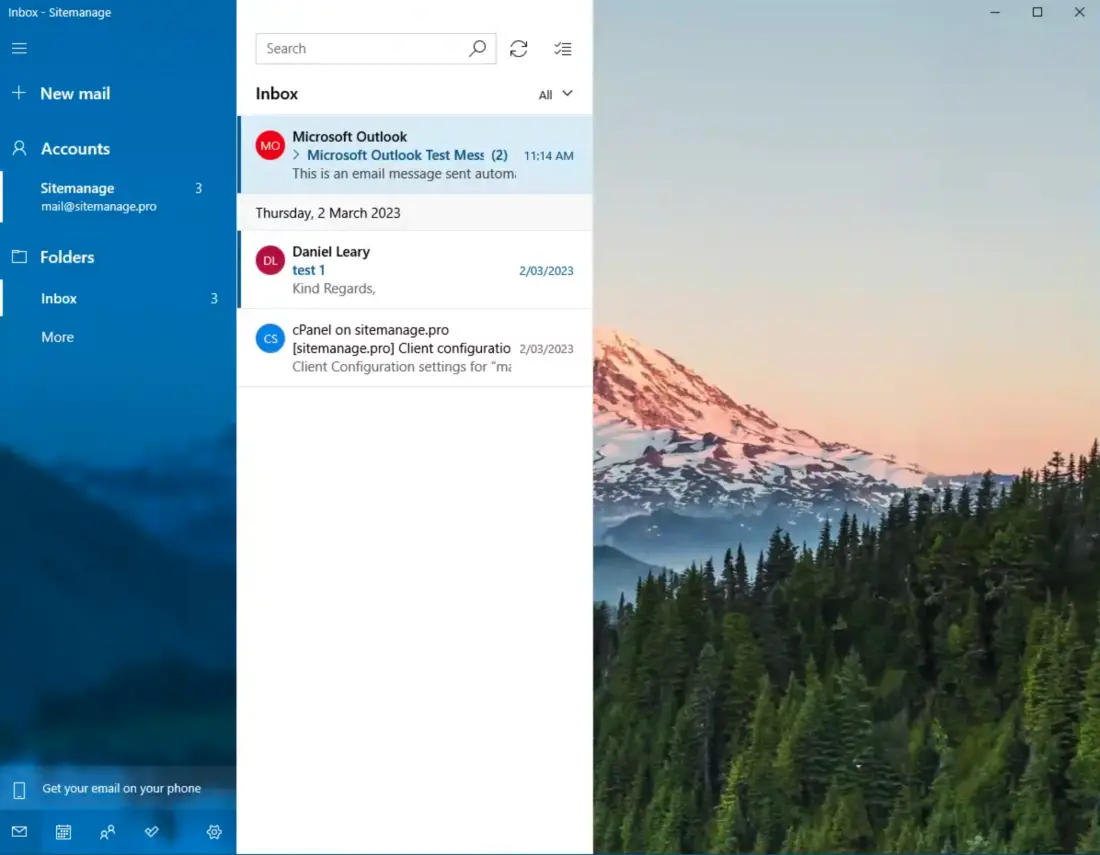
You can now send and receive email in Windows Mail.
Still stuck? Call 1300 27 81 27 and the team will help you get set up.